This article presents the steps that allow you to achieve message archiving using the MailArchiva solution with Axigen Mail Server via MILTER.
Solution
We will presume that AXIGEN and Mailarchiva are already installed with their respective default parameters on a given machine. Firstly, we will describe the steps needed in configuring Mailarchiva and then those specific to the AXIGEN Mail Server, consequently ensuring that you have an effective and full flavored email server - archiving solution integration.
1. Configuring Mailarchiva
The first thing to do is to connect to 'http://<hostname>:8090'. Login with the 'admin' user name and 'admin' password, then go to the Configuration menu, Domains tab and define one or more local domains, as shown below:
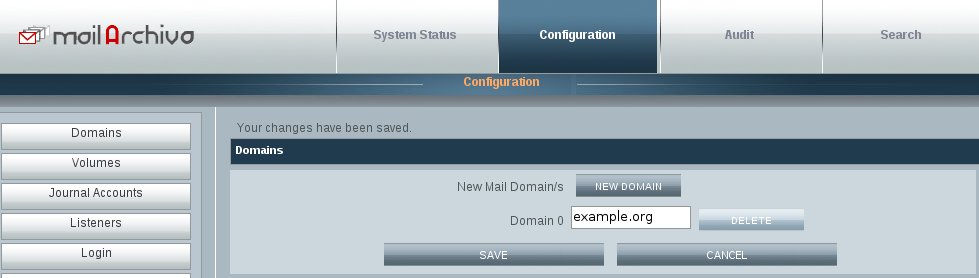
This step was necessary in order for the archiver to know which emails are 'sent' and which ones are 'received'.
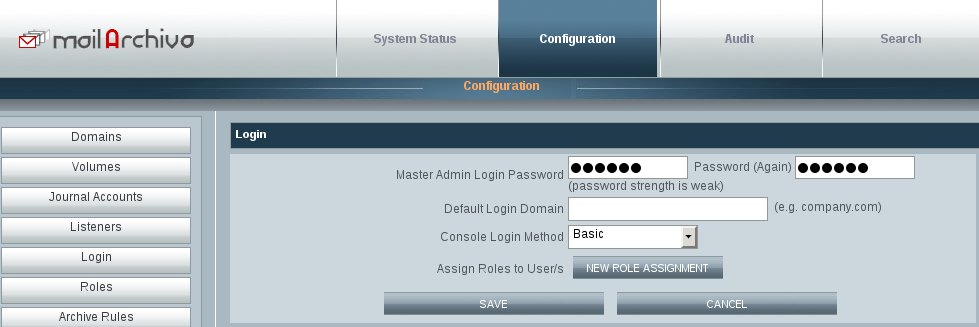
Next, you need to set master administration password, under Configuration -> Login:
Next, you will need to select the Configuration -> Volumes tab, and set an encryption password. After that, on the same page, you have to define a volume to be used for storing emails:
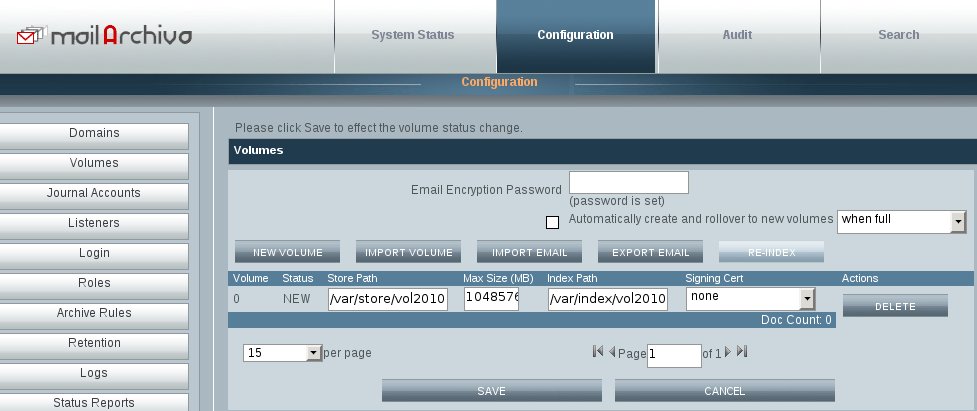
Please remember to save the configuration after you defined the necessary paths.
2. Configuring AXIGEN
You will first need to open the Axigen Webadmin interface, by default available at http://<hostname>:9000. Login with the 'admin' user and the associated password, then navigate to the following section: Security & Filtering -> Acceptance & Routing -> Advanced Settings. Here, press the 'Add Acceptance/Routing Rule' Button.
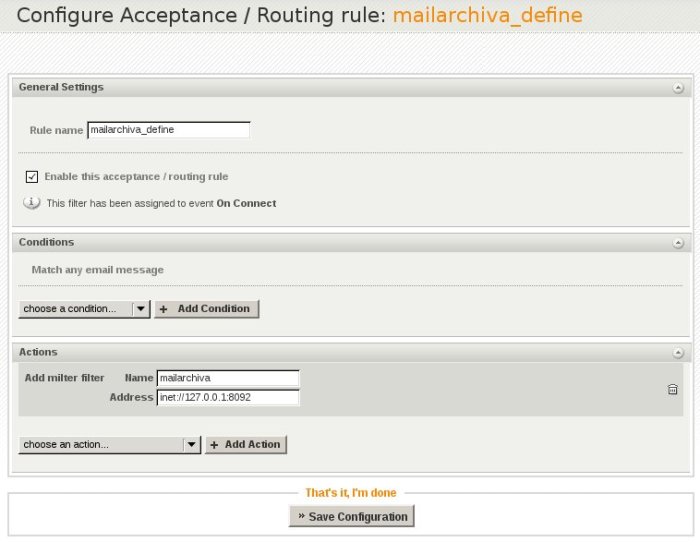
Type a suggestive Rule name such as 'mailarchiva_define', then in the Actions section select the Add filter option from the Filters category and press Add Action. Type a name for the new filter, and fill the Address field with the connection address of Mailarchiva's MILTER listener. By default, this listener is available on port 8092, therefore you need to use the following address:
inet://127.0.0.1:8092
The filter configuration should resemble the following, before pressing the Save Configuration button:
After saving the configuration, press again the 'Add Acceptance/Routing Rule' Button.This new filter will be used for actually calling the one we defined before. Type a suggestive name such as 'mailarchiva_execute', then in the Actions section select the Execute filters option from the Filters category and press Add Action. Fill the Name pattern field with the name of the previously defined filter, in our case 'mailarchiva':
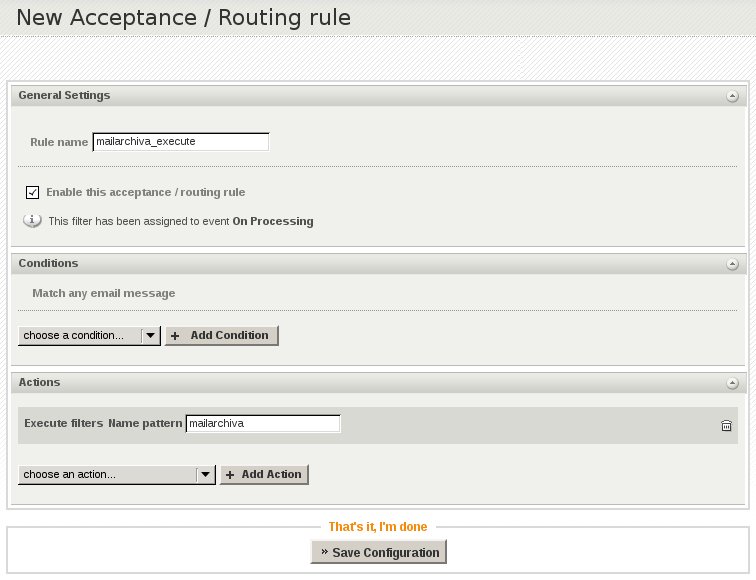
Finally, press the Save configuration button in order to activate this rule.
After this point, all the server's traffic will be archived with the MailArchiva solution.
1. Configuring Mailarchiva
The first thing to do is to connect to 'http://<hostname>:8090'. Login with the 'admin' user name and 'admin' password, then go to the Configuration menu, Domains tab and define one or more local domains, as shown below:
Next, you need to set master administration password, under Configuration -> Login:
Next, you will need to select the Configuration -> Volumes tab, and set an encryption password. After that, on the same page, you have to define a volume to be used for storing emails:
Please remember to save the configuration after you defined the necessary paths.
2. Configuring AXIGEN
You will first need to open the Axigen Webadmin interface, by default available at http://<hostname>:9000. Login with the 'admin' user and the associated password, then navigate to the following section: Security & Filtering -> Acceptance & Routing -> Advanced Settings. Here, press the 'Add Acceptance/Routing Rule' Button.
Type a suggestive Rule name such as 'mailarchiva_define', then in the Actions section select the Add filter option from the Filters category and press Add Action. Type a name for the new filter, and fill the Address field with the connection address of Mailarchiva's MILTER listener. By default, this listener is available on port 8092, therefore you need to use the following address:
inet://127.0.0.1:8092
The filter configuration should resemble the following, before pressing the Save Configuration button:
After saving the configuration, press again the 'Add Acceptance/Routing Rule' Button.This new filter will be used for actually calling the one we defined before. Type a suggestive name such as 'mailarchiva_execute', then in the Actions section select the Execute filters option from the Filters category and press Add Action. Fill the Name pattern field with the name of the previously defined filter, in our case 'mailarchiva':
Finally, press the Save configuration button in order to activate this rule.
After this point, all the server's traffic will be archived with the MailArchiva solution.
OS:
LinuxWindows