In a previous article, we showed you how to protect your Linux servers by enabling the Fail2Ban integration in Axigen. In this article, we’ll show you a similar procedure you can follow for Windows servers, using the RdpGuard integration.
Brute-force attack protection prevents intruders from accessing your servers by trying different passwords and passphrases until they find the right combination. Although this is not a new type of attack, it’s still successfully used thanks to its effectiveness against weak passwords.
Long passwords with various characters are better than short ones, but they’re still not enough to keep your emails safe. That’s why you need a brute-force attack protection tool, and why we decided to integrate with RdpGuard.

How RdpGuard protects your mail server from brute-force attacks
Just like Fail2Ban, RdpGuard is an intrusion prevention system that works by monitoring the logs on your server and detecting failed login attempts. Whenever the number of failed login attempts passes a set threshold, the attacker’s IP address is blocked for a specified period of time.
How to install and configure RdpGuard 6.9.7+ to integrate with Axigen
Here’s how you can enable the RdpGuard 6.9.7+ integration in Axigen for increased brute-force attack protection on Windows servers.
1. Enable Security Log in Axigen using the below CLI commands:
CLI Commands to enable Security Log
<server#> CONFIG LOG
<server-log#> set enableSecurityLog yes
<server-log#> commit
<server#> commit
<#> save config
<#> quit
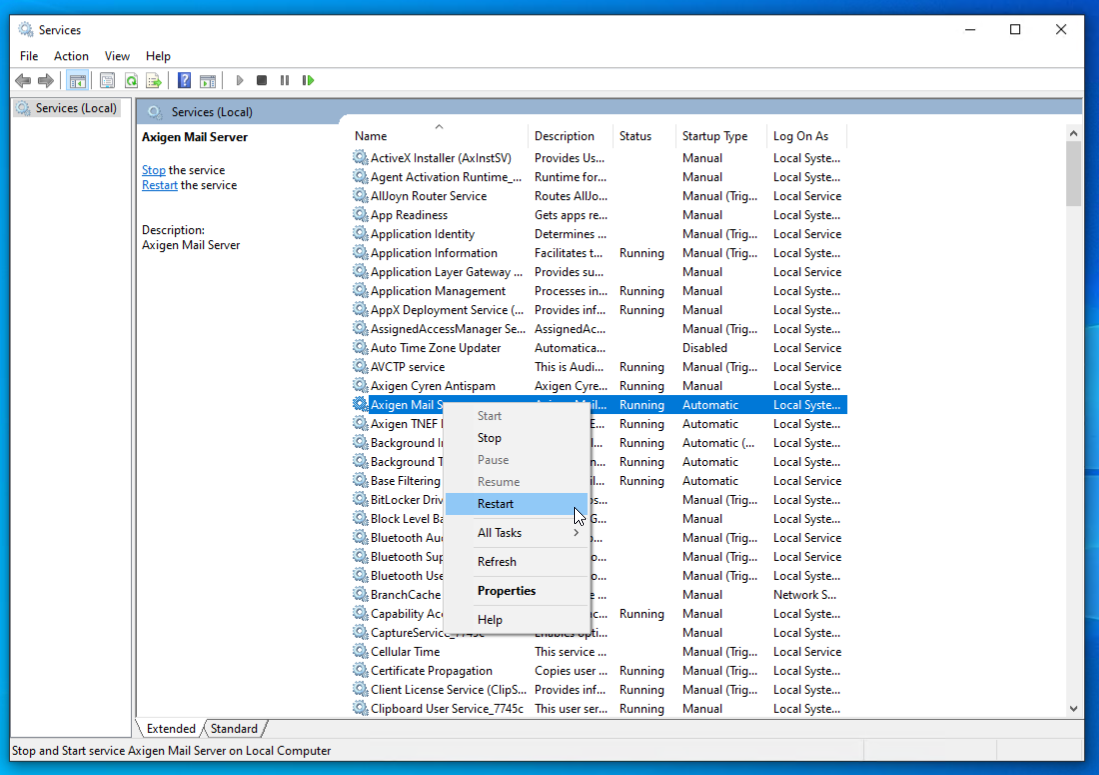
Restart the Axigen service from Control Panel → Administrative Tools → Services (or Run option; %SystemRoot%\system32\services.msc)
2. Download and install RdpGuard 6.9.7+
The RdpGuard install package is available for download at https://rdpguard.com/download.aspx
3. Start RdpGuard and configure monitoring for:
IMAP
- Click on the “Disabled” button next to IMAP
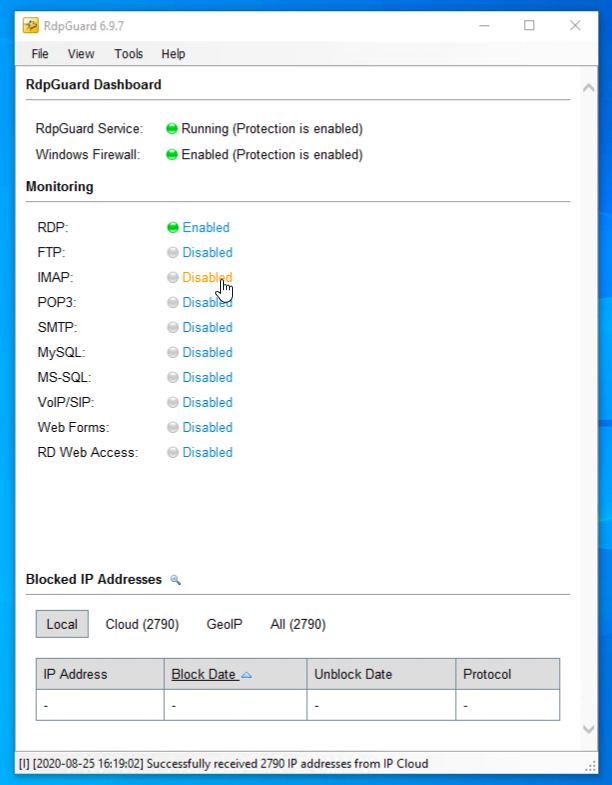
- Check “Enable IMAP protection” → select “Log based” → for “Select server type:” choose “Axigen Mail Server” → Specify the security log file location in “Security log file:” → Save

- By default, the Security file location is “C:\Program Files\Axigen Mail Server\log\security.txt”.
POP3
- Click on the “Disabled” button next to POP3
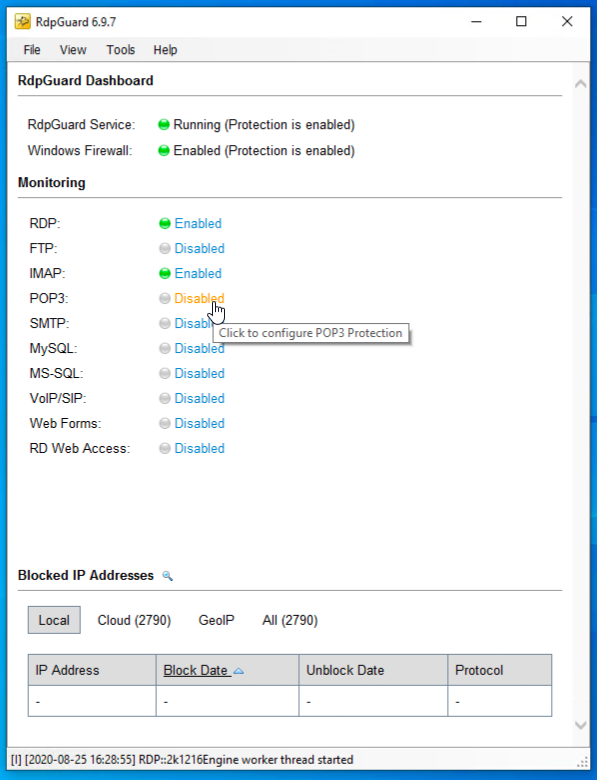
- Check “Enable POP3 protection” → select “Log based” → for “Select server type:” choose “Axigen Mail Server” → Specify the security log file location in “Security log file:” → Save
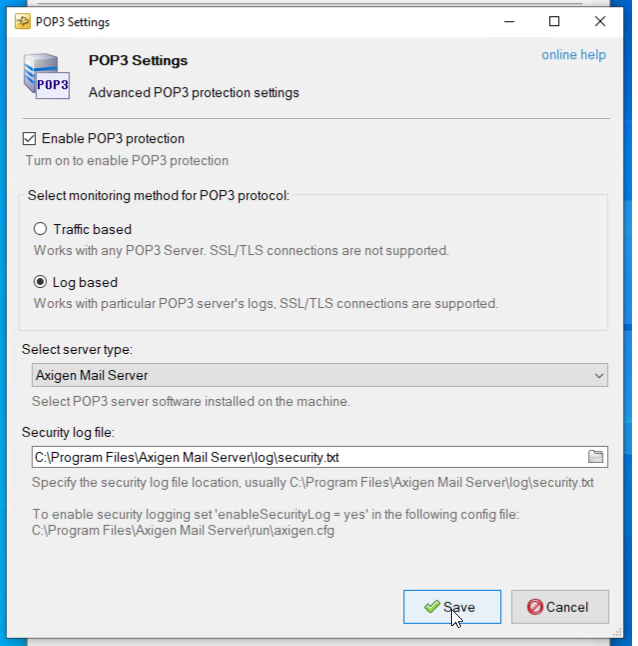
- By default, the Security file location is “C:\Program Files\Axigen Mail Server\log\security.txt”.
SMTP
- Click on the “Disabled” button next to SMTP
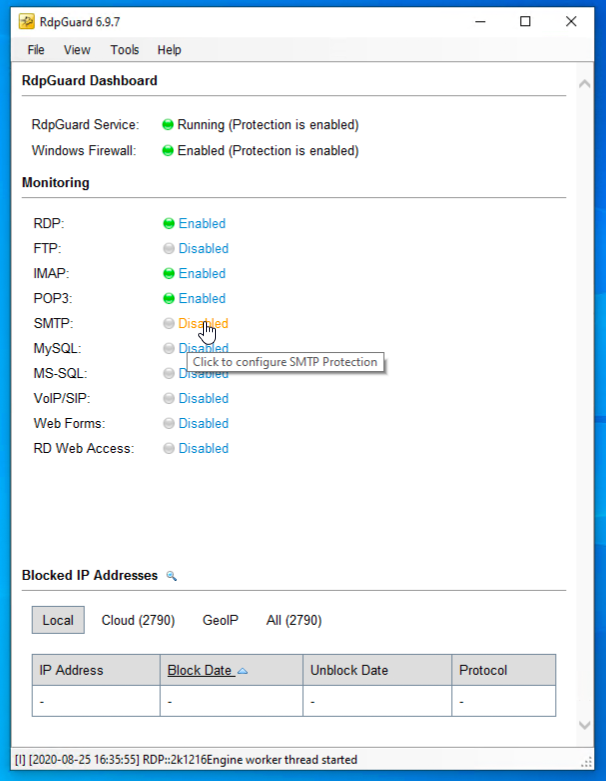
- Check “Enable SMTP protection” → select “Log based” → for “Select server type:” choose “Axigen Mail Server” → Specify the security log file location in “Security log file:” → Save
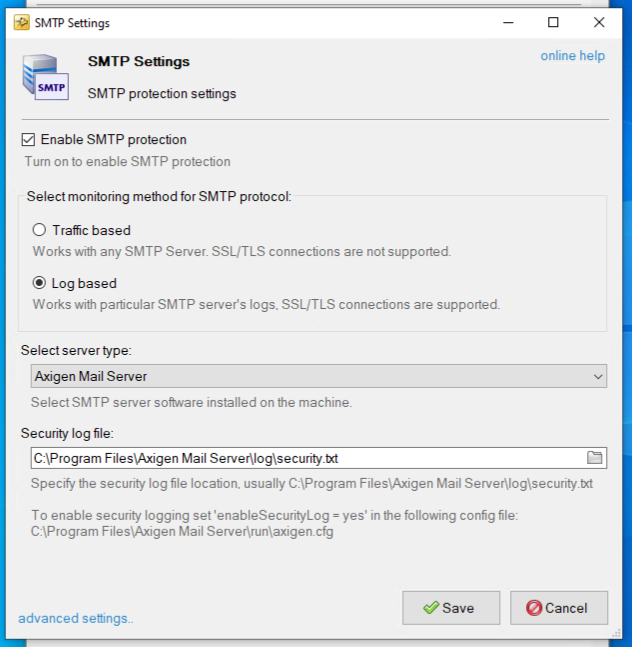
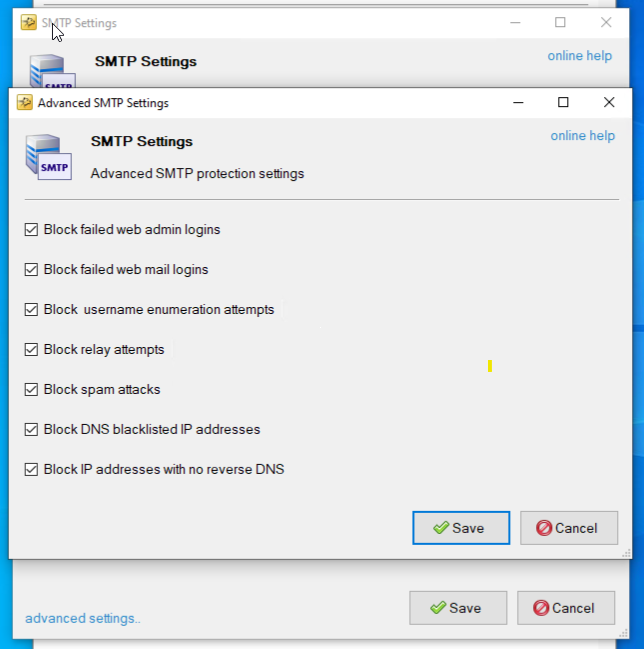
- Enabling SMTP Protection will also protect WebAdmin and WebMail Services from brute force attacks. This additional protection can be configured from the “advanced settings" menu available in the SMTP Settings window.
- By default, the Security file location is “C:\Program Files\Axigen Mail Server\log\security.txt”.
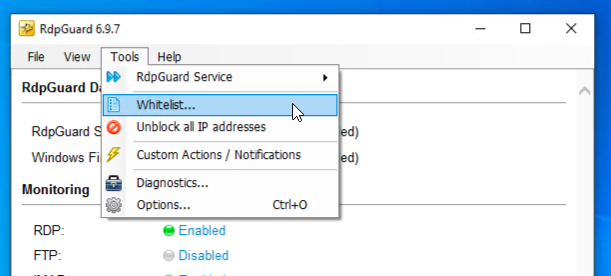
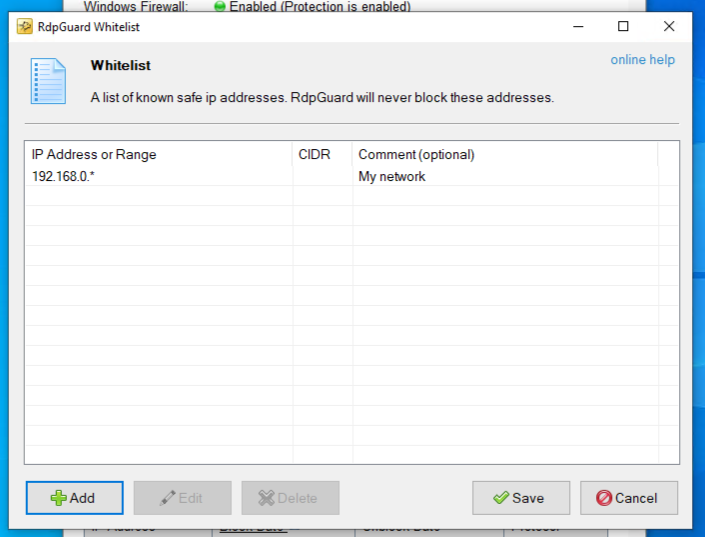
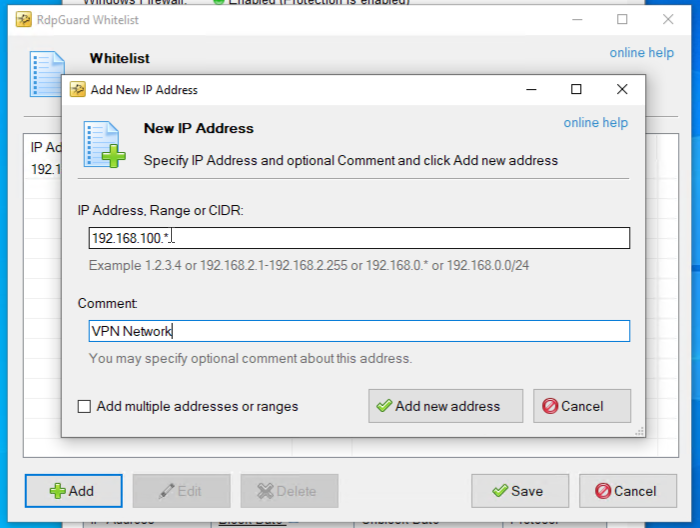
4. Add the trusted IP(s) to whitelist
To avoid admin lockout, you may add your IP to the whitelist from the Menu bar → Tools → Whitelist.
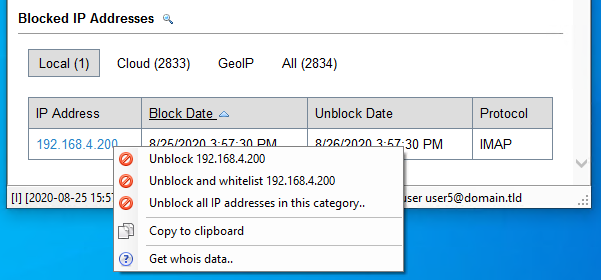
5. Unblock an IP address
You may unblock an IP using Right-Click of your mouse on the desired IP address → Select “Unblock X.Y.Z.W”.