Updated: September 21, 2021
The following page is a step-by-step guide to for the proper setup of the Axigen Outlook Connector.
Before you begin the actual configuration, you need to download the install wizard and run it. Get the Axigen Outlook Connector here
Steps to Set Up Axigen Outlook Connector
After running the setup wizard, you will have to configure the MS Outlook email client for communicating with the Axigen mail server via Axigen Outlook Connector. To do so, please follow the steps below:
1. Add a New Outlook Profile, If You Don't Have One
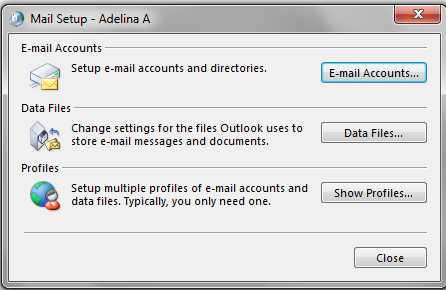
a. Go to "Start" → "Control Panel" → "Mail";
If you checked the "Add Outlook profile" option in the final step of the Axiolk install wizard, then the Mail applet will be automatically opened after pressing the "Finish" button.
b. Select "Show Profiles" → "Add...", to add a name for your new profile, and then press "OK"; the "Add New Account" wizard window will appear, guiding you through the process.
2. Add a New Account to the Profile You Have Just Added
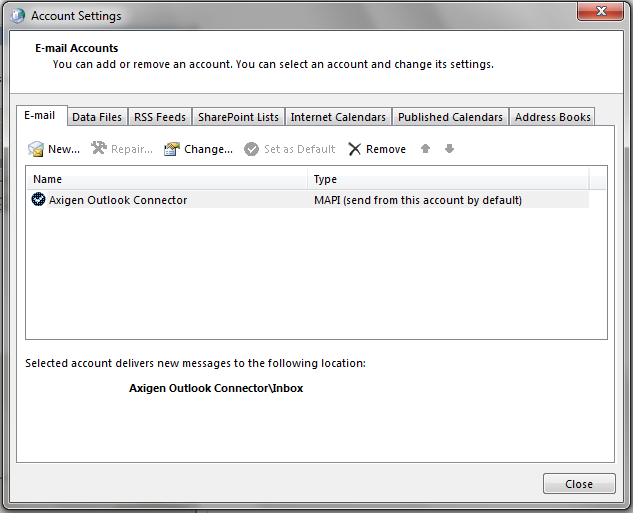
a. Select "E-mail Accounts" (from the first window of the Mail applet) and click the "New..." icon to add a new email account.
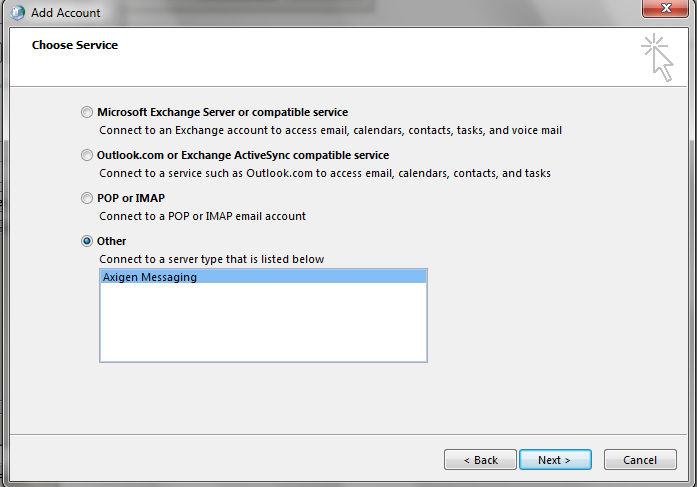
3. Fill All Required Settings for the "Axigen Outlook Connector" Service
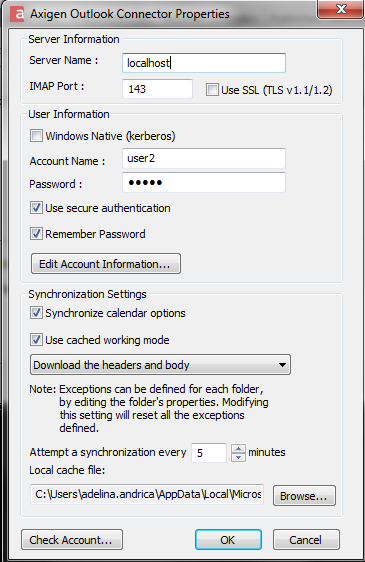
a. Fill in the "Server Name" field with the IP or the name of the Axigen mail server. If you do not have the required information, please contact your system administrator for more details.
b. Fill in the "IMAP Port" field, with the port on which the IMAP service is listening (the standard value here is: 143). If the Axigen server uses IMAP over SSL (port 993), simply check the box related to the "Use SSL" option to enable the use of SSL communication for your Axiolk profile. If you do not have the required information, please contact your system administrator for more details.
c. Enable the "Windows Native (kerberos)" option so the connector will use the credentials of the logged in user to authenticate to the Axigen account (if the server is configured to allow this type of authentication). Enabling this option disables the account name and password fields since the current user credentials from the kerberos ticket will be used.
d. Fill in the "Account Name" and "Password" fields with the account name and password provided by your mail server administrator.
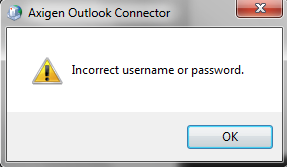
e. Check the "Use secure authentication" option to instruct the Connector to use secured authentication methods. If the server is not configured to allow this type of authentication, enabling this option will yield login failure.
f. Use the "Remember Password" option so you won't have to type it every time you open Outlook.
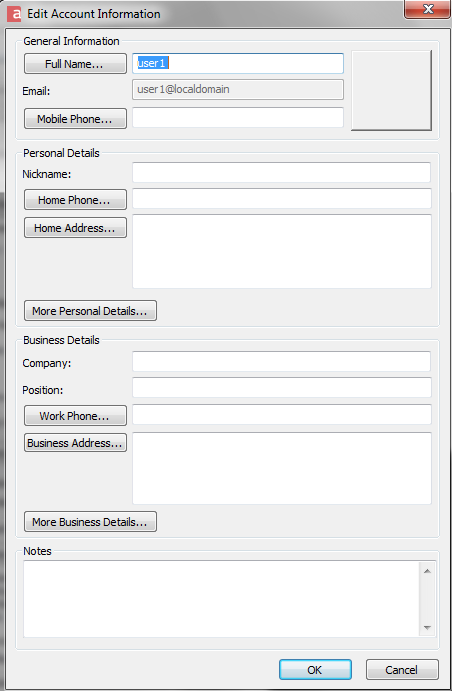
g. You can also edit the contact information for your account by clicking the "Edit Contact Information..." button.
If the administrator has explicitly denied you to edit your contact information, you will be presented with the below error message when trying to save changes.
h. If you wish to use, at a certain point, the offline working mode for your Outlook client, check the box related to the "Use cached working mode" option and select the caching level from the drop-down box. This will allow Axiolk to use a local .pst file to keep your profile data, perform regular access operations using the local cache file, thus improving the general performance of your email client. To keep the local cache synchronized with the account data on the Axigen server, Axigen Outlook Connector will start a periodic synchronization process, based on the timer set via the "Attempt a synchronization every _ minutes" parameter.
If you wish all operations to be performed directly on the server, then simply uncheck the box related to the "Used cached working mode". If this option is disabled, no local cache file will be used.
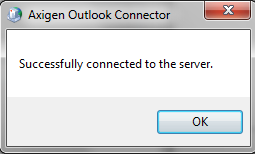
i. Click the "Check Account..." button to verify that the details you have entered are correct and complete, and that your account is working properly.
