Updated: October 22, 2024
The WebAdmin tab allows you to configure parameters relative to this specific service's configuration, add listeners, and manage access to the service by adding rules applicable to all existing listeners. For details on listener and rule configuration, see the Listeners chapter.
Through Service Configuration, you can manage logging, HTTP protocol, WebAdmin session, and thread management parameters.
Listeners and Control Rules
1. Listeners
The first section in the WebAdmin tab is Listeners. Here you can add, delete, or edit the TCP socket listeners for the WebAdmin service.

Editing one of the existing listeners will result in accessing two configuration pages: General and SSL Settings. The same pages will also be displayed when hitting the Add Listener button and choosing the Advanced Config option.
By default the listeners will be configured on 0.0.0.0 (IP block containing all possible configured IPv4 addresses) and :::(IP block containing all possible configured IPv6 addresses) port 9000, the standard port (non-SSL) and 9443 port used for Implicit SSL/TLS.
Specific to the WebMail and WebAdmin listeners is the Secure login section available in the Listener configuration → SSL Settings tab.
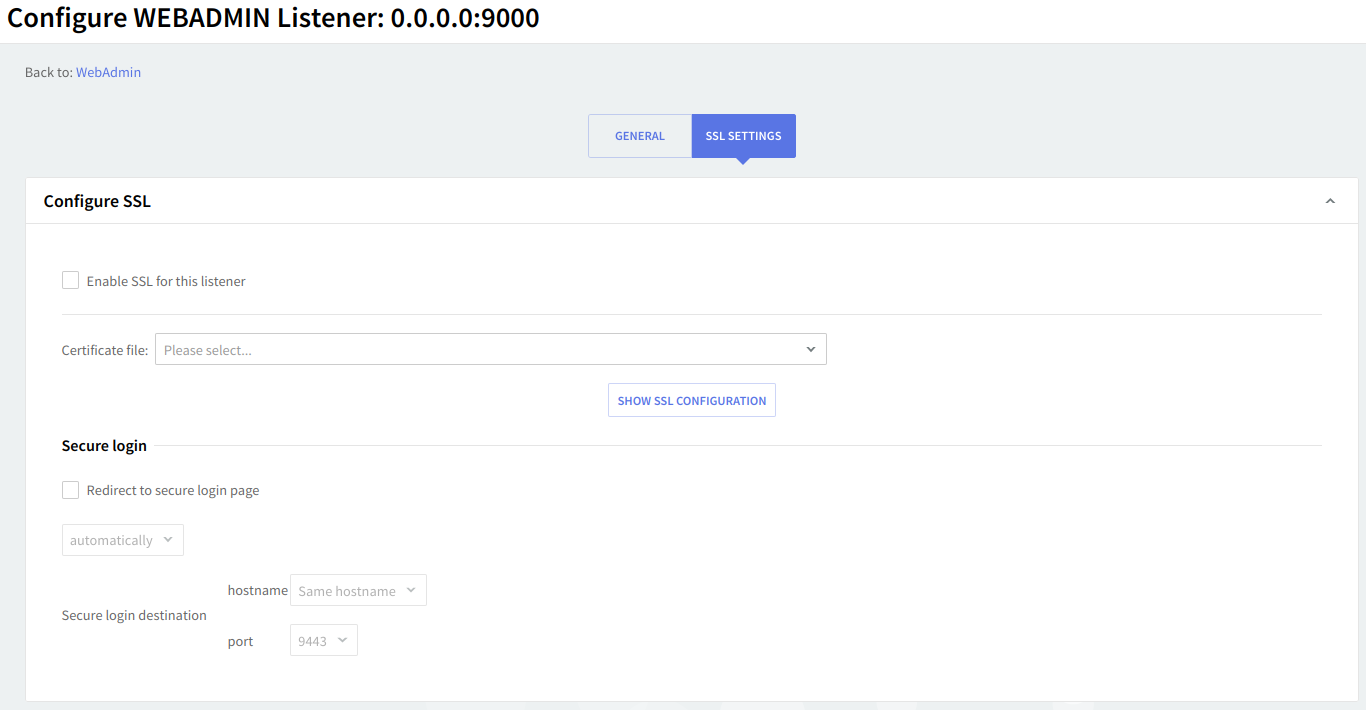
This section will only appear after an SSL-enabled listener is available for the WebAdmin service.
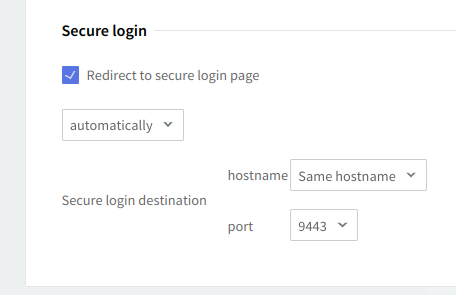
Here you can enable the Display secure login option on the login page option, which will add a Secure login link on the WebAdmin login page if set to manually, or perform an automatic redirect when set to automatically; you can also set a specific listener to be used for the redirect.
2. Access Control

Access rules allow you to control connection to this service from specific Networks / IP Ranges / IPs.
3. Flow Control

The service flow control context allows you to define the max connections, max connections/interval, max peer connections, and max peer connections/interval values.
Service Configuration
1. Logging

You can select several types of messages to be logged for the WebAdmin service: critical messages, error messages, warning messages, informational messages, and protocol communication. To select which of these are to be logged, click the Log Level slider and move it to the left or the right. The selected types of messages will change color from whiter to blue.
Log files can be stored using your internal log files, your system's log files, or within the log files located on a remote system. Use the Log drop-down menu to select where to save your log files.
2. HTTP Protocol Options
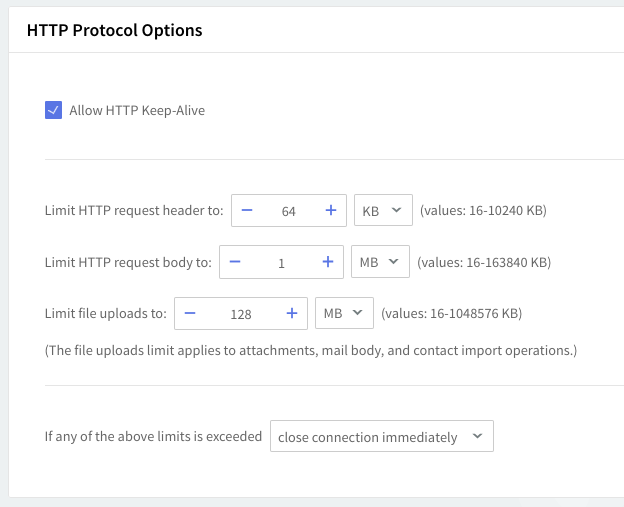
By checking the Allow HTTP Keep-Alive option, you allow permanent HTTP connections for the WebAdmin service.
Next, you can set the HTTP limits for WebAdmin requests. Use the Limit HTTP Request header option to specify the maximum allowed size for incoming HTTP headers, and the Limit HTTP Request body option to specify the maximum allowed size for incoming HTTP body. The third option, Limit file uploads, can be used to set the maximum allowed size for incoming upload data. All size values can be set by using the up and down arrows, in KB or MB and specifically for the Limit file uploads options, in GB.
Select the appropriate action to be taken when the incoming data is over the set limits by using the If any of the above limits is exceeded option. Use the drop-down menu in order to choose between closing the connection immediately or allowing all data to be sent.
3. WebAdmin Options
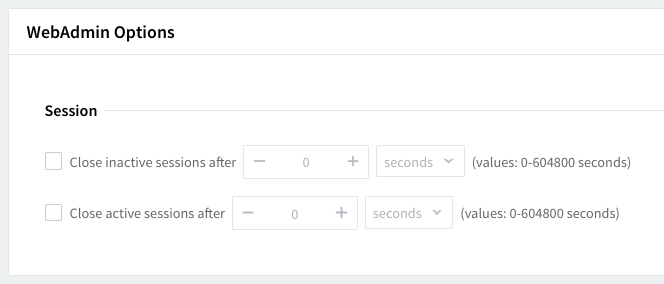
Set the parameters for WebAdmin sessions by using the two options under the Session section. You can specify after what interval an inactive (idle) / active WebAdmin session is closed. Values for these parameters can be entered in seconds, minutes, hours, or days by using the up and down arrows.
Thread Management
Thread management allows you to set different numbers of processing threads for the WebAdmin service, depending on your traffic load. First, using the up and down arrows, set a number of threads to be allotted when the WebAdmin service is started. To have a different number of threads for peak periods, check the overload option and use the up and down arrows to choose the thread number.
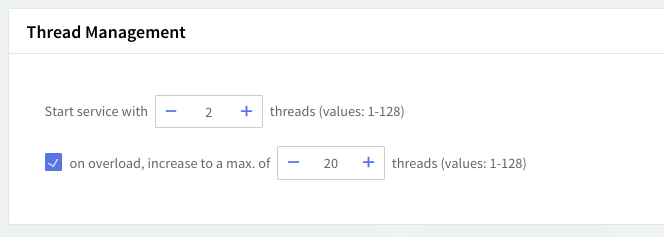
Depending on your WebAdmin service load, you can increase the number of processing threads which can lead to increased performance and response time for this service. However, this increase should be made very carefully, and making sure that the server hardware can provide the processing and memory resources required by a higher number of threads. The default setting of 2 starting threads and an increase on overload to 20 threads is recommended.
When you are done configuring these parameters, remember to hit the Save Configuration button to preserve your changes.