Updated: June 13, 2024
Starting with Axigen X4, you can authenticate in the Axigen WebMail using OAuth 2.0 / OpenID Connect.
However, as IMAP / POP3 (and SMTP) clients have not yet adopted OAuth 2.0 / OpenID Connect as a standard, you don’t have this option out of the box. This causes a problem for end-users as they would need two different sets of credentials: one for the WebMail and another one for their IMAP / POP3 clients.
This article describes a configuration that allows users to use a single set of credentials for authentication with Axigen, an authorization server (we’ve used Keycloak to illustrate the configuration), and LDAP.
OAuth / OpenID Connect support is available starting with Axigen X4 (10.4).
The scope of this article is limited to authorization and authentication. Account provisioning can be achieved either manually or via LDAP sync.
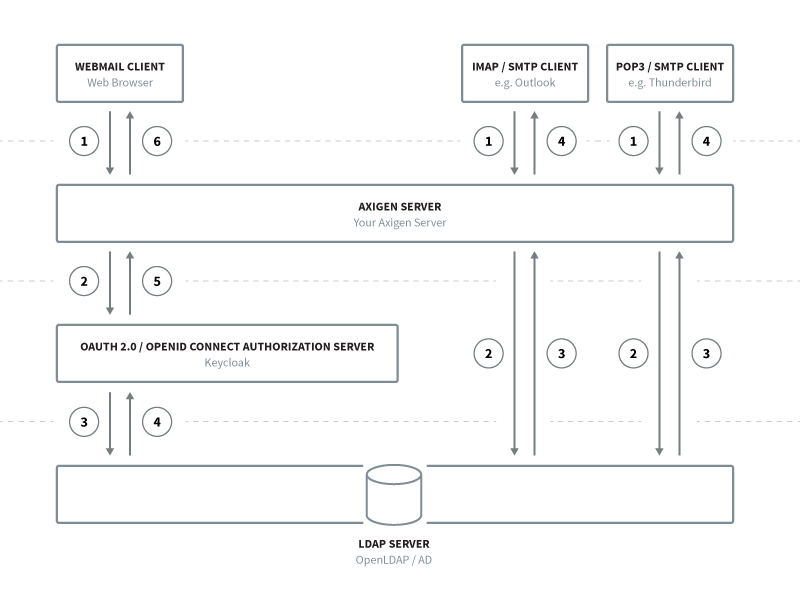
Concept
Since OAuth 2.0 is not commonly supported for services such as SMTP, POP3, and IMAP, we will employ an LDAP connector to authenticate requests for these services.
Subsequently, we will set up Keycloak as the OAuth 2.0/OpenID Connect authentication provider for WebMail. To allow users to utilize the same credentials across different services, we need to configure Keycloak's User Federation to connect to the same LDAP instance.
Setup Used
Here is the setup used for the purpose of this article:
Service | Version | Hostname | Ports |
|---|---|---|---|
OpenLDAP | 2.6.8 | openldap | 1389 |
Keycloak | 25.0.0 | keycloak | 8080 |
Axigen (standalone) | 10.4 + | axigen | 443 (WebMail) |
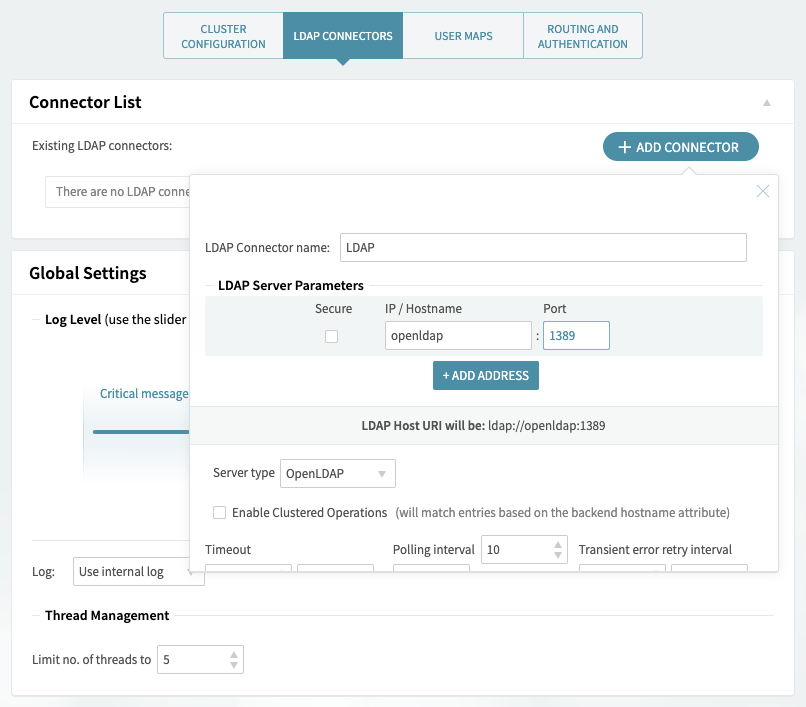
1. Axigen: Add an LDAP connector to be used for authentication
Open your WebAdmin and go to Clustering → Clustering Setup. In the LDAP Connectors tab, click the Add Connector button.
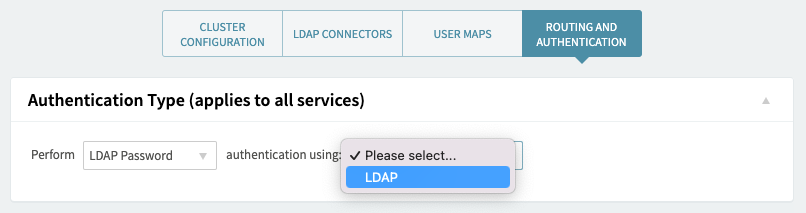
2. Axigen: Set the authentication to use the LDAP connector
Click the Routing and Authentication tab and change the Authentication Type (applies to all services) section.
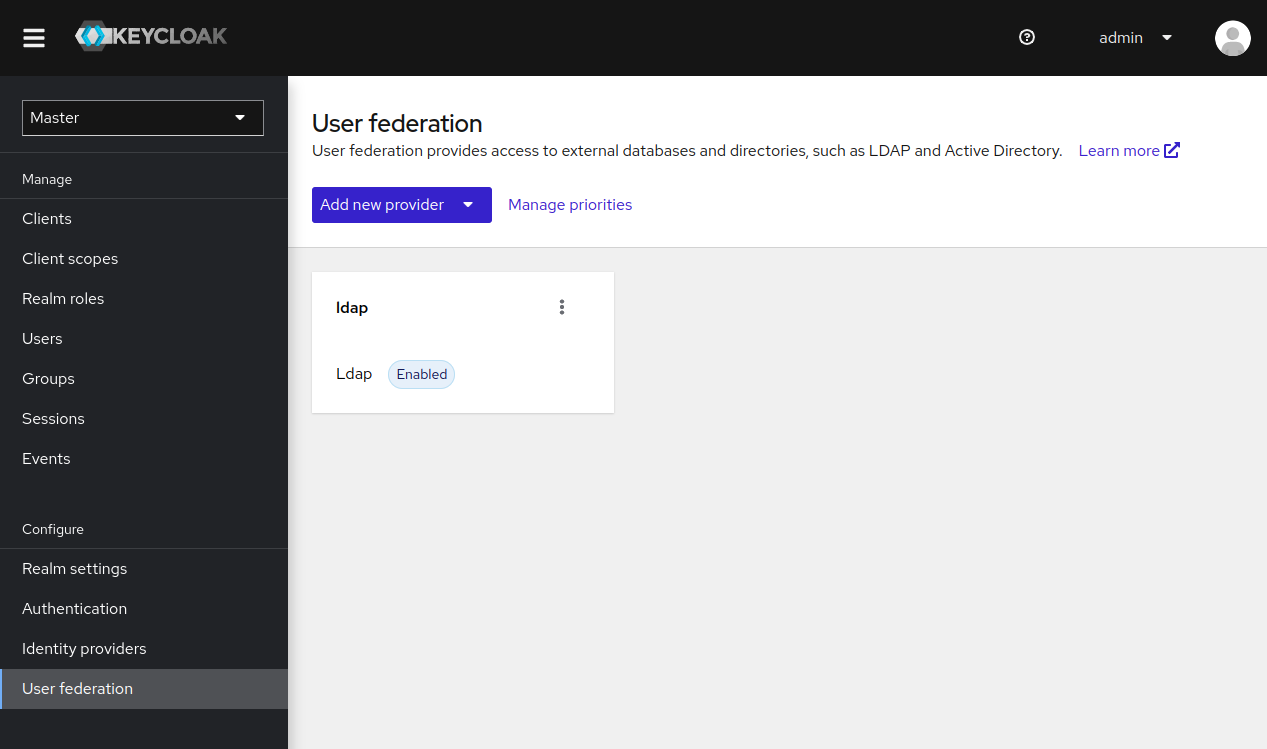
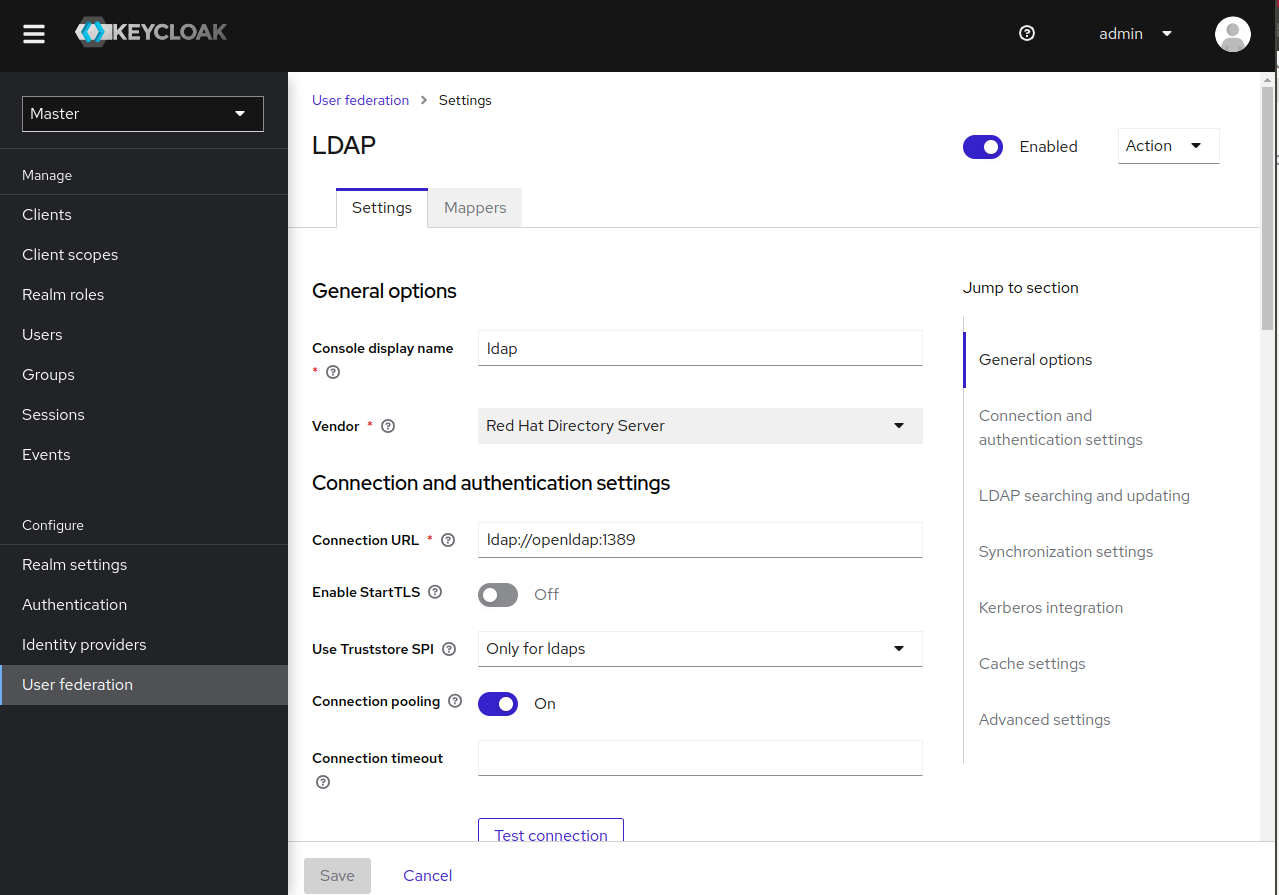
3. Keycloak: Add the LDAP provider
In the User federation configuration page, click Add new provider and configure the newly added LDAP provider.
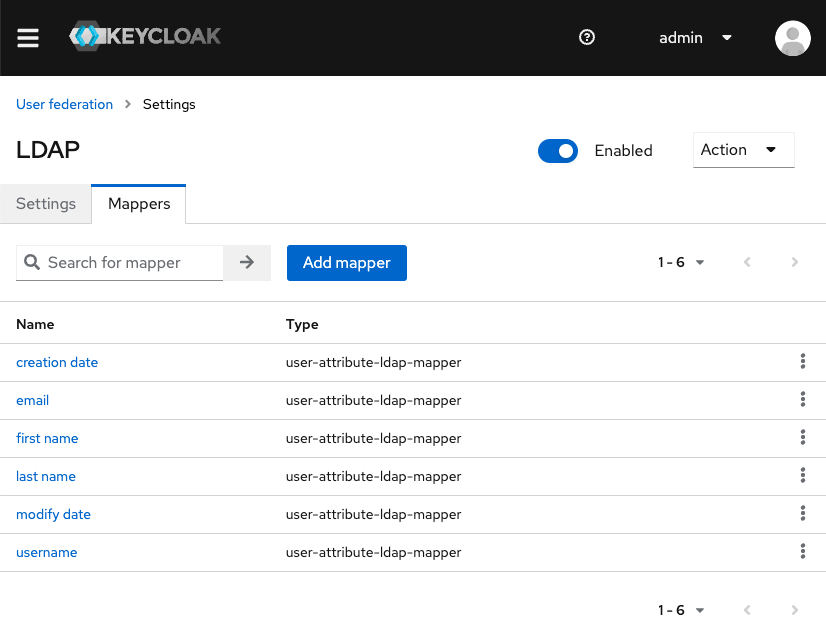
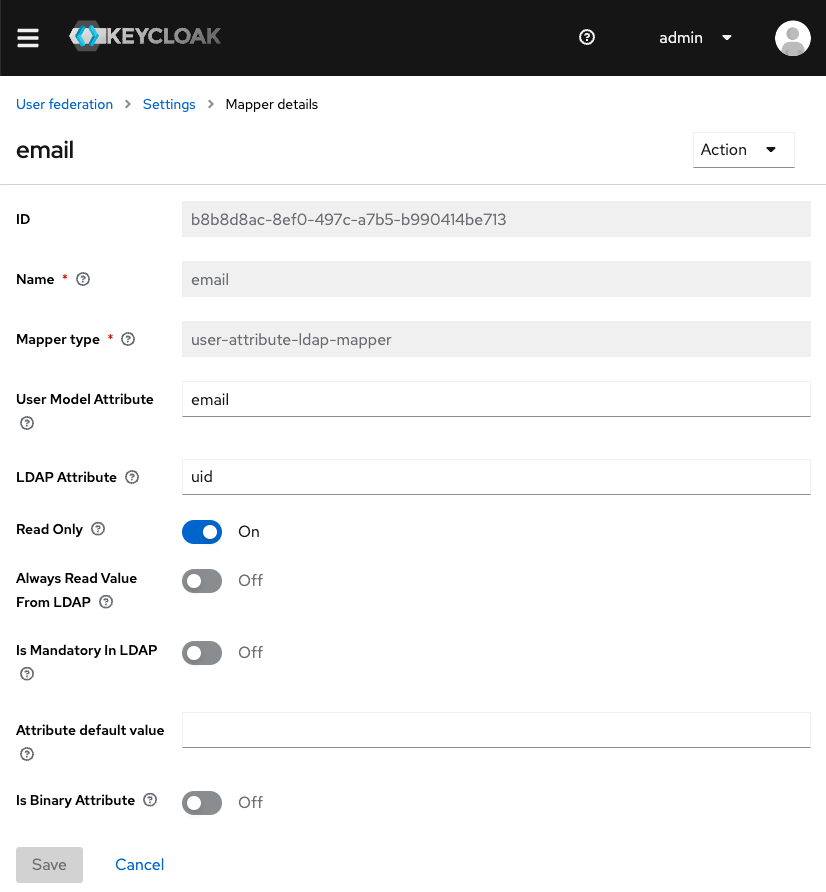
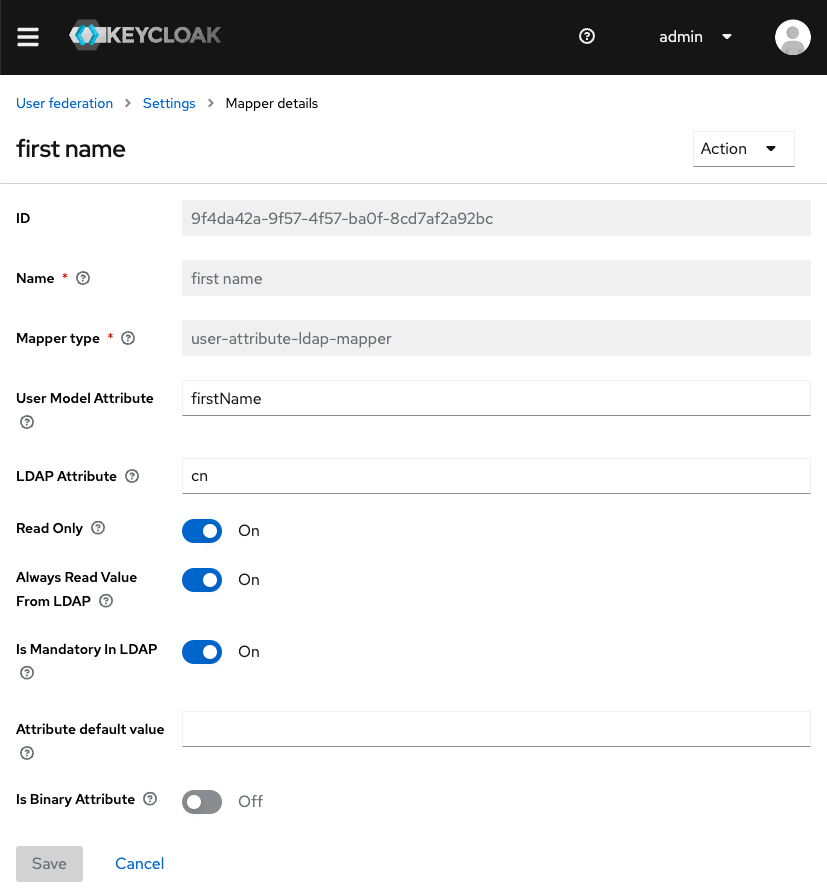
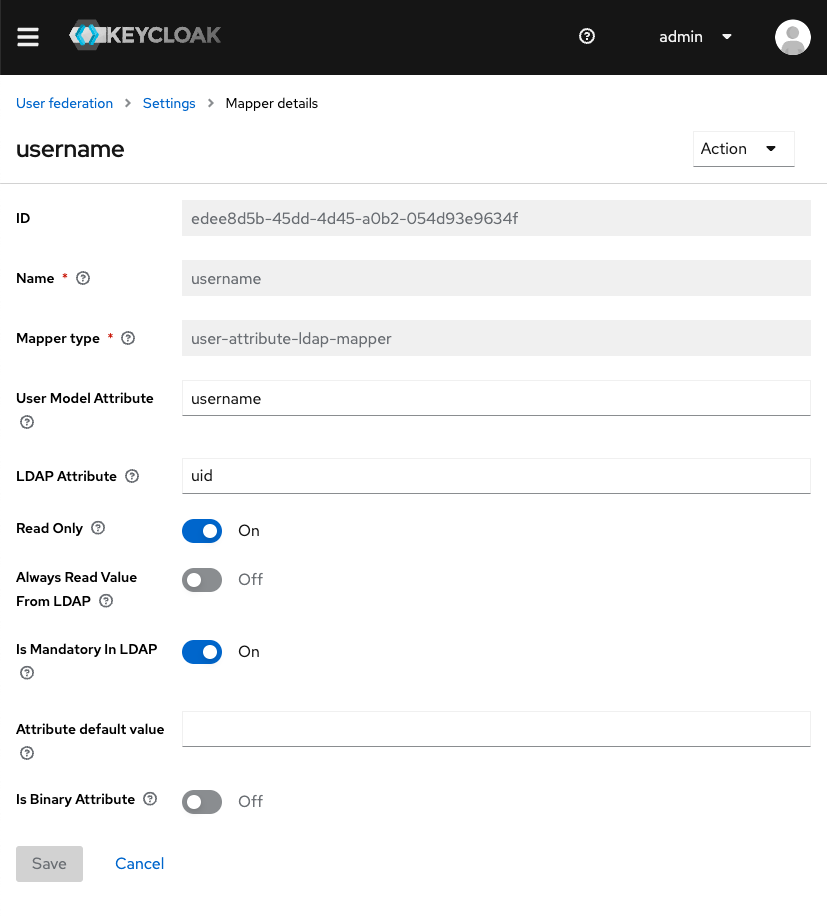
Make sure you configure Keycloak to map all the fields you need for authentication to the respective LDAP attributes. This can be done from the Mappers tab in your LDAP provider. Below you can see a sample mapping:

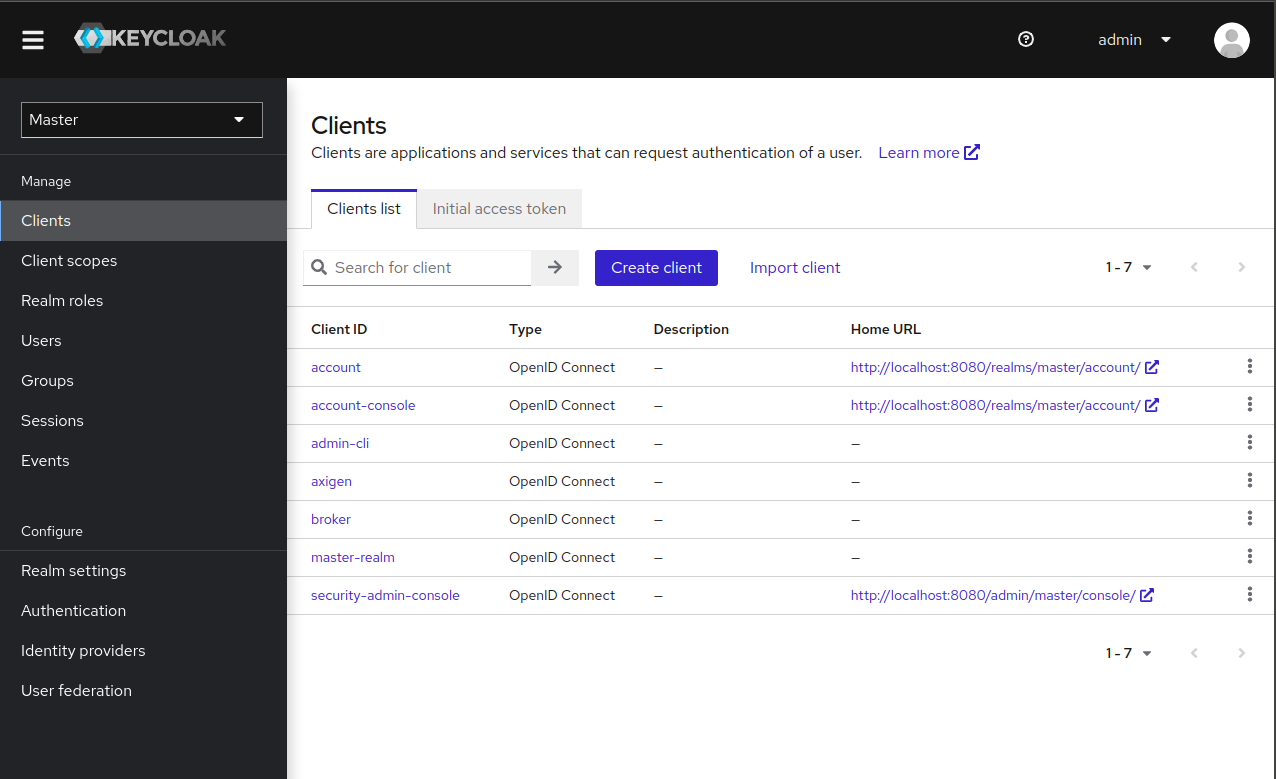
4. Keycloak: Add Axigen as an OpenID Connect client
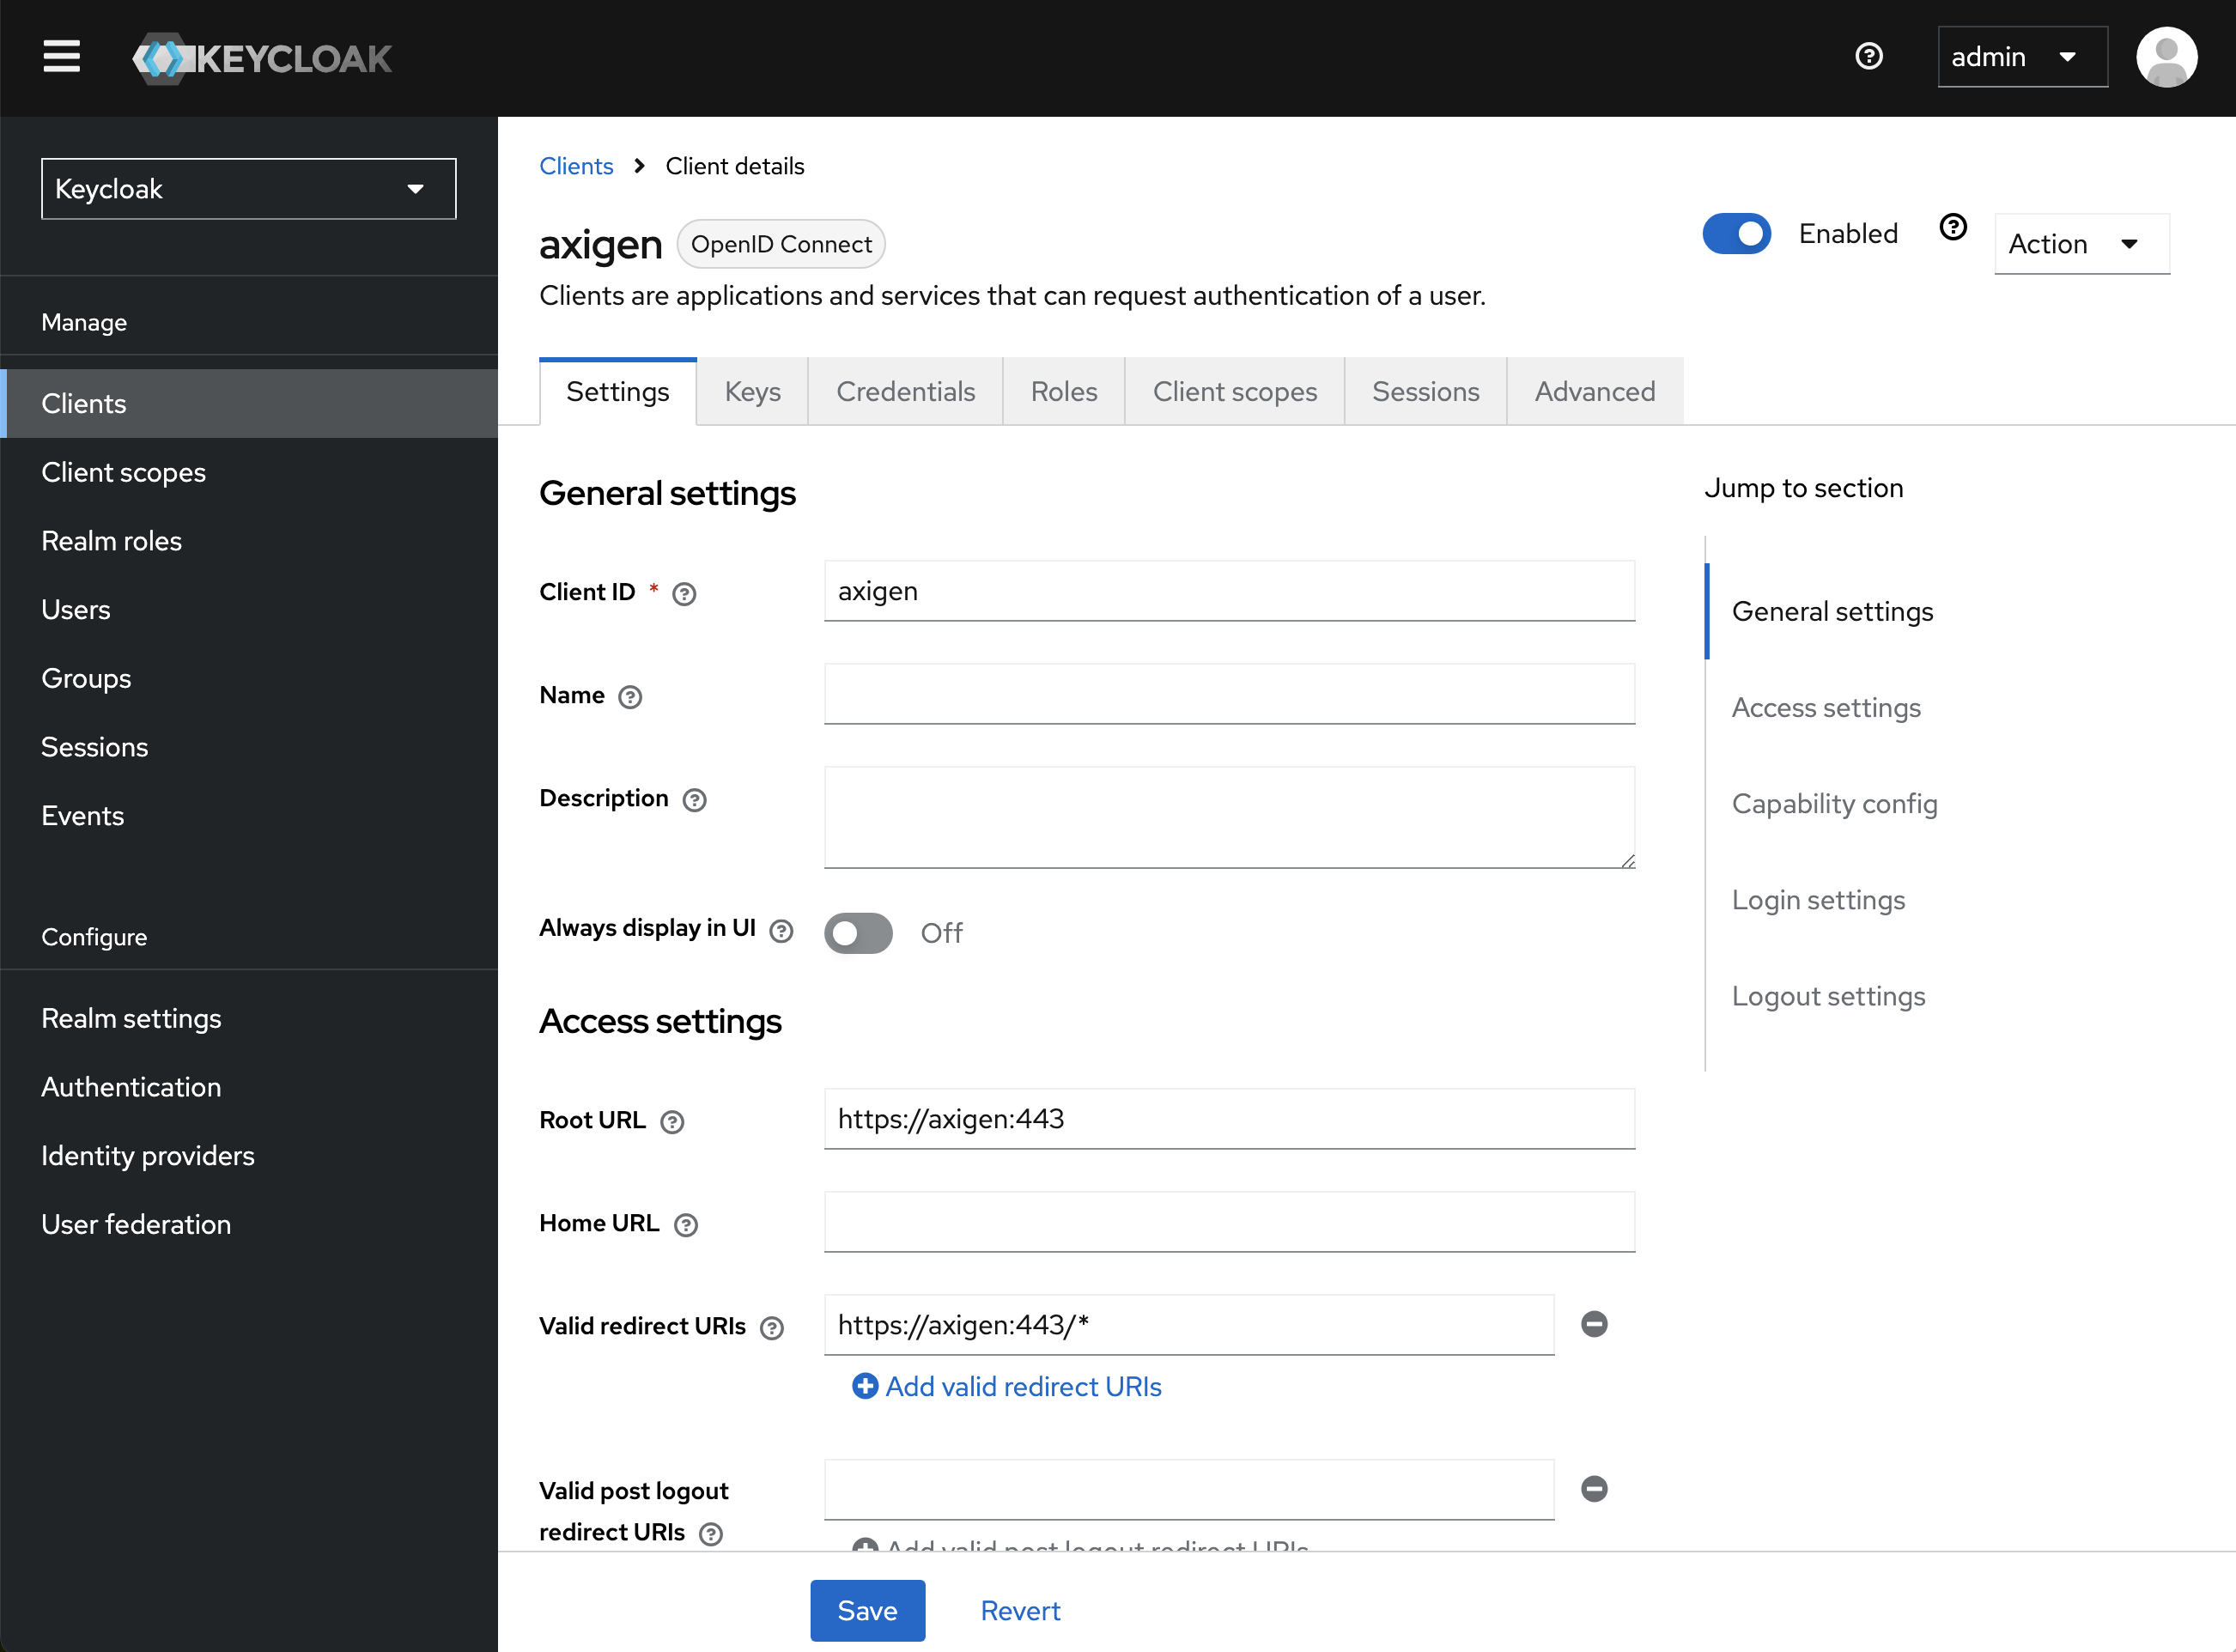
In the Clients configuration page, click Create client and configure the Axigen OpenID Connect client.
Note that Keycloak validates the incoming redirect_uri query parameter in the authorization request against the value configured in the Valid redirect URIs field. Make sure to include the port and the wildcard “*”.
5. Axigen: Add an OAuth (OpenID Connect) connector
Connect to Axigen’s CLI interface and add an OAuth connector (OpenID Connect) using commands similar to the ones below:
6. Axigen: Use the OAuth (OpenID Connect) connector for WebMail auth only
Change the WebMail configuration to use the newly defined OAuth connector along side the LDAP connector. This will allow additional services such as ActiveSync, CalDAV or CardDAV to failover to the LDAP connector.
In Axigen’s CLI interface, use commands similar to: