Updated: December 13, 2021
In this short article, we’ll explain how to configure your Axigen Mail Server as a log server.
First off, we’ll split this into two parts:
- How to configure Axigen as a log server
- How to configure a service for Axigen to log on a remote host
For everything to work, you need to have two Axigen instances installed and running, one represents the actual mail server while the other one will be used as a log server.
Solution
How to Configure Axigen as a Log Server
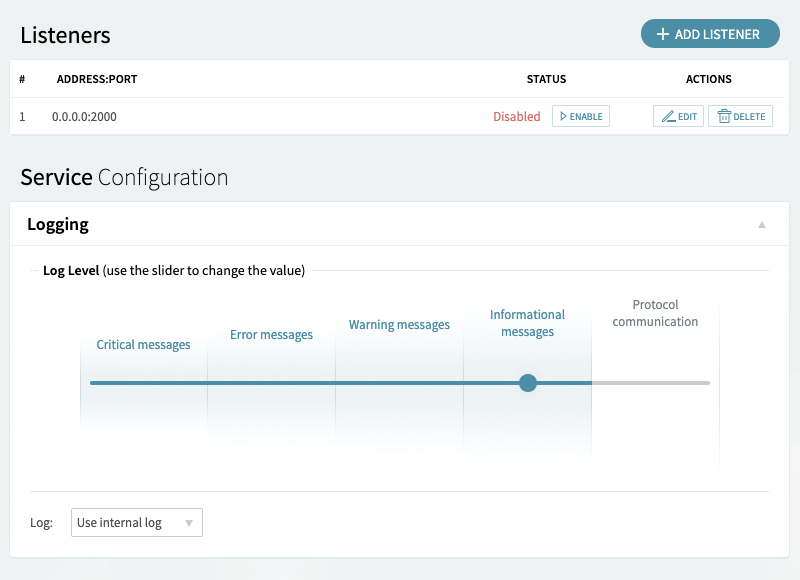
1. In the WebAdmin interface, navigate to Logging → Log Server Settings.
2. Make sure that the log listener is enabled and listening on a real network interface. Use 0.0.0.0 if you want that this listener to be available to all system interfaces. Port 2000 is the default one but you can use another one.
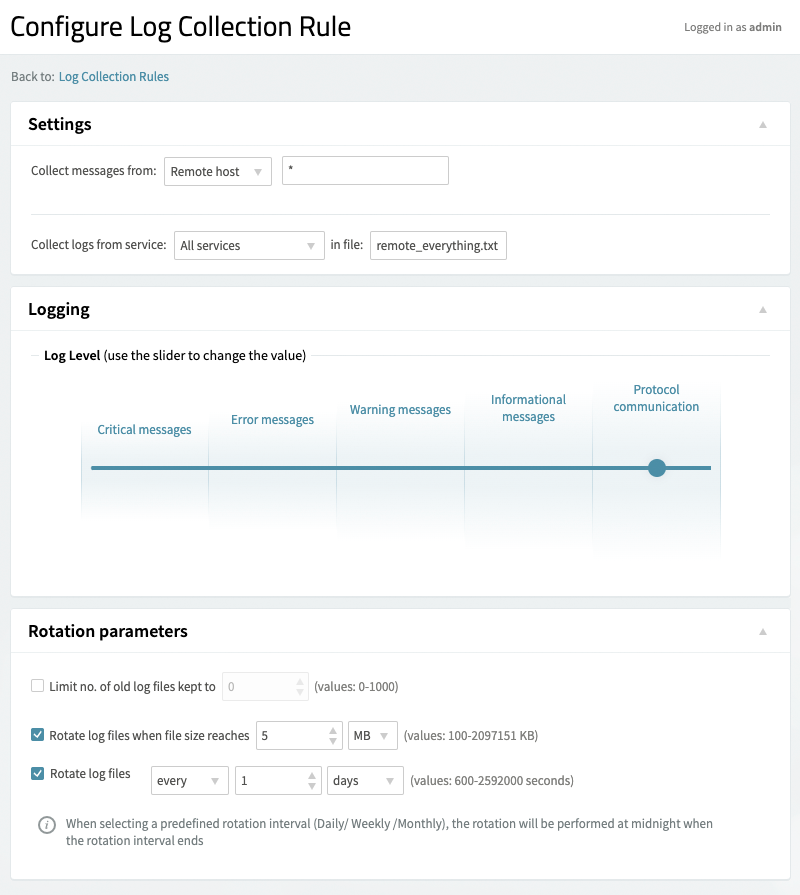
3. Navigate to Logging → Log Collection Rules and add a new log collection rule with the following parameters:
-
Collect messages from: → Remote host → *
-
Collect logs from service → All services → in file: → type a suggestive file name
4. Save your Configuration
How to Configure Axigen to Log on a Remote Host
We will configure Processing Service to log on remote host configured in first part.
1. In the WebAdmin interface, navigate to Queue → Processing.
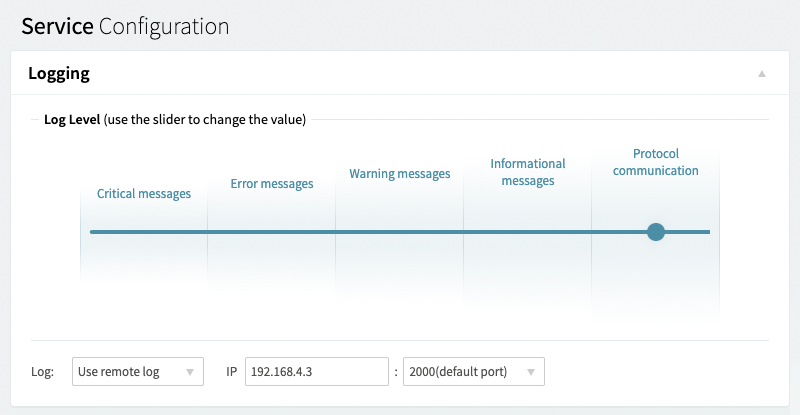
2. Under Service Configuration → Logging, choose the following settings:
-
Log: → Use remote log
- IP → W.X.Y.Z : 2000 (default port)
3. Save your Configuration
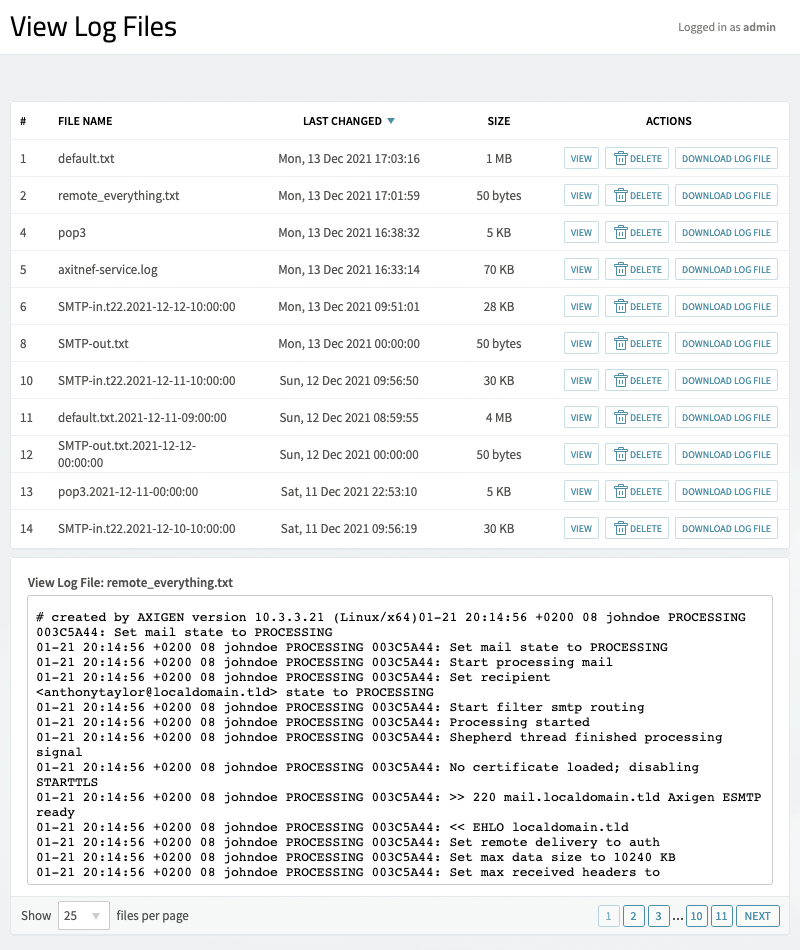
5. Verify on the Axigen Log Server (in our case is the one with IP 192.168.4.3) that remote_everything.txt collects the logs for the Processing service by navigating to Logging → View Log Files and clicking on the View button near the above mentioned file name.