Updated: August 2, 2022
This article will explain how to create a mail server environment with Kubernetes in Google Cloud. There are many other cloud platforms offering Kubernetes, so why GCP? There are two reasons why we’ve chosen Google Cloud Kubernetes:
- Google is the main entity driving Kubernetes development, as well as Golang development (which is, or at least, is becoming, the leading development language for modern cloud platforms);
- GCP offers a free 1 year trial service with credits for running compute and storage, which come in handy for building proficiency in cloud development and operations.
Note: This article is part 2 of a series on deploying a Dockerized mail server application to a Kubernetes cluster. The intent is to share a real-time, intuitive experiment with our community and provide an overview of what it means to take a standard RPM package and turn it into a cloud application. Check out part one on how to create a mail server environment with Docker here.
In the first part of this series, we created a containerized version of our Axigen package. What we now have is a re-packaging of the app that allows deployment in the cloud. Next, we want to actually run an instance of this application in the cloud.
Let’s get started.
Publishing Our Mail Server App Using Docker Hub
We previously created the container from the RPM locally; for it to be accessible (installable) from the cloud, we have to upload it to a location for distribution.
Docker’s mechanism for distributing an image is called Docker Registry; it is a repository, fully integrated with the Docker command line utility, maintaining a catalogue of Docker images and allowing others to instantiate containers based on these images.
The main (and default) Docker Registry is Docker Hub — it is operated and maintained by Docker and available to everyone.
While we have the option of using a private Docker Registry, setting one up is beyond the scope of this article; thus, it is the public Docker Hub that we shall use.
In Docker Hub, each image is called ‘repository’. Public repositories do not require authentication for use, while private repositories are only available to authenticated users (with permission on the repository mentioned above - collaborators).
Publishing an image in Docker Hub for distribution, however, may only be performed by an authenticated user.
A user (Docker ID) is required to create and manage repositories - sign-in is free of charge for public repositories. We shall use the “ionnistor” id for the scope of this article.
First, login into Docker Hub (the docker utility will preserve the credentials):
Login with your Docker ID to push and pull images from Docker Hub. If you don't have a Docker ID, head over to https://hub.docker.com to create one.
Username: ionnistor
Password:
Login Succeeded
Let us first see the images we have locally:
REPOSITORY TAG IMAGE ID CREATED SIZE
my_2nd_new_and_shiny_axigen_image latest ef7ce0fd9a47 13 days ago 1.43GB
my_new_and_shiny_axigen_image latest e7ca09e1933b 13 days ago 1.43GB
In order to push (publish) a local image to a Docker Registry, we need to ‘tag’ it with the appropriate name. For Docker Hub, the name is in the format <dockerID>/<repositoryName>. For private registries, the format is <dockerRegistryHostname/repositoryName>
ion@IN-MBP ~ % docker image ls
REPOSITORY TAG IMAGE ID CREATED SIZE
ionnnistor/my_2nd_new_and_shiny_axigen_image latest ef7ce0fd9a47 13 days ago 1.43GB
my_2nd_new_and_shiny_axigen_image latest ef7ce0fd9a47 13 days ago 1.43GB
my_new_and_shiny_axigen_image latest e7ca09e1933b 13 days ago 1.43GB
The new name (inistor/my_2nd_new_and_shiny_axigen_image) is used to refer to the same image as the one we’ve created before (id ef7ce0fd9a47). We need this tag to push to Docker Hub, as the push command does not take a ‘source’ / ‘destination’ combination of parameters; instead, it uses the name itself to identify the target Docker Registry.
Everything is ready, so let’s push the image to Docker Hub:
The push refers to repository [docker.io/ionnistor/my_2nd_new_and_shiny_axigen_image]
733c5df06d93: Pushed
0683de282177: Pushed
latest: digest: sha256:95e43e1f6cb87d3fcfadb97dbab4ba9789da80953ebd0d7118a1e4ecdcba6747 size: 742
At this point, the Docker Hub portal will display the newly created / pushed repository:
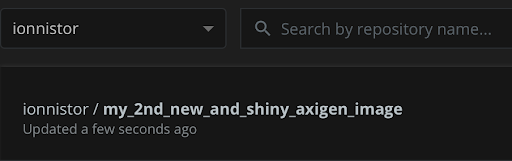
We now have a public repository with the created Axigen image. Its name is ionnistor/my_2nd_new_and_shiny_axigen_image and this is how we’ll refer to it in the cloud.
Using Our Docker Image to Create a Mail Server Environment with Kubernetes in Google Cloud (GCP)
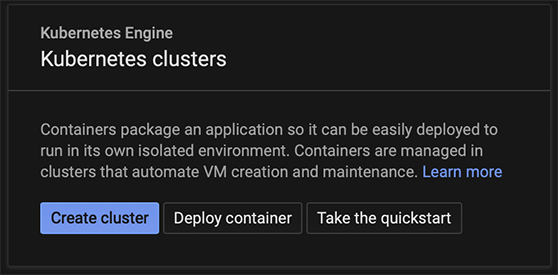
Let’s prepare the GCP Kubernetes cluster. All operations will be performed in the “Compute / Kubernetes Engine” section, so this will be omitted below.
The GCP console allows the creation of a Kubernetes cluster, from the Clusters sub-menu select “Create Cluster”:
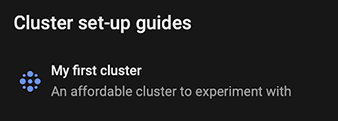
The fastest way to getting a cluster underway is to use GCP’s preset ‘My first cluster’:
Using the defaults, the cluster takes a few minutes to be created:

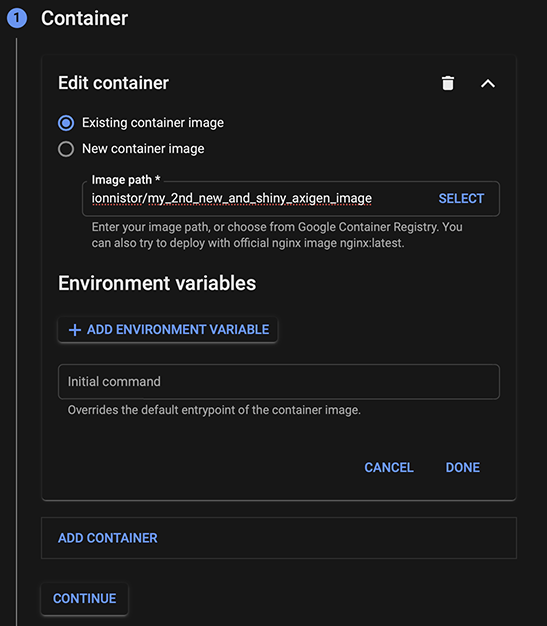
We have the cluster, let’s create our instance. Switch to the ‘Workloads’ sub-menu and choose ‘Deploy’. In the ‘Container’ section, choose ‘Existing container image’ and fill-in “ionnistor/my_2nd_new_and_shiny_axigen_image” for the Image Path. “ionnistor” must be changed to your Docker ID, if you’ve published an Axigen container.
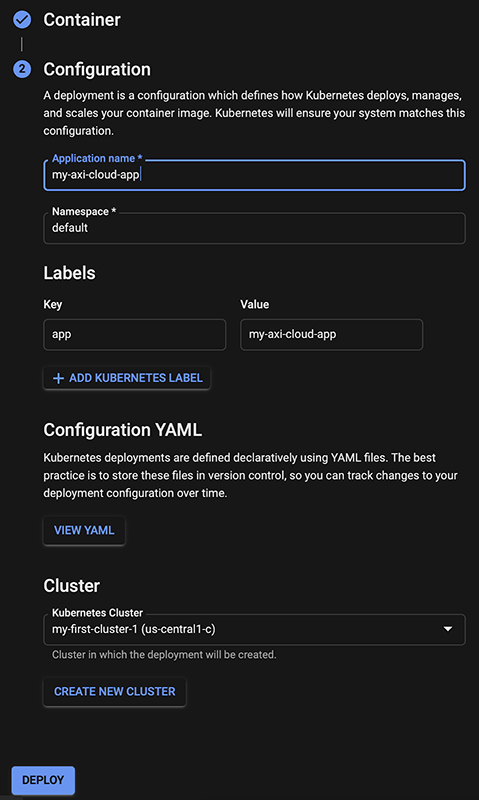
In the ‘Configuration’ section, fill-in a name for the Application (this is the name of the instance to be created). Click ‘Deploy’.
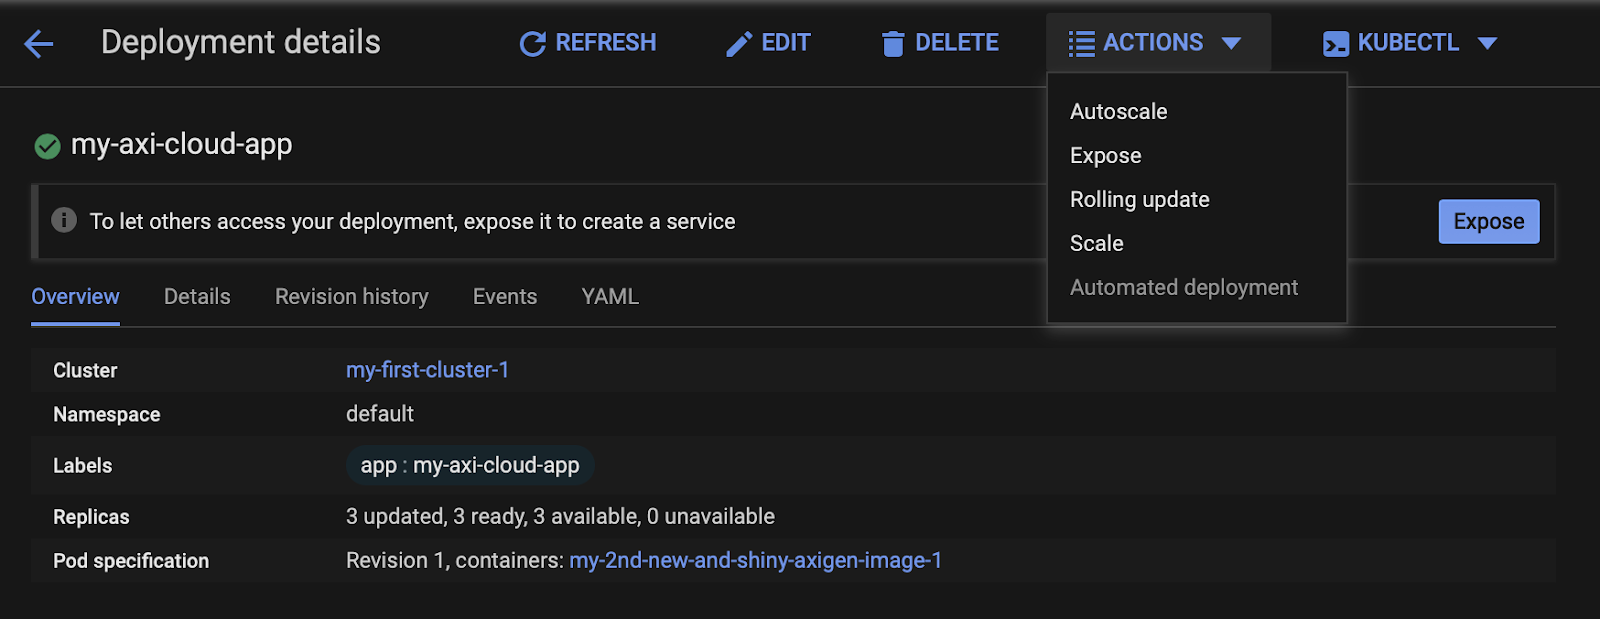
After a few minutes, the application will have been deployed and started on GCP. As we intend to make sure it is actually running, we’ll expose to the internet the WebAdmin HTTPS port.
With the application now created, click on the app name in the ‘Workloads’ sub-menu; the Deployment Details page will open. From the ‘Actions’ drop-down on top, choose ‘Expose’.
Set ‘Port’ and ‘Target port’ to 9443, choose ‘Load Balancer’ as service type and click ‘Expose’.
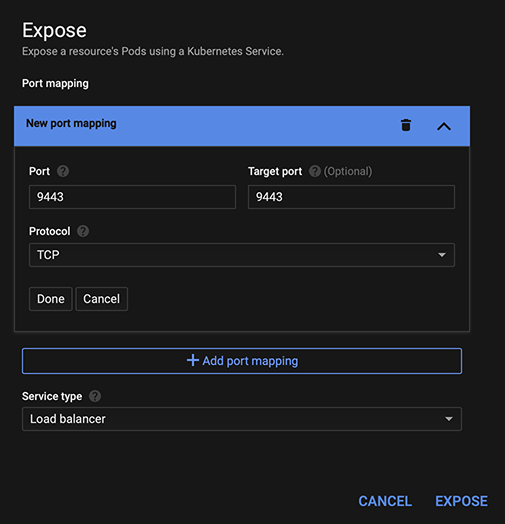
Wait for the service to be created then take a note of the ‘Load Balancer IP’ address, in our case 35.188.224.202.
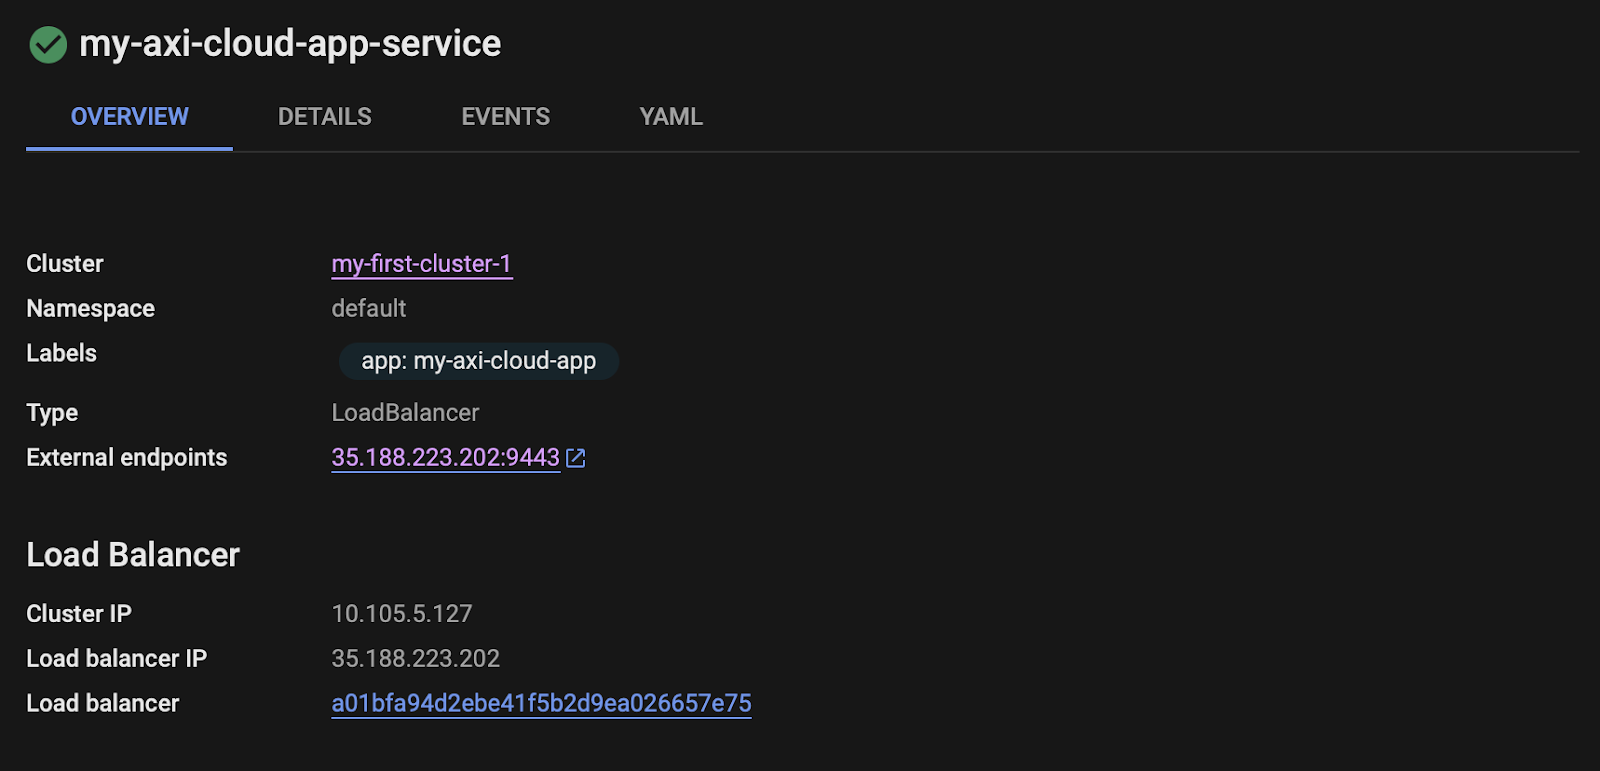
Point your browser to https://<Load Balancer IP>:9443/. The WebAdmin onboarding wizard should be displayed.
Wrapping Up
We’ve reached the end of our journey into the cloud, from the conversion of a RPM to a Docker image, publishing to Docker Hub, creating and clustering in Google Cloud Platform and finally deploying our image.
Like we’ve mentioned before, this resulting instance is part of an experiment, so it’s not yet functional. Among the topics that should be addressed to achieve a functional cloud instance are:
- Network domain:
- Mapping ports and addresses to services for ingress
- Outbound connections for delivering SMTP traffic
- DNS settings
- Storage domain:
- Persisting domain data
- Backup processes
There are other aspects to consider as well, but we’re saving those for a future in-depth article.
Note: Axigen already provides a fully functional, ready for use Docker image in Docker Hub. You can find all the information and try it out for yourself here.
We also offer an Axigen Helm chart for anyone who wants to deploy a clustered Axigen Mail server on Kubernetes platforms.
For help in gathering prerequisites, performing the installation, configuring your settings, and upgrading or uninstalling your deployment, please visit our dedicated documentation page for the Axigen AxiHelm.
Both AxiHelm and the Axigen Docker Image are intended for actual production use and are adjusted as such.