The WebMail Branding feature addresses businesses and service providers offering business-grade email based on Axigen. It allows end-customers to personalize their email interface design using their logo and brand name in the WebMail, instead of the default (Axigen) ones. This applies to all three Axigen WebMail applications — Ajax, Standard, and Mobile.
In this article, we’ll go through the configuration of WebMail branding elements at a server level, as well as for each customer (domain).
Branding elements
Here are the elements you can change to match your own brand or your customers’ brands:
Cross app branding elements
The elements below are common for all WebMail applications (Ajax, Standard, and Mobile).
Brand name — your company or service commercial name; this will be visible in the title tag and login page.

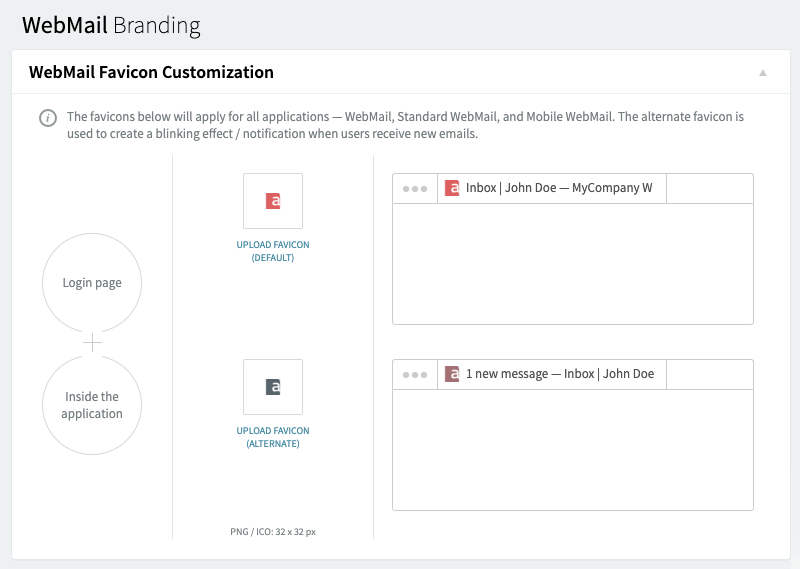
Favicon — the small icon shown by the browsers in the tab, usually followed by the application title; Axigen uses two different Favicons to notify the user whether or not there are new emails.
Application-level branding elements
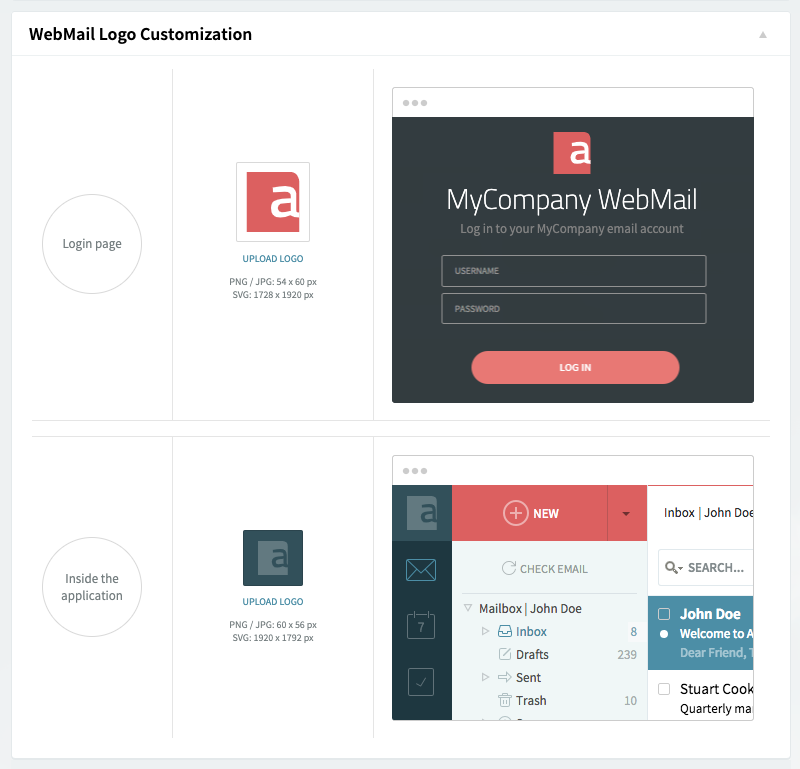
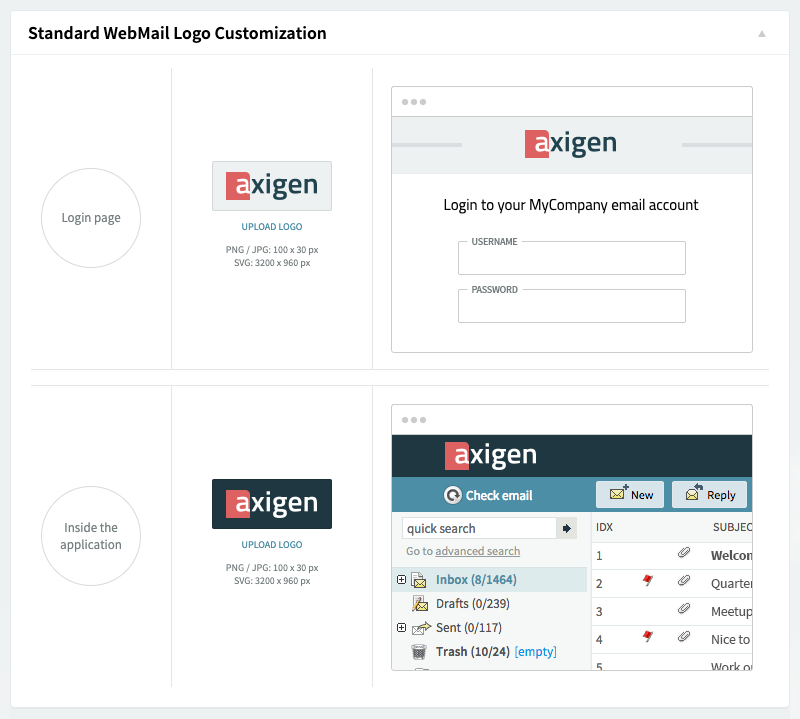
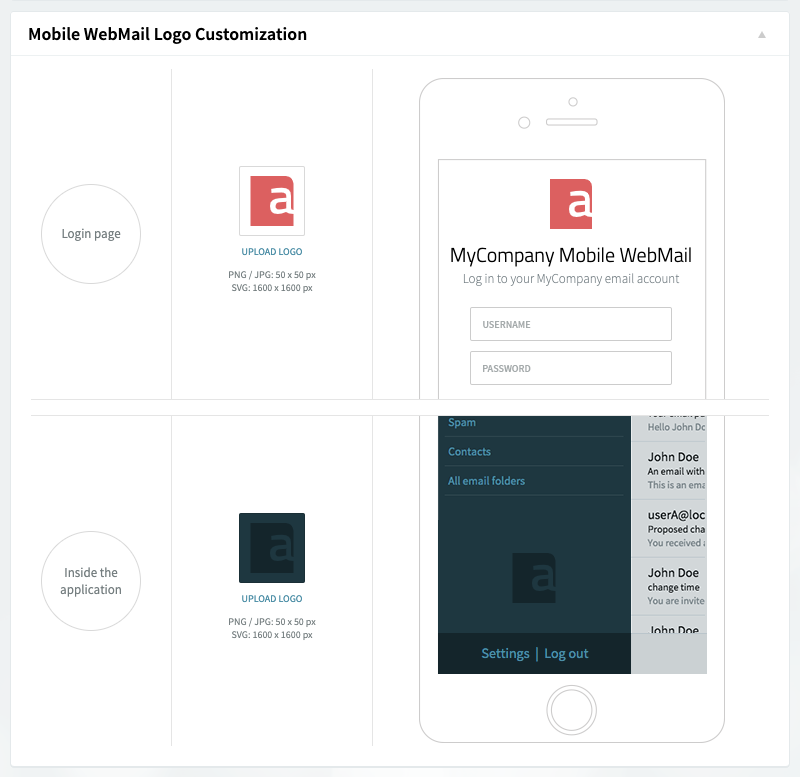
Apart from the Brand name and Favicon, you will be able to change the logos — there’s a logo shown in the public context (e.g., login page), and another one used in the private context (i.e., after logging in). Axigen includes three WebMail applications (Ajax, Standard, and Mobile), and each of them uses a different set of logos — various sizes and different placements.
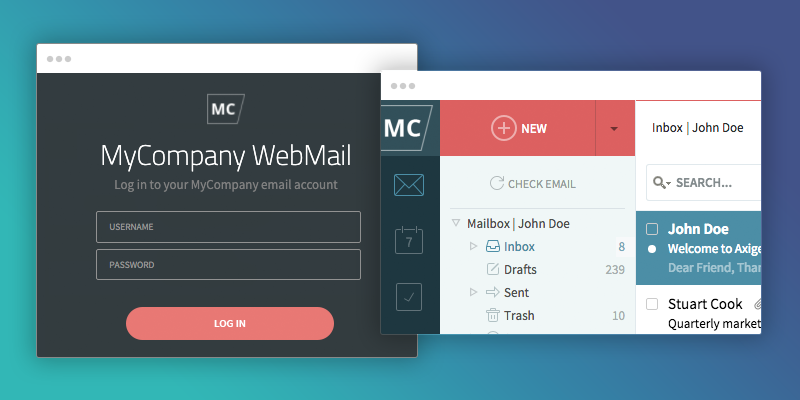
Ajax WebMail
Standard WebMail
Mobile WebMail
Global Branding for all your domains
With Global branding, you can apply the same branding elements for all your domains that don’t have specific branding elements configured — this also includes newly created domains.
Step 1: Log into WebAdmin → Choose Global Settings from the left menu → Scroll down to the Branding section and click on Configure Branding
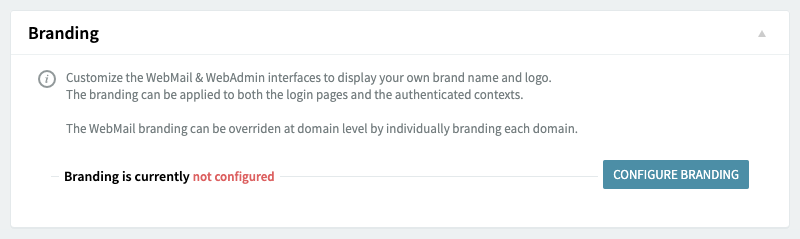
Step 2: Customize the branding elements (as detailed above).
Customer (domain) level branding
With Customer level branding, you can individually brand each customer domain — for service providers, this option could be offered as part of a premium plan.
Step 1: Log into WebAdmin → Choose Domains & Accounts → Manage domains from the left menu → Click to edit the domain you want to brand → Scroll down to the Branding section and click on Configure Branding
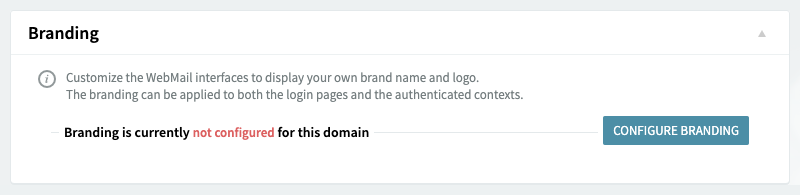
Step 2: Choose the Brand name and the Virtual host (e.g., webmail.yourdomain.com) — the virtual host is used to display the configured branding elements in the public context, based on the hostname used to access the WebMail.
Step 3: Customize the other branding elements (as detailed above).
Additional reading:
- Branding the WebMail for a Domain
- Advanced WebMail Skinning Using SCSS
- WebMail Listeners, Virtual Hosts & Control Rules
- Managing SSL Certificates