Updated: February 19, 2025
Prerequisites:
The Axigen Migration module requires an IMAP connection (SSL or non-SSL) to the remote server.
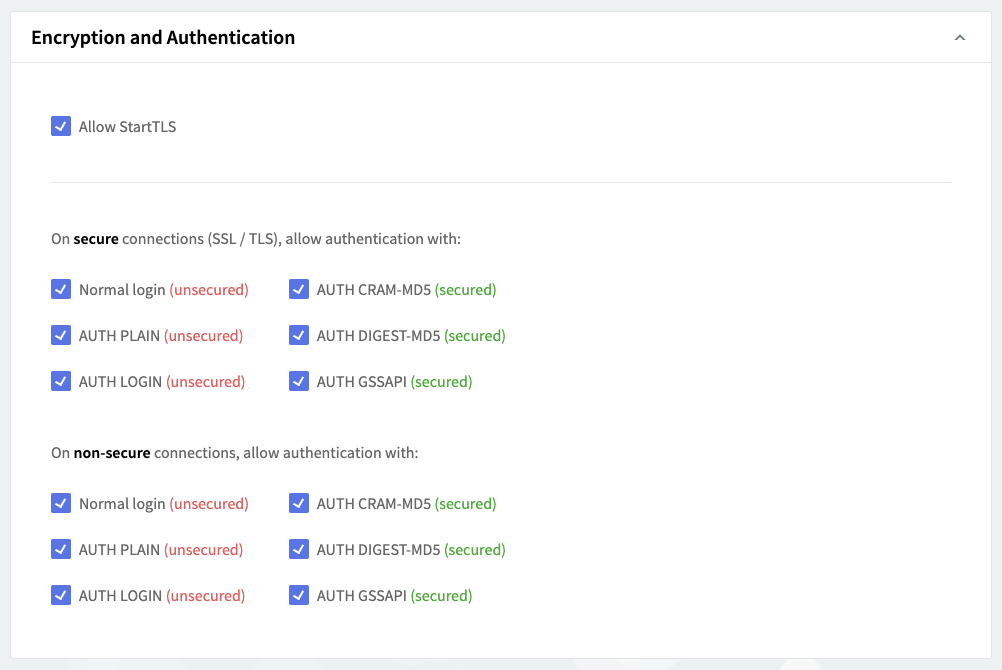
Both Axigen and the legacy server must allow plain login authentication for the IMAP service.
To allow plain login for the Axigen IMAP service, go to WebAdmin → Services → IMAP, scroll down to "Encryption and Authentication" and apply the configurations shown below:

Auto Migration from Axigen WebAdmin
Auto migration can be configured from the Axigen WebAdmin. To do so, simply go to the Auto migration section of the WebAdmin and enable automatic migration for the domain your desired domain.
If the domain is not listed here, or if you require guided assistance through the process, please read our separate page on how to configure automatic migration in the Axigen WebAdmin.
Auto Migration from Axigen CLI
Auto migration can be configured from the CLI interface using the MIGRATIONDATA context at domain level.
To connect to Axigen command line interface (CLI), you should use the telnet command followed by your CLI Listener IP and port (the default Axigen settings uses IP 127.0.0.1 and port 7000).
Assuming that the domain that will be migrated is already created in Axigen and the configuration will be similar with the one presented in the section above, we will use the following commands:
Check your auto migration configuration using:
Enable the option 'Enable automatic migration for this domain' using the below CLI commands:
-
fort the domain default account class
-
for a specific account class
Test the Migration Configuration
Log into WebMail using an account to trigger the migration process and check the Axigen log file for the migration status: