Axigen users who want to use Outlook as their email client can do so by enabling auto-discovery in Outlook via IMAP. Moreover, to enable calendar synchronization, we recommend using an add-in such as CalDavSynchronizer to enable recurring automatic sync after a set interval (or on demand).
Note: CalDavSynchronizer is an open-source third-party plugin. We do not endorse it nor have any say in its development. Axigen supports CalDAV, and CalDavSynchronizer is an Outlook add-in that enables automatic sync through CalDAV.
The following guide will explain how to install and configure CalDavSynchronizer to allow the syncing of calendars and contacts with the Axigen mail server.
Solution
How to Install and Configure CalDavSynchronizer in Outlook
1. Download CalDavSynchronizer
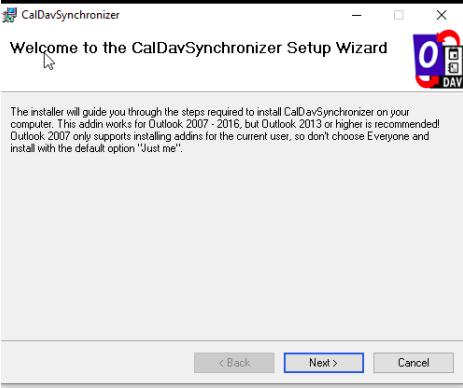
First, you need to download and install the CalDavSyncrhonizer from their downloads page. The following guide uses version 4.3.0, released on July 5, 2022.
2. Install CalDavSynchronizer
Once the download is complete, extract the files in a dedicated folder, and run through the setup.exe installer application.
Click on Next to continue.
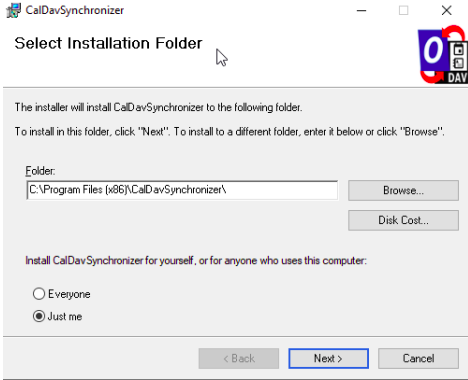
Select your preferred installation folder, then click Next.
Once the installation is done, you can click the Close button.
3. Open Outlook and Click “CalDav Synchronizer”
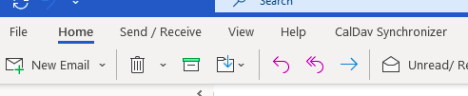
After completing the CalDavSynchronizer install, you will see a new CalDav Synchronizer tab in your Outlook application.
You need to click that tab to proceed with the configuration.
4. Add a New Synchronization Profile
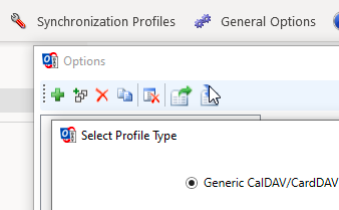
To synchronize your calendar in Outlook, you need to click on Synchronization Profiles and add a new profile.

Select the Generic CalDAV/CardDAV profile type and click OK.
5. Add the Axigen Server Details
Find your Outlook Folder and go to your Local Calendar Folder.
Select the folder and add your Axigen server details under Server Settings:
- Outlook Folder → Local Calendar Folder
- DAV URL: https://webmail.axigen.url/Calendar/Calendar/
- Username: Your Axigen email address.
- Password: Your Axigen email password.
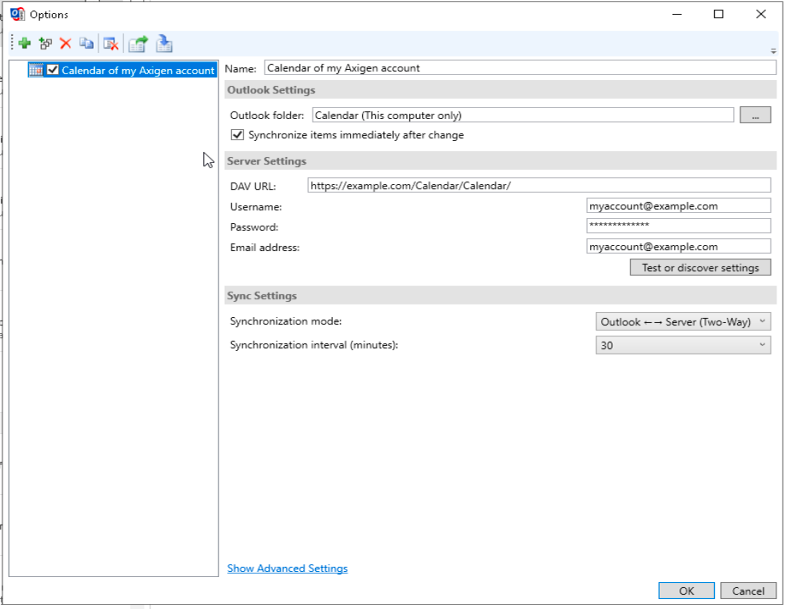
Note: Under Sync Settings, you may select your preferred synchronization interval in minutes. The default is set to 30 minutes.
6. Advanced Settings and Test
Once added, you must check a minor configuration option.
At the bottom of the setup window for your Local Calendar Folder is a link to Show Advanced Settings. Click on it, and in the next window, check “Use WebDAV collection sync”
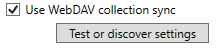
After checking the box, test the settings. If the connection test is successful, click OK and close all CalDavSynchronizer windows.
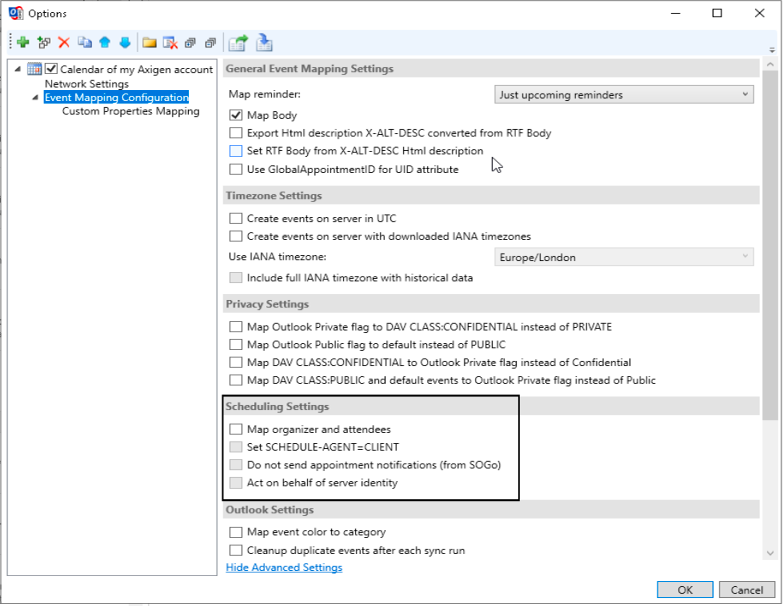
Notice: How to Avoid Duplicate Invitations during Setup
By performing a CalDAV sync with this addon, you may inadvertently send duplicate calendar invitations. To prevent this, follow these steps:
- Click on CalDav Synchronizer
- Open Synchronization Profiles
- Show Advanced Settings
- Select Event Mapping Configuration
- Make sure none of the scheduling settings are selected:
Once you click OK, your Axigen calendar is correctly set up in your Outlook email client. Changes between Outlook and your Axigen Webmail will automatically sync every 30 minutes. You may change this in your Local Calendar Folder under Sync Settings.
You may also manually synchronize the changes by clicking the Synchronize now button.
After performing the first synchronization, please ensure all your existing appointments are synced correctly.
How to Synchronize Contacts
After syncing your calendar appointments, the CalDavSynchronizer also allows you to synchronize your Axigen Contacts list with Outlook.
1. Add a New Synchronization Profile
Go to your Synchronization Profiles under the CalDav Synchronizer tab once again. Add a new profile and select the same Generic CalDAV/CardDAV profile type.
2. Add the Axigen Server Details
In this new profile, under the Outlook Folder, select your Calendar Folder and add the Axigen Server details under Server Settings:
- Outlook Folder → Local Contacts Folder
- DAV URL: https://webmail.axigen.url/Contacts/Contacts/
- Username: Your Axigen email address.
- Password: Your Axigen email password.
3. Advanced Settings and Test
Next, perform the same advanced setup as with the Calendar sync.
Click on Show Advanced Settings and check “Use WebDAV collection sync”
After this is done, test the settings. If the connection test is successful, click OK and close all CalDavSynchronizer windows.
Note: For each separate Personal contacts folder, please use the appropriate link (for example — https://<webmail.url>/Contacts/FolderName/).
Note 2: You cannot link public resources such as Public Contacts, Domain Contacts, or other similar “contacts” folders.