- Performing Axigen WebMail Single Sign-on
- Deep Linking Emails in Third Party Apps to Open in WebMail
- Integrating Zoom into the WebMail Calendar
- Integrating Microsoft Teams into the WebMail Calendar
- Configuring BIMI for Your Axigen WebMail: A Step-by-Step Guide
- Configuring SMS Connectors for 2-Step Verification and Account Recovery
This integration is available starting with Axigen X6 (10.6.0).
The Zoom integration allows Axigen users to add a Zoom meeting invitation linked to their personal Zoom account when creating a calendar event in WebMail. Any changes made to the event in WebMail are synchronized with the Zoom application, updating in real-time.
Even if discarding the event from WebMail, the event will automatically be removed from the user’s Zoom calendar.
Concepts
Zoom provides Axigen with an access token, which serves as a unique credential for authorizing Axigen to interact with Zoom on the users' behalf.
This token allows Axigen to initiate and manage meeting requests without directly accessing or storing any of your Zoom account details.
Essentially, Axigen operates under the permissions granted by the token, which is specific to your account. This means Axigen does not require knowledge of your Zoom credentials or account information, but instead uses the access token to perform tasks like creating or managing meetings as authorized by you.
Essentially, the Zoom application acts as a frontend. Through OAuth, it allows Axigen, as a delegate, to perform a small set of operations on behalf of a user, based on the consent the user has given.
The synchronization direction is Axigen → Zoom, where Zoom is reading the Axigen user's Calendar events.
Installation and Configuration
There are 3 main phases to configure this integration:
-
Zoom Preparation: Registering an Application in the Zoom Marketplace
-
Axigen Preparation: Creating and Configuring the Zoom Connector in Axigen
-
End-user Settings
Steps #1 and #2 can be performed in any sequence.
1. Zoom Preparation: Registering an Application in the Zoom Marketplace
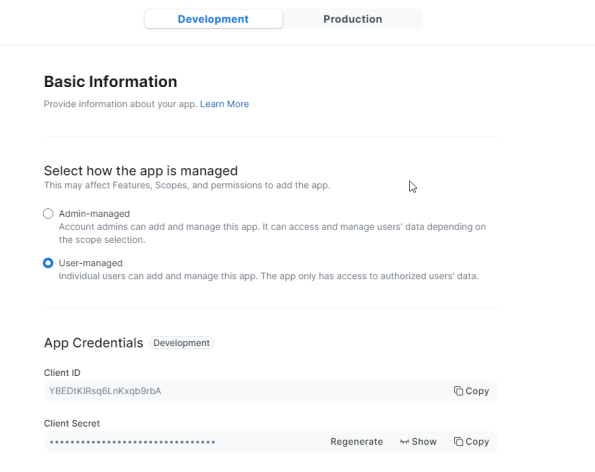
For this example, the Zoom application that will be created in the Zoom Marketplace is only accessible by the application owner.
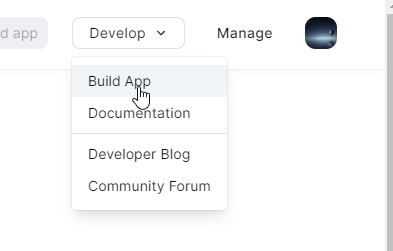
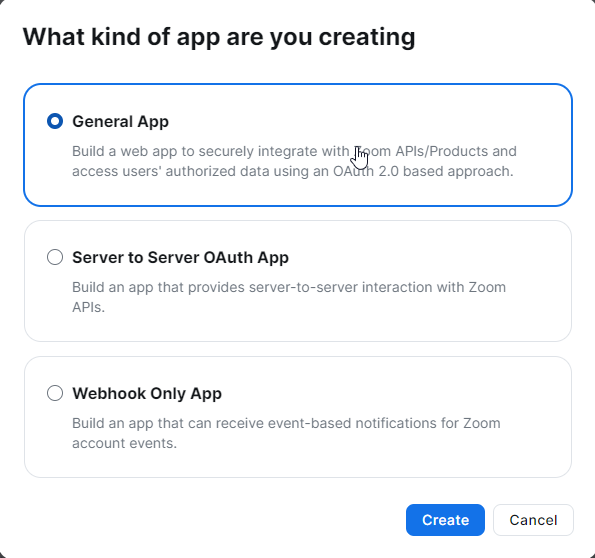
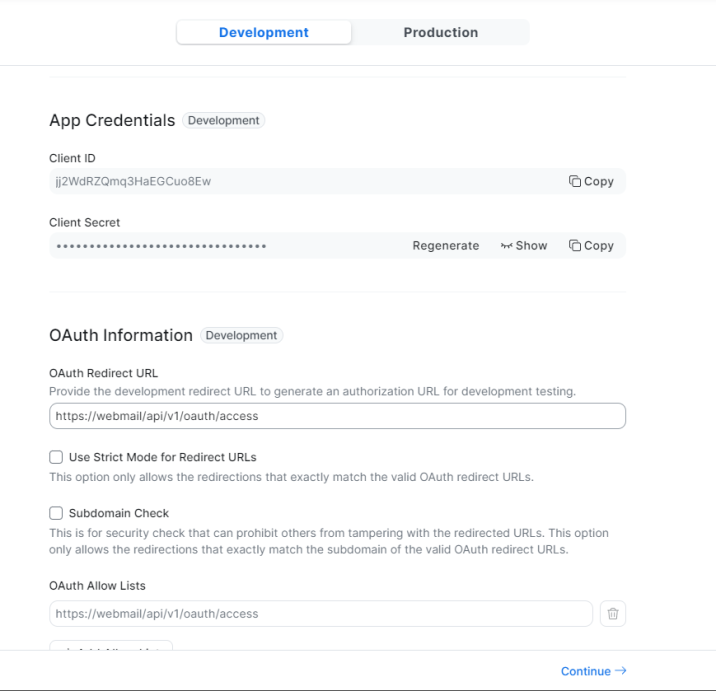
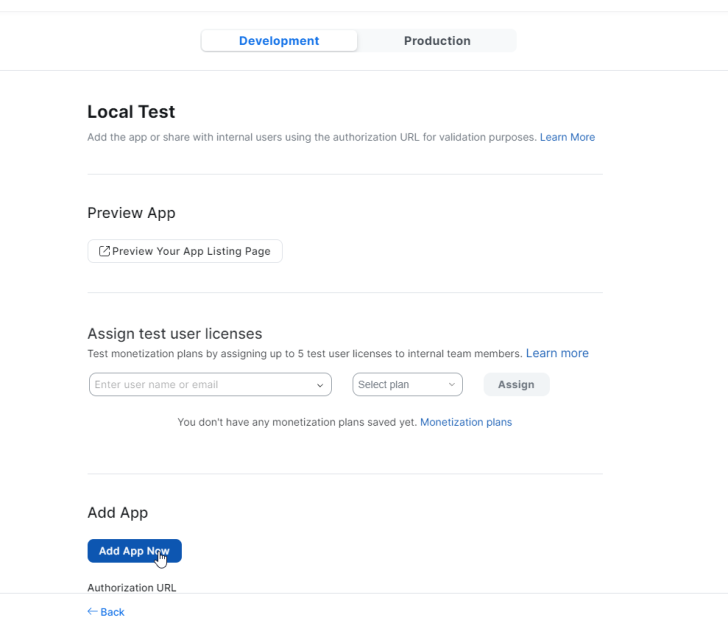
1.1. Log into the Zoom Marketplace and define a new application
The page URL page must be using a secure port, like 443 in the above example
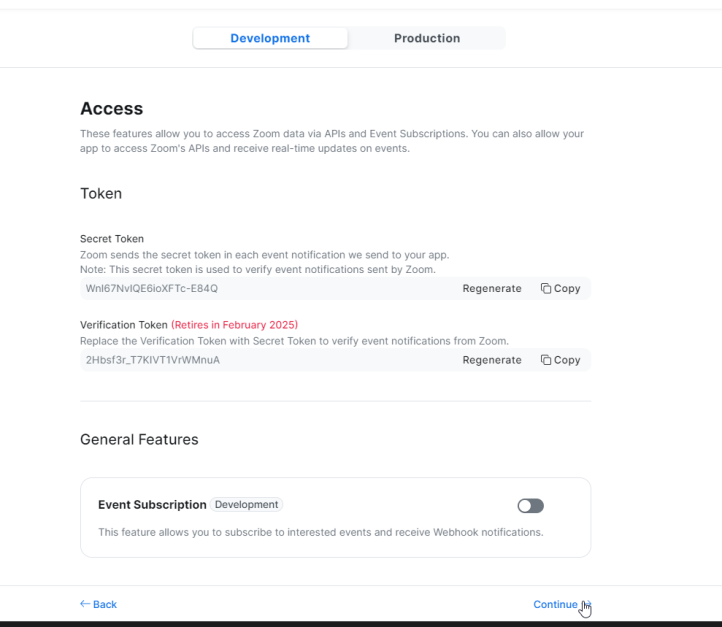
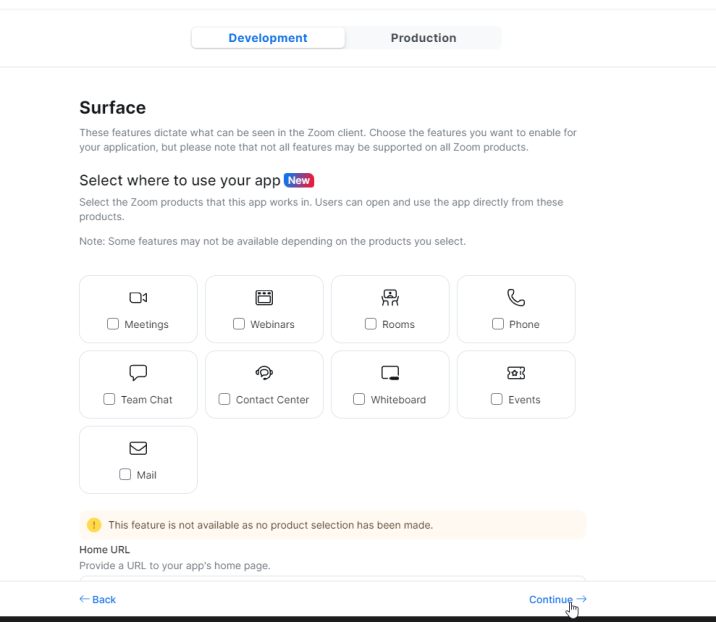
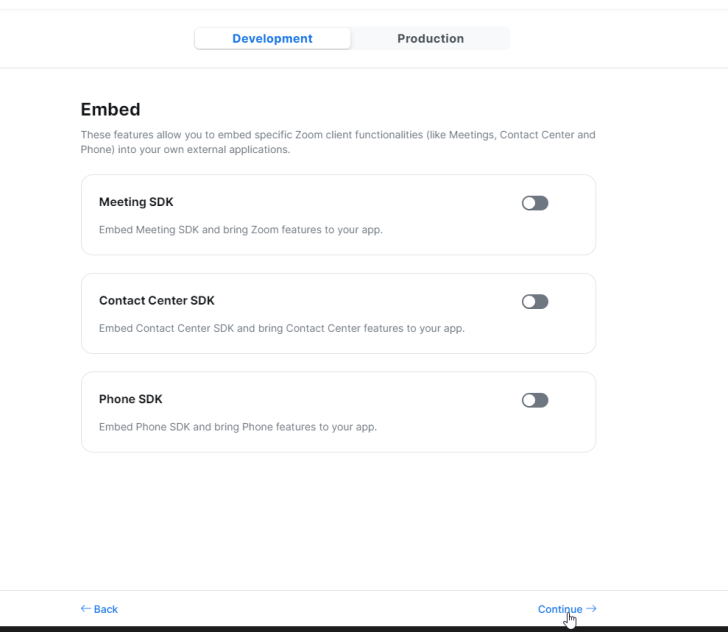
1.2. Do not select any features — for this particular case, we are not interested in any features. The permissions (scopes) will be added afterwards.
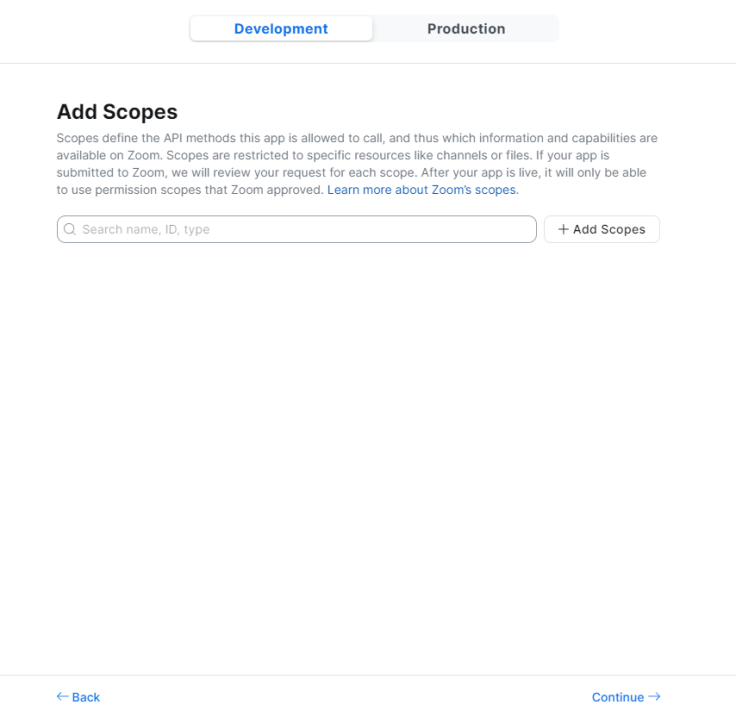
1.3. Scopes definitions
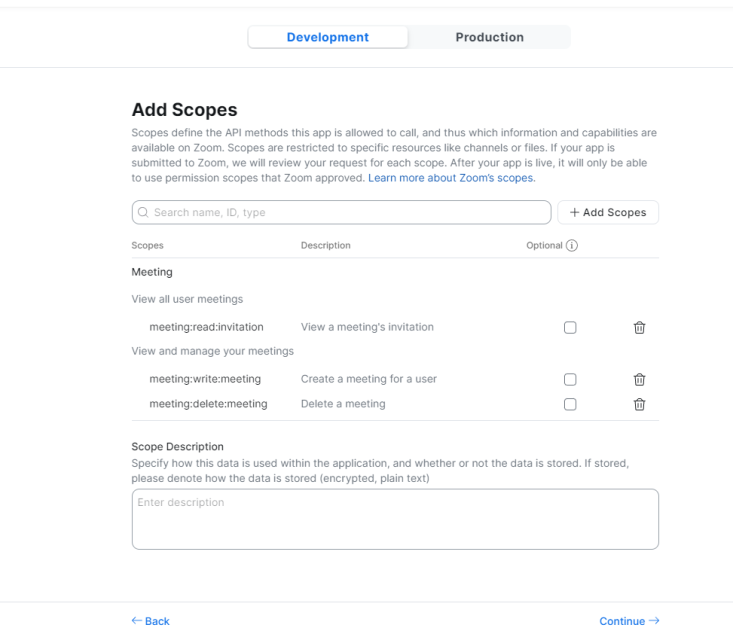
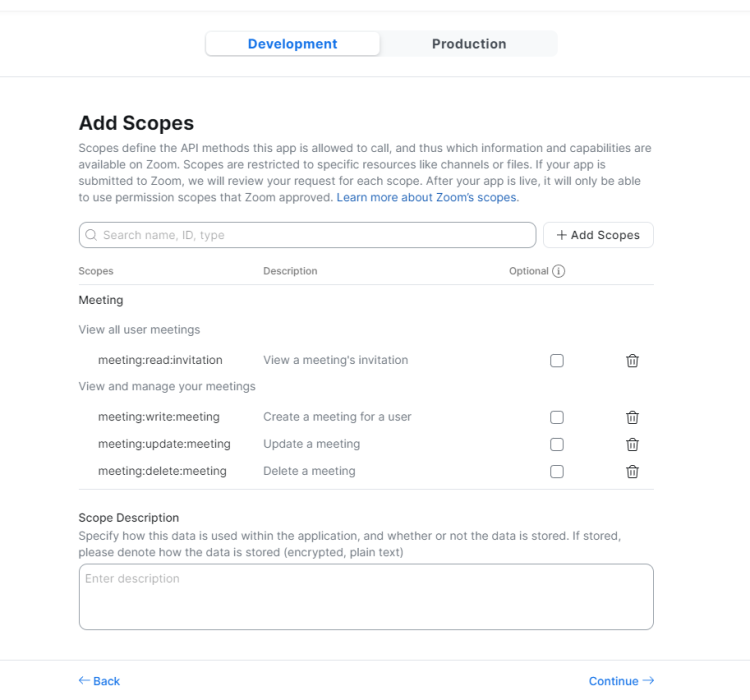
In order for the Zoom to see the Axigen events , some permissions (scopes) must be defined into the Zoom application. The minimum scopes for the integration to work are:
-
meeting:read:invitation- View a meeting's invitation -
meeting:write:meeting- Create a meeting for a user
Example 1
In this example, when creating an event from WebMail Calendar which includes a Zoom invite, Zoom will read the user’s calendar and populate its own Calendar with the event created in Axigen. However, with the above permissions, if there are other changes made on the event in WebMail after the event was created, the Zoom will not update them.
For example if you remove the event just created, the invite will still be visible in Zoom’s Calendar.
For Zoom to see the “delete” update made on WebMail, the “delete” permission must be added to the Zoom application:
-
meeting:delete:meeting- Delete a meeting
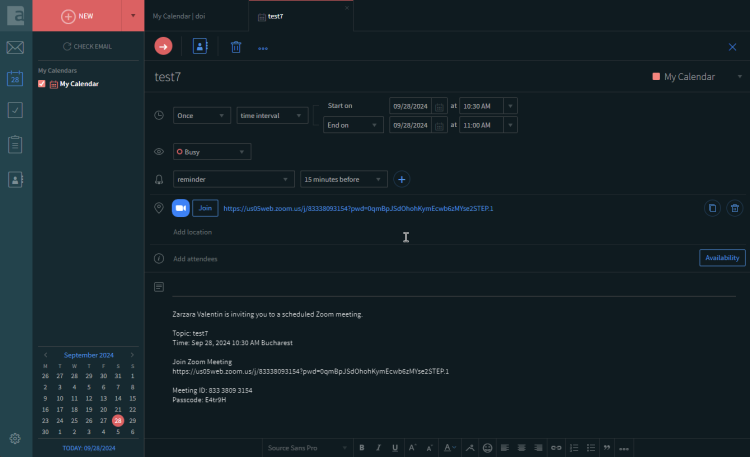
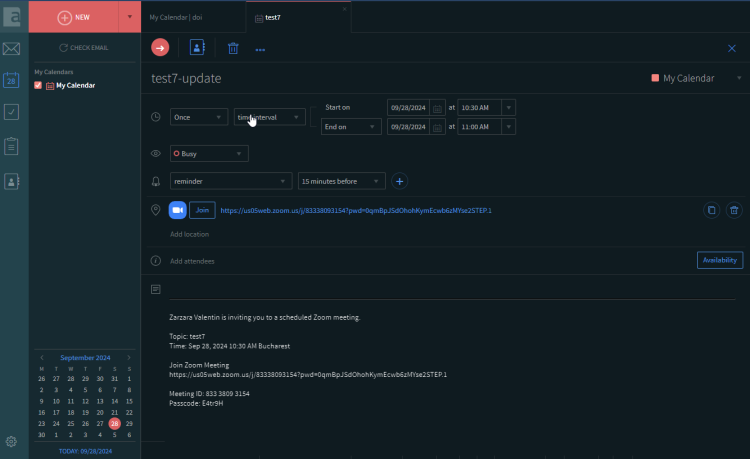
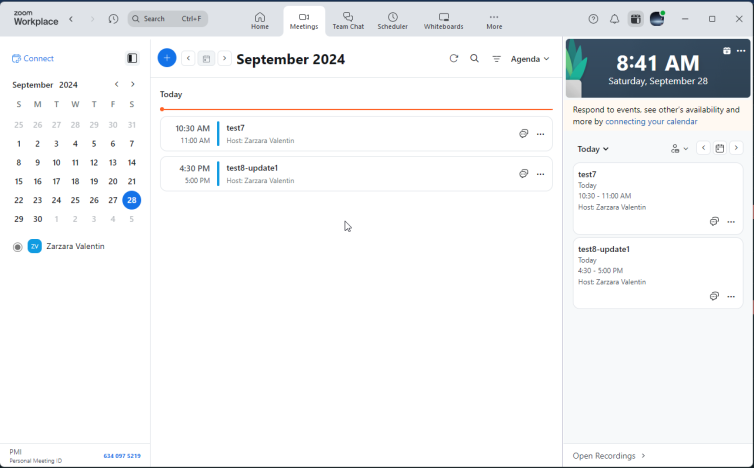
The end user creates an event in WebMail.
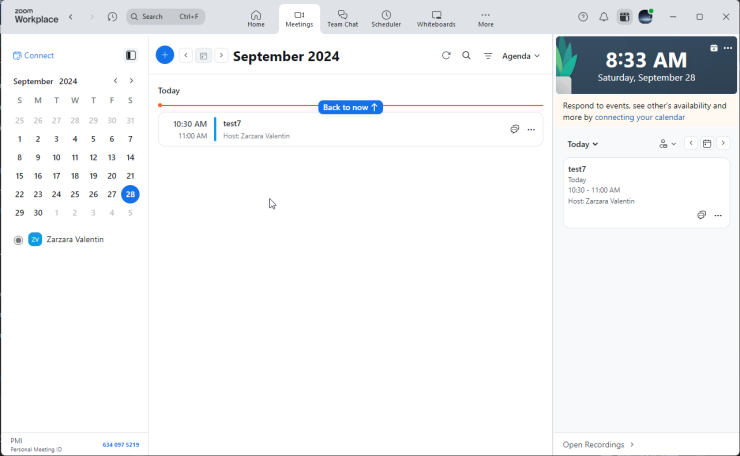
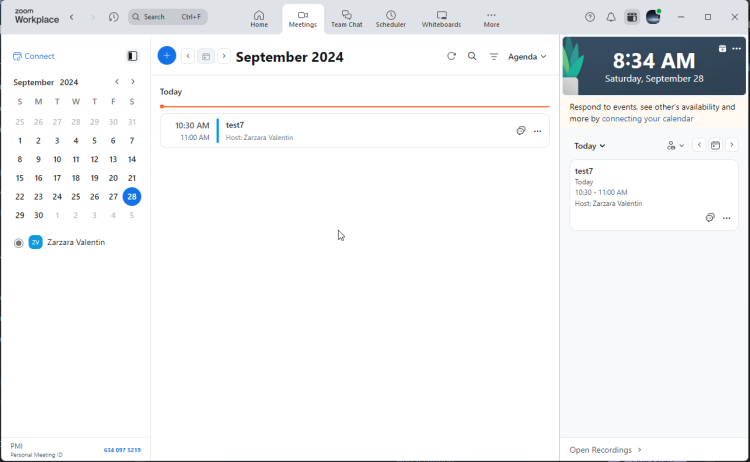
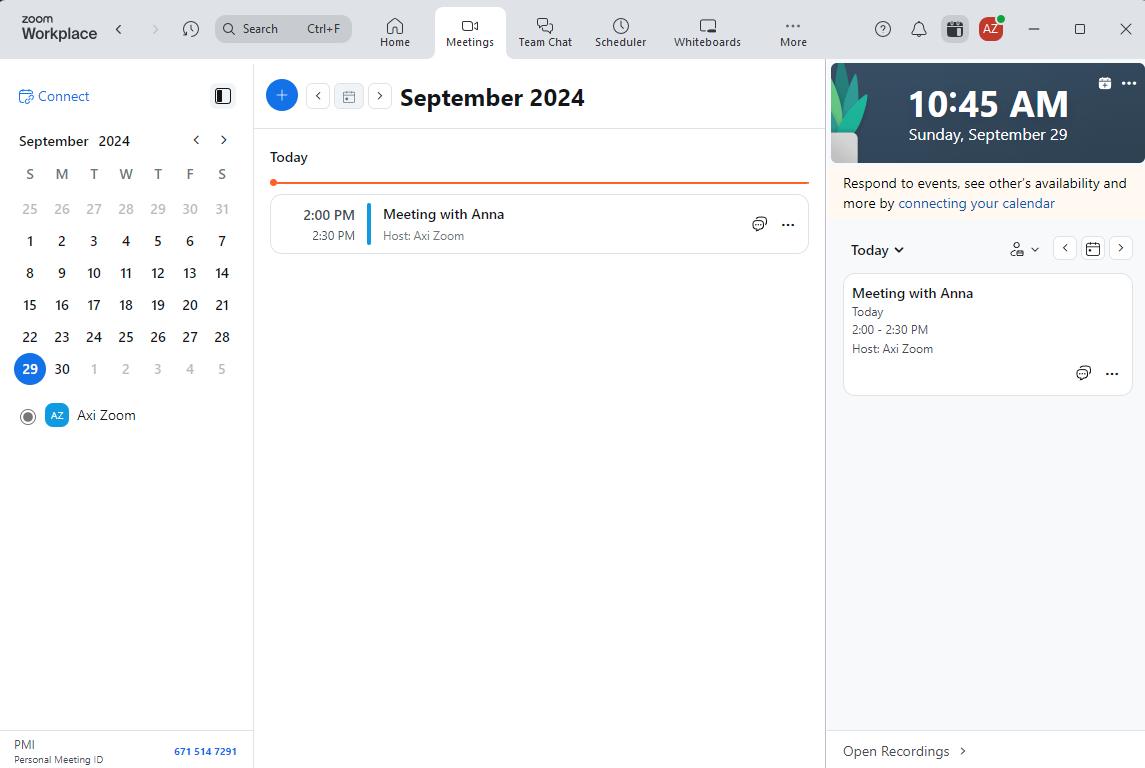
The event was instantly created in Zoom application before even saving it in Axigen.
Example 2
Another update example made on the event in WebMail is to update the event, like changing the subject of the event:
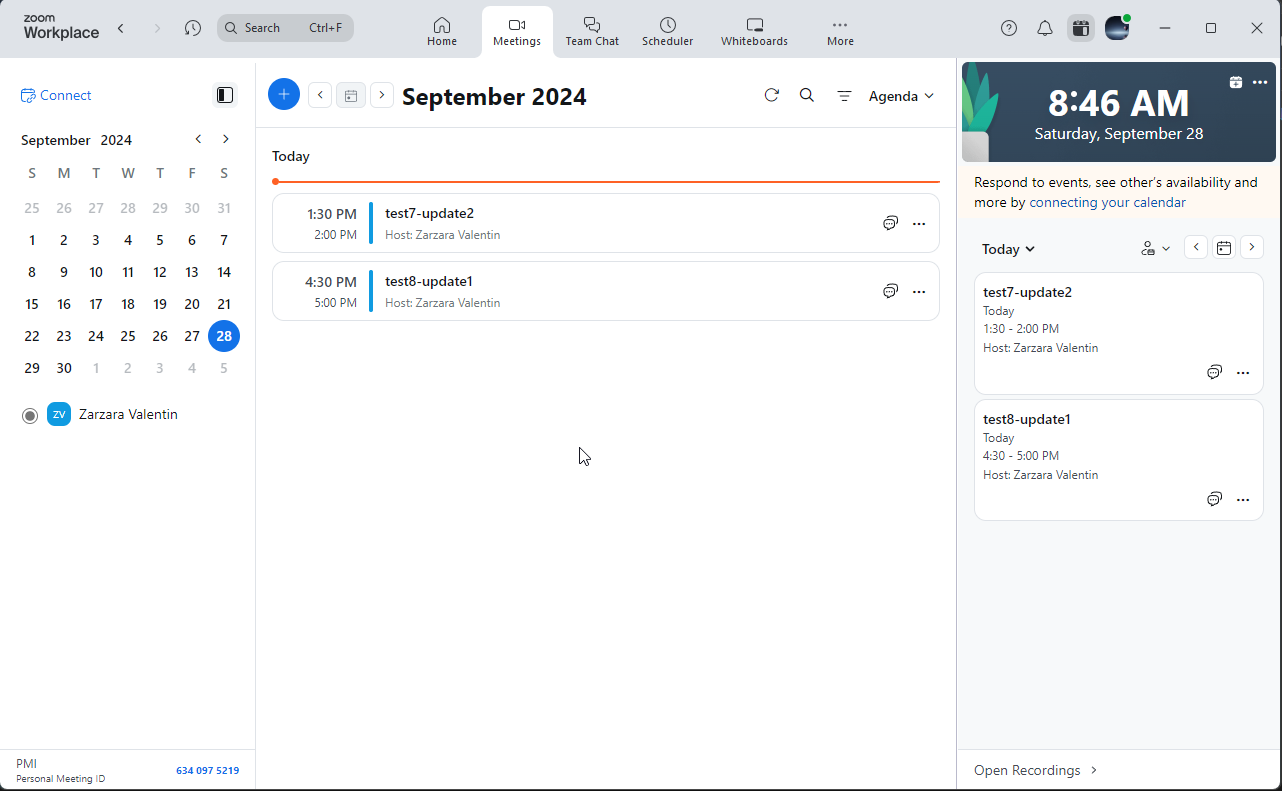
The update hasn’t been read by Zoom, because the update scope is not defined in the Zoom application.
Next, let’s add the update scope:
-
meeting:update:meeting- Update a meeting
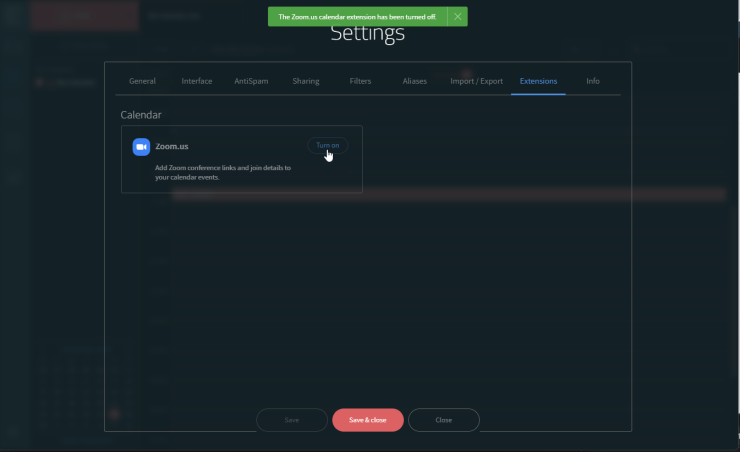
Very important: For the changes to take effect, the Zoom Connector must be re-enabled (turn off and then turn on) so the new scopes to be passed to Axigen.
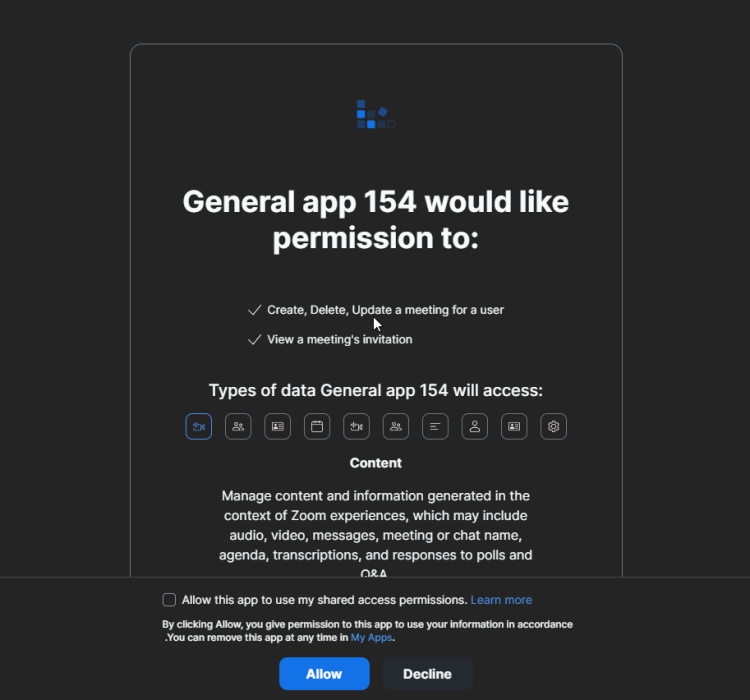
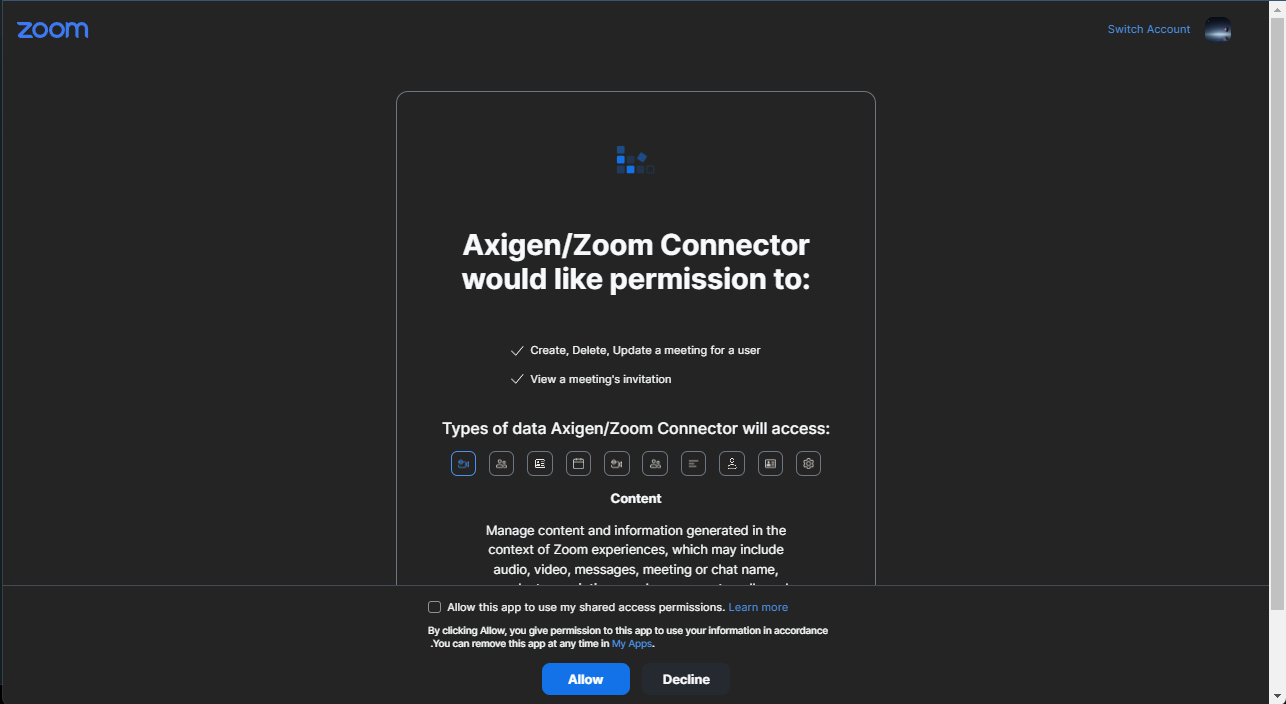
When you turn on the connector, a new page will be opened asking to allow the new permissions:
With this permission set, a limitation exists: updates will not be applied to already existing meetings by Zoom; they will only affect new events created moving forward.
But, if you update the already existing events again (edit the event in WebMail and save it), the update will be seen by Zoom.
2. Axigen Preparation: Creating the Zoom connector
Via CLI
On Axigen 10.6.0, the configuration for the Zoom connector is already defined.
The parameters for authzuri, tokenuri and endpointsBaseUrl are always the same:
-
set authzuri https://zoom.us/oauth/authorize -
set tokenuri https://zoom.us/oauth/toke -
set endpointsBaseUrl https://api.zoom.us
The clientId and the clientSecret are unique values and created at the previous step:
-
set clientId <zoomClientID> -
set clientSecret <YourActualClientSecretReceivedFromZoom>
Via WebAdmin
Since the Zoom connector is already defined, the only parameters left, are the clientId and the clientSecret.
Navigate to the WebAdmin interface → Services - > WebMail → Extensions tab
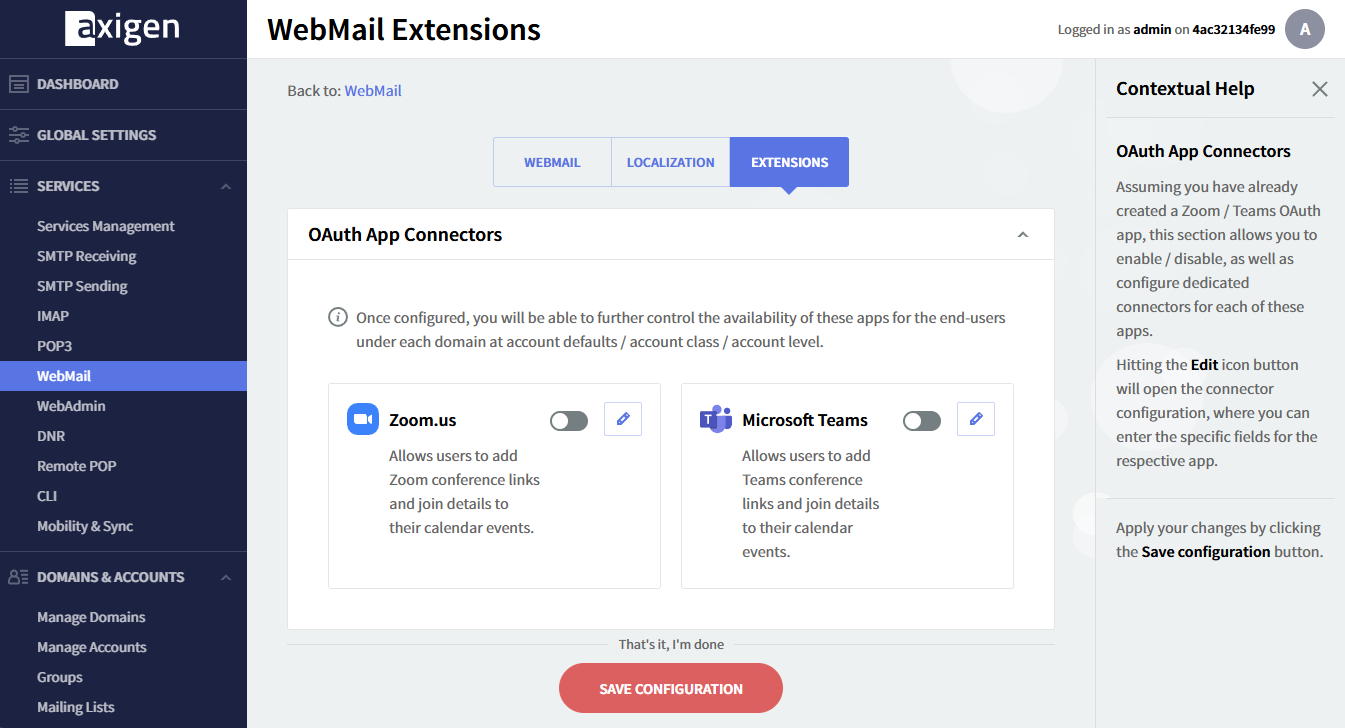
At this point, the Zoom connector is not enabled. Edit the connector, type in the clientId and the clientSecret and save the connector.

Enable the connector and save the configuration.
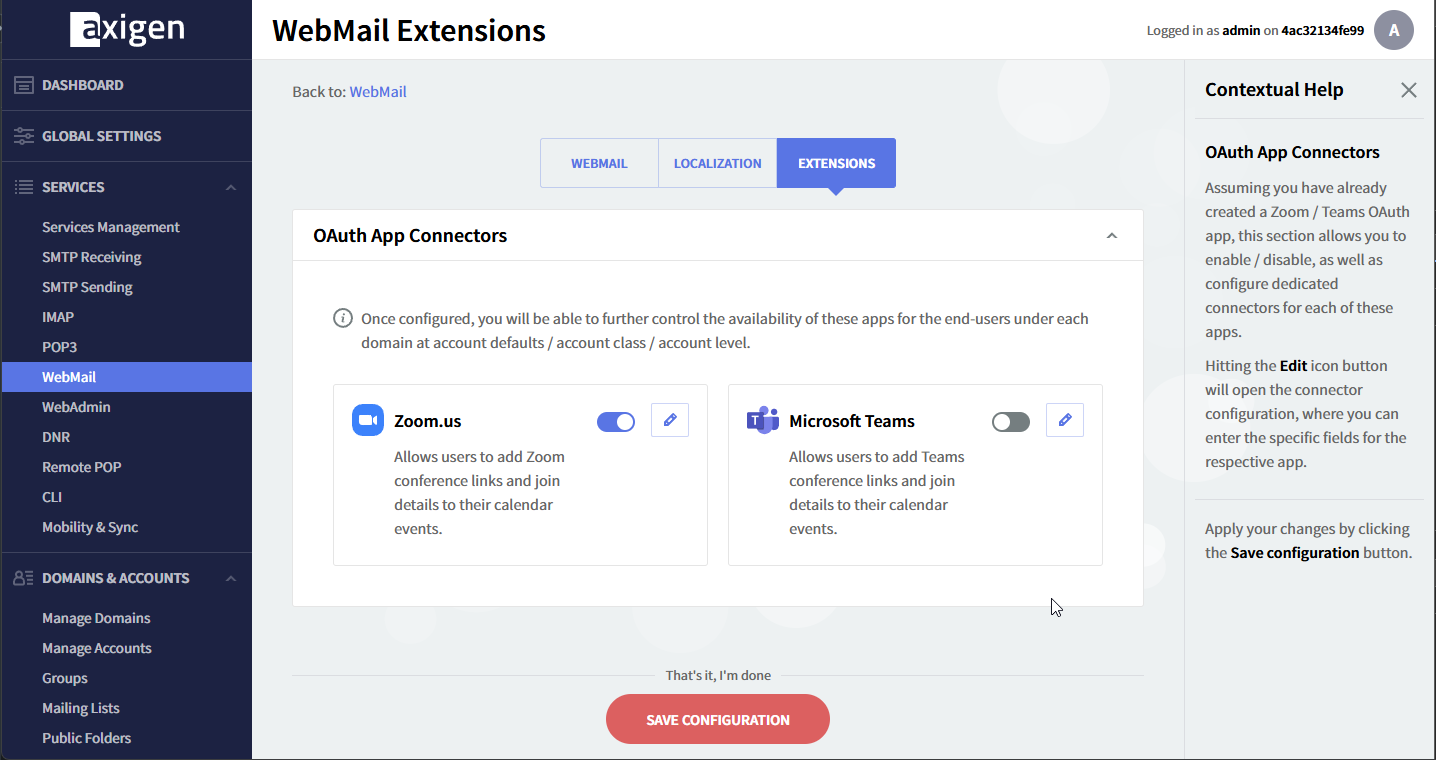
Allowing the Zoom Connector to Be Used
The Zoom connector is defined at server level, however, this functionality must be also enabled. Depending of the preferences, this can be enabled at domain level, account level or account class.
In this example, I will enable it at domain level.
Navigate to the WebAdmin interface → Domains & Accounts → Manage domains → select the domain → Account defaults → Quotas and Restrictions → scroll down to External Apps section. Enable the “Zoom.us” application and save the configuration

Now the users in domain “test.tld” are able to use the connector.
3. End-user Settings
3.1. Log into the WebMail interface
3.2. Navigate to Settings

3.3. Go to Extensions tab

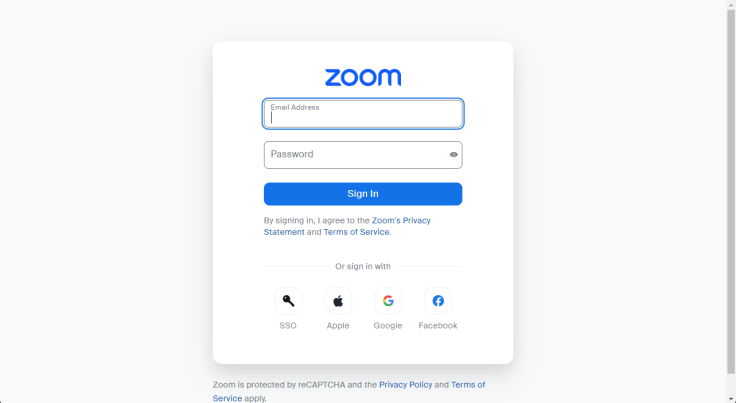
3.4. Turn on Zoom.us — a Zoom login page will open
In case the Zoom login page does not appear, it means you are already logged in.
3.5. Login using your Zoom Account
3.6. A new window will pop-up, where the Zoom application is asking for permissions to be granted to access the user’s calendar.

Use Case Examples
Event Creation
-
Create a calendar event from the WebMail interface
-
Create the Zoom invite by clicking Add Zoom

-
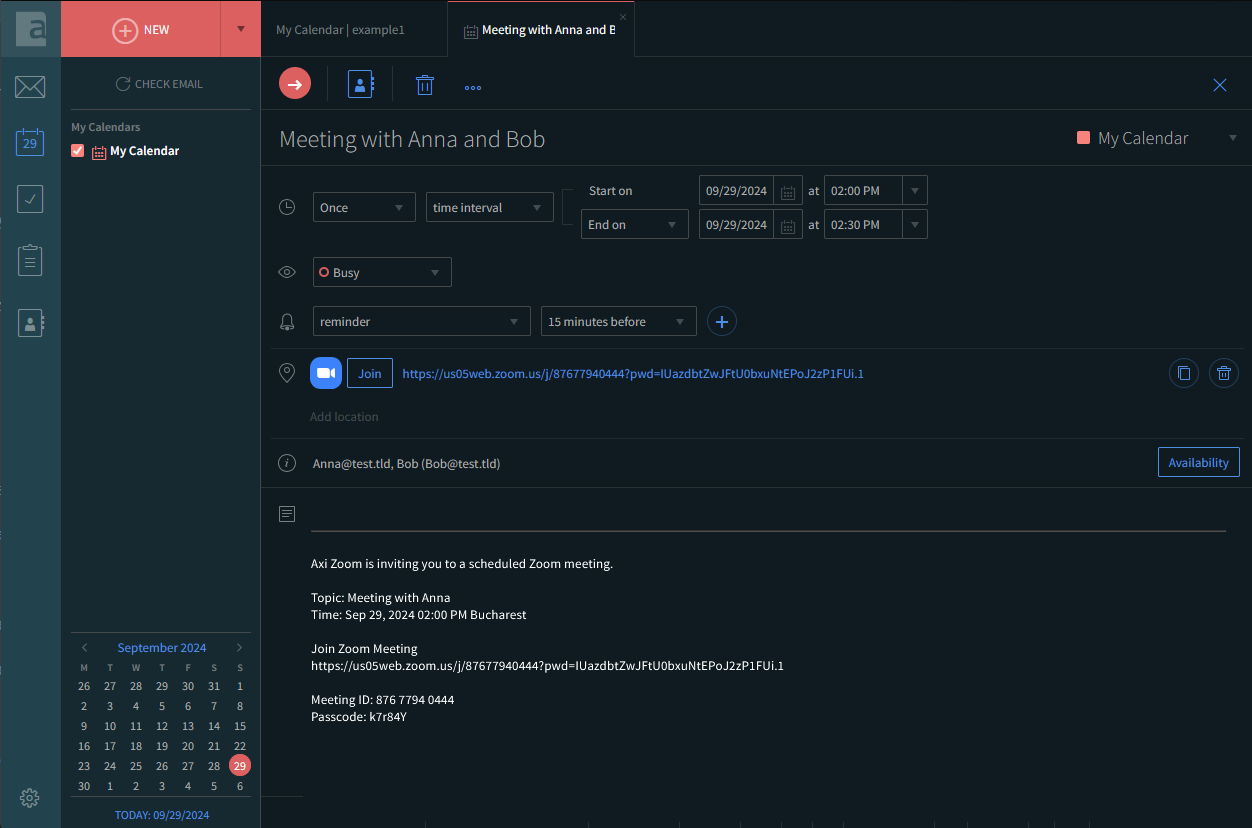
The invite has been created

-
The event was also created in Zoom, before even saving the event
-
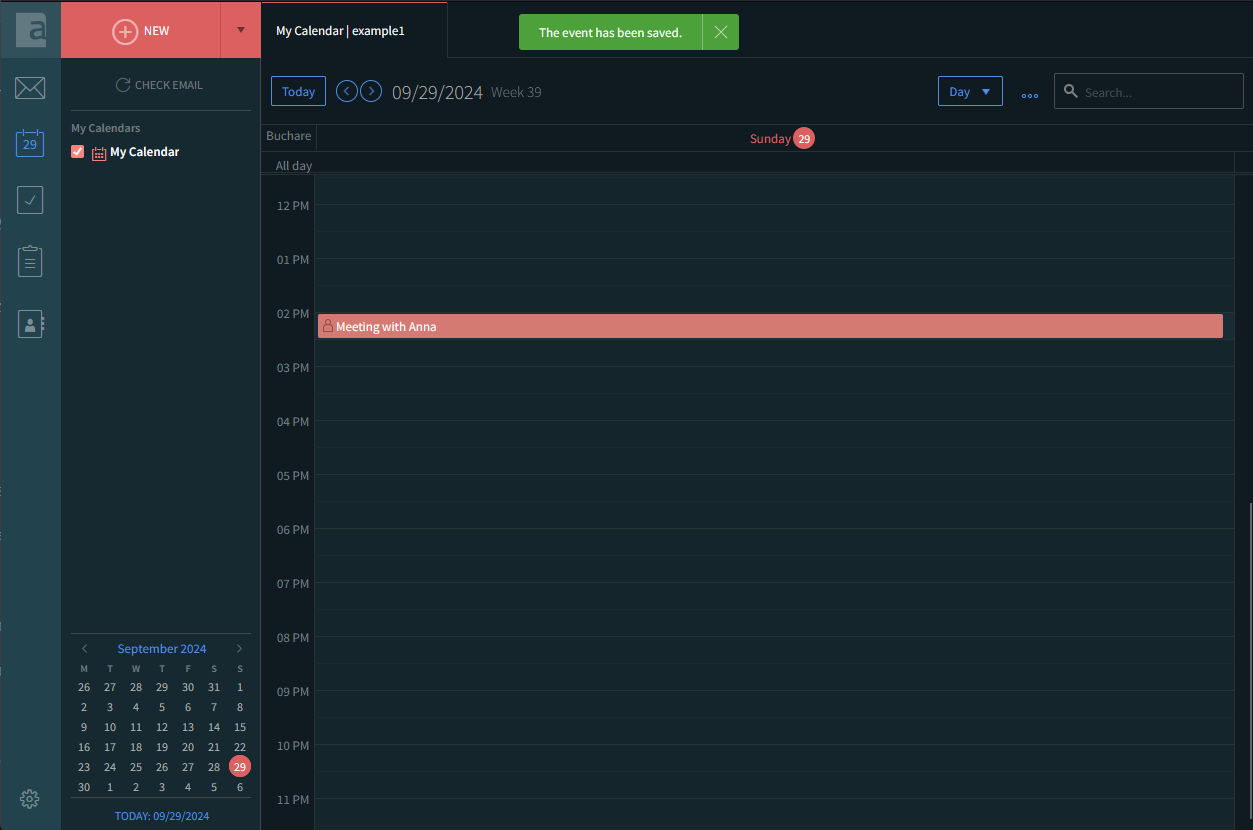
Save the event
Event Update
In this example, the end-user has updated the event by changing the subject and has added another recipient.
Event Deletion
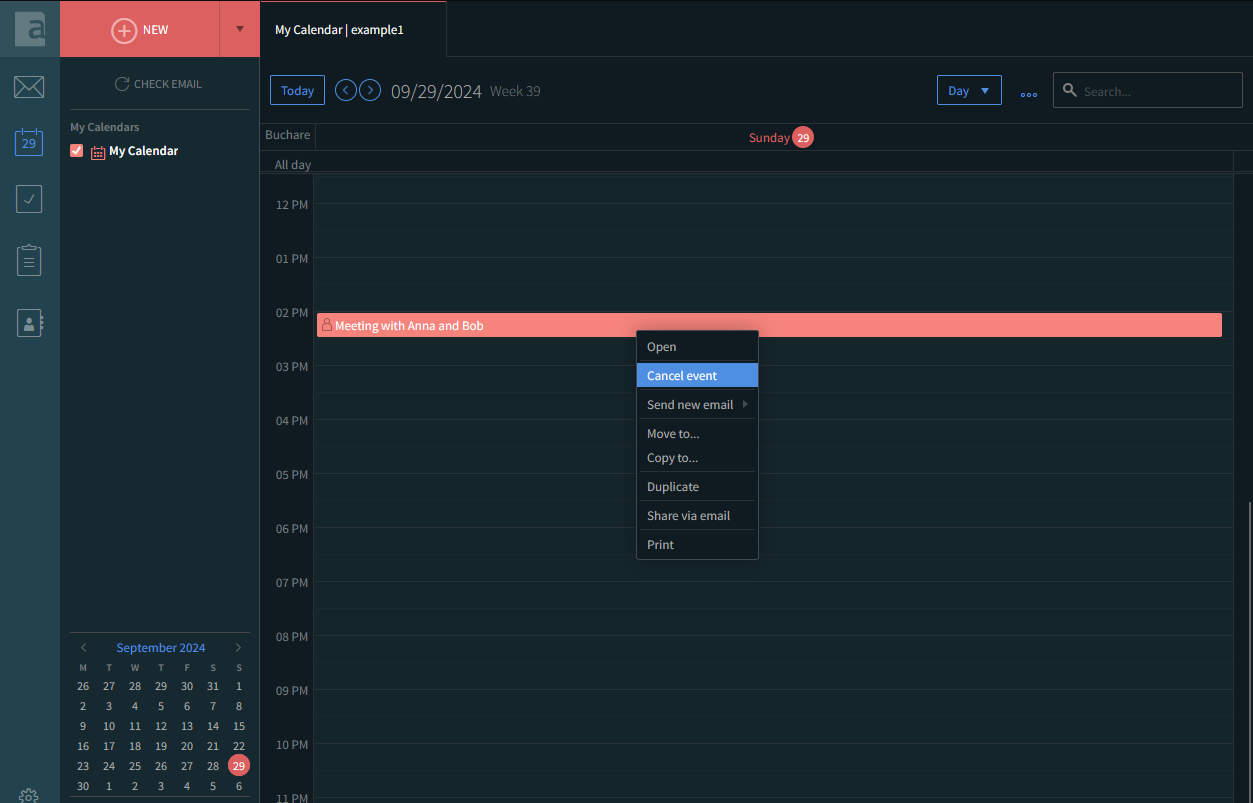
Now, cancel the event from the WebMail interface.
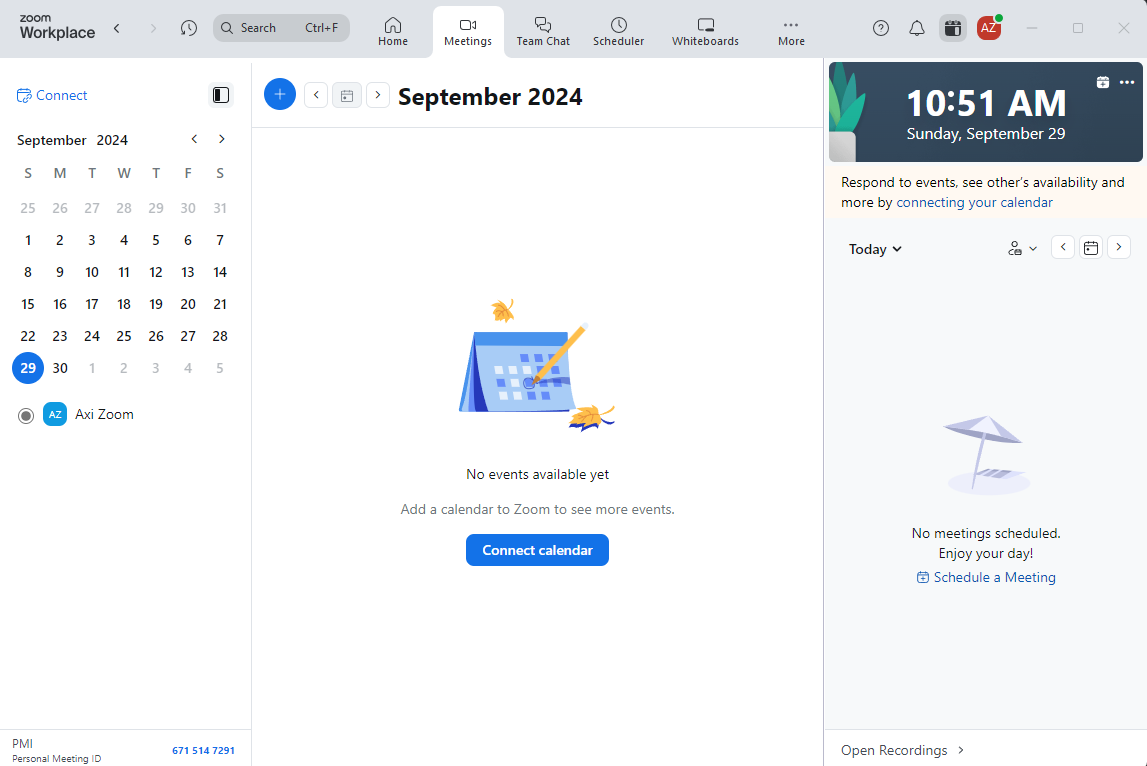
The event has been also removed from Zoom.
Troubleshooting
AddMeetingZoomErr
This error is related to a missing scope in Zoom Marketplace and Zoom does not have access to a specific permission that must be granted by Axigen.
Check the app permissions on Zoom Marketplace.
