- Performing Axigen WebMail Single Sign-on
- Deep Linking Emails in Third Party Apps to Open in WebMail
- Integrating Zoom into the WebMail Calendar
- Integrating Microsoft Teams into the WebMail Calendar
- Configuring BIMI for Your Axigen WebMail: A Step-by-Step Guide
- Configuring SMS Connectors for 2-Step Verification and Account Recovery
Updated: December 4, 2024
BIMI support is available starting with Axigen X6 (10.6.0).
Brand Indicators for Message Identification (BIMI) provides a mechanism for mail senders to publish a validated logotype that mail receivers can display alongside the sender’s messages. This enhances brand visibility and authenticity while fostering trust with recipients.
To enable the BIMI functionality in your Axigen WebMail, follow the steps below to configure the necessary prerequisites and settings.
- Prerequisites
- Step 1: Configure BIMI Checks
- Step 2: Verify the Configuration
- Step 3: Test the BIMI Logos in WebMail
- Additional Resources
Prerequisites
Before enabling BIMI, ensure the following:
-
SPF (Sender Policy Framework) and DKIM (DomainKeys Identified Mail) authentication mechanisms are active.
-
DMARC is configured via OpenDMARC integration using Milter.
-
Detailed instructions are available at: Stop Email Spoofing - OpenDMARC Integration
-
If the Axigen server is behind another system performing SPF checks, configure OpenDMARC to trust the message headers added by that system.
Step 1: Configure BIMI Checks
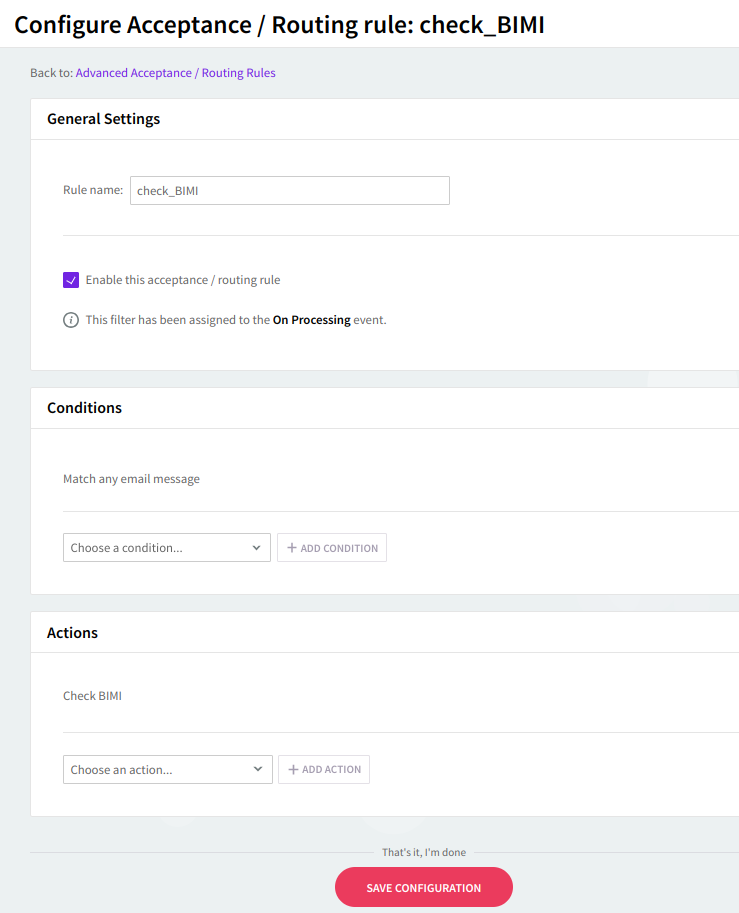
Add a rule to perform BIMI validation for authenticated emails.
-
Navigate to Security & Filtering → Acceptance & Routing → Advanced Settings → Add Acceptance / Routing Rule.
-
Set the conditions to Match any email message.
-
Add the following action:
-
Check BIMI
-
For clustered deployments, ensure these rules are added to the frontend SMTP servers.

Step 2: Verify the Configuration
After completing the above steps, verify the configuration using Axigen’s processing logs and message headers.
Processing Logs
For a sender domain without BIMI:
For a sender domain with BIMI enabled:
For a sender domain where BIMI validation fails:
Message Headers
Without BIMI or failed validation:
With successful BIMI validation:
Step 3: Test the BIMI Logos in WebMail
You can test whether BIMI logos are displayed correctly in Axigen WebMail using the following resource:
Additional Resources
For more information on BIMI and related specifications: