Conga
Login
In order to start configuring your browser, type the Conga interface address into a browser: https://n1.cl.axilab.local:8084. Login using the admin username and the password you have previously set in the previous luci configuration section.
Cluster Creation
After a successful login, the interface will show the Luci homebase page. Click on the cluster tab and then on the Create a New Cluster option from the left side menu.
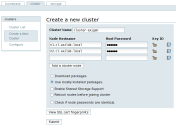
Fill in all the nodes involved in the cluster, along with their root password. Then, select the Use locally installed packages option (we have already installed all the needed cluster packages), and deselect all of Enable Shared Storage Support (we are not using GFS and other shared storage specialized file systems), Reboot nodes before joining cluster (there is no need for this option). The last option Check if node passwords are identical should be checked only if all the nodes involved in the cluster have the same root password and checking it will leave editable only the first node's password, all the other password fields will be grayed out (disabled). Please use a proper naming for the cluster, like cluster-axigen.
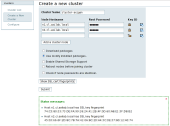
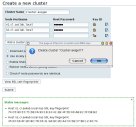
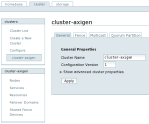
Press the View SSL cert fingerprints and the informational panel should appear at the bottom of the page. Click the Submit button and confirm this action to begin the cluster creation. At the end, the cluster configuration will be displayed.
 |
 |
|
New cluster creation page |
Fingerprint verification messages |
 |
 |
|
Cluster creation confirmation |
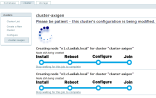
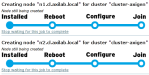
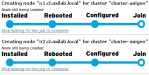
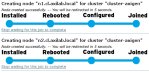
Cluster creation progress (node creation) |
 |
 |
|
Cluster creation progress (Installed) |
Cluster creation progress (Configured) |
 |
 |
|
Cluster creation progress (Joined) |
Cluster configuration page is displayed after creation |
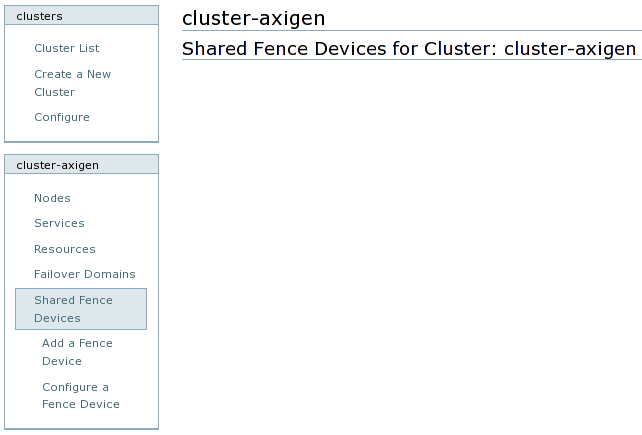
Fence Devices
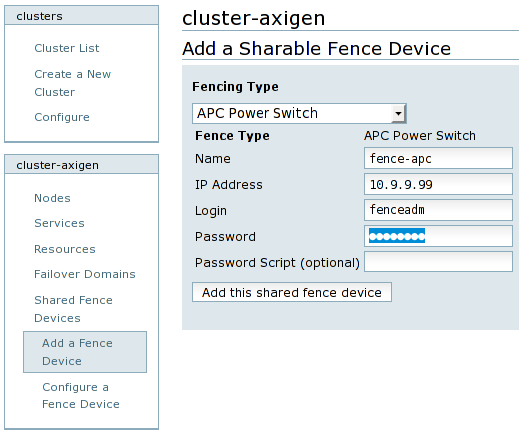
Next step is to configure the cluster fencing, by adding a fence device. To add a fence device, in the cluster name left menu, click on the Shared Fence Devices menu and choose the Add a Fence Device option from the expanded submenu. Then, choose your fence device from the drop down options list and configure its parameters accordingly. Name the shared fencing device properly, like fence-type, for example fence-apc for an APC Power Switch.
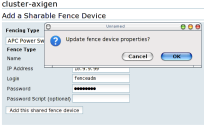
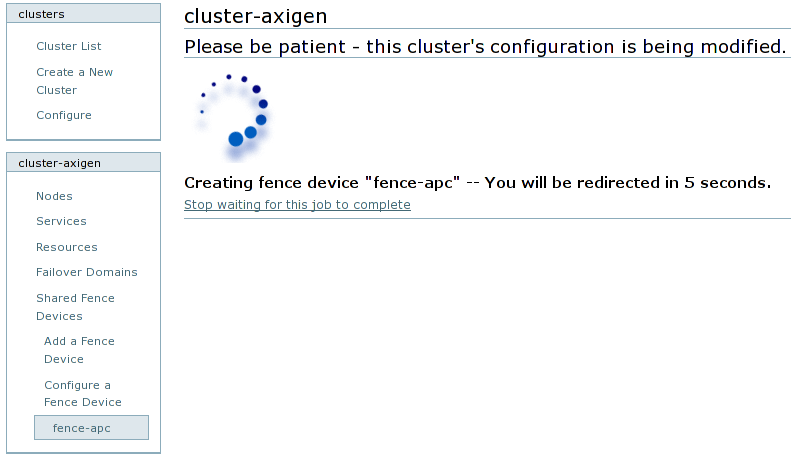
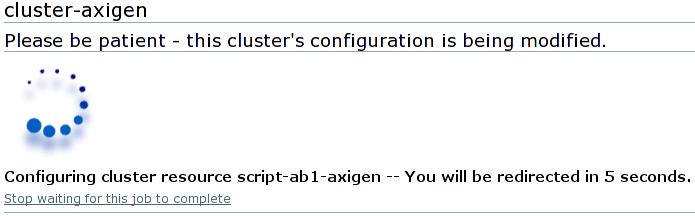
After you finish setting up parameters for the fence device, press the Add this shared fence device button. A confirmation window will appear. Confirming will show the progress screen for updating the cluster configuration.
 |
 |
|
Shared Fence Devices menu |
Configuration for an APC Power Switch |
 |
 |
|
Fence addition confirmation |
Cluster configuration update progress |
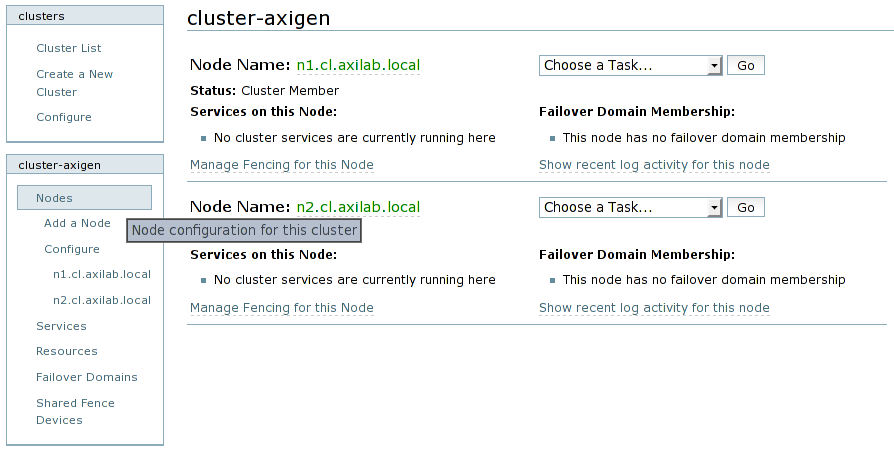
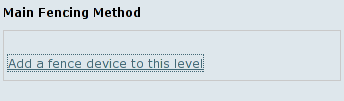
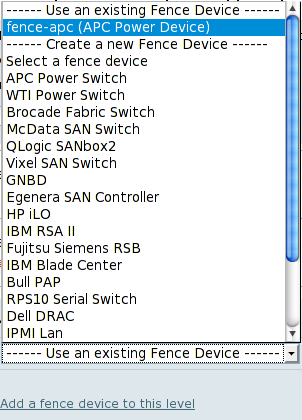
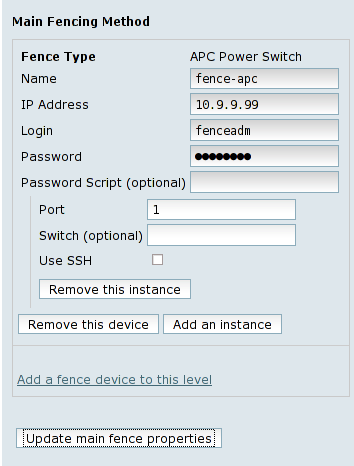
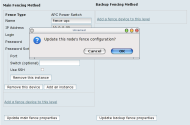
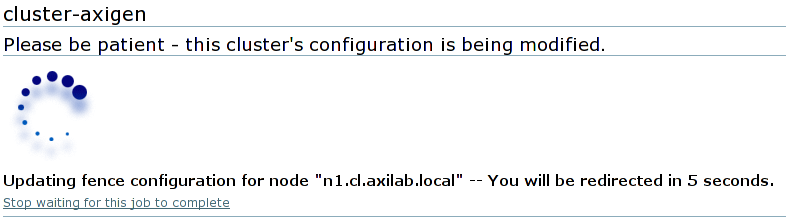
After adding the shared fence device, it must be attached for fencing all nodes. To achieve this, click on the Nodes option from the cluster name left menu and then on each node's entry form the Configure submenu. Clicking on the Manage fencing for this node link will open the node configuration page. Click the Add a fence device to this level link from the Main fencing method panel. From the drop-down list, select the shared fencing device you have previously configured, under the Use an existing fence device option. Fill in any additional parameters, like the switch port or anything else that is requested by the fencing device to recognize this specific node. Click on the Update main fence properties button, confirm the fence addition and wait for the cluster configuration to be updated.
Repeat this step for all the other nodes in the cluster.
 |
 |
|
Nodes list example |
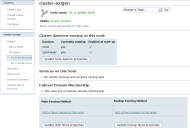
Node n1 configuration |
|---|
 |
 |
|
Click on the Add a fence device to this level option |
Select the previously configured fence device |
|---|
 |
 |
|
Configure switch port |
Confirm the addition |
|---|
 |
 |
|
Wait until the configuration is updated |
Node n2 configuration |
|---|
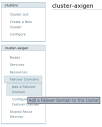
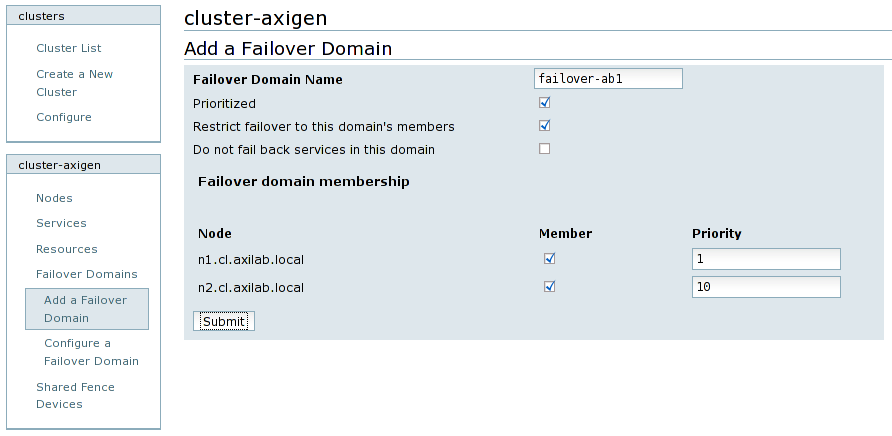
Failover Domains
This step consists in creating a failover domain for each pair of active / passive nodes, so that when the active node fails at some point, the passive node takes over the responsibilities. In order to create a failover domain, click on the Failover Domains entry from the cluster name menu and then on the Add a Failover Domain option.
Fill in the failover domain name, which should be tagged according to the naming conventions you have previously set up, prefixed with the failover-text, for example failover-axib1. Check the Prioritized and Restrict failover to this domain's members options and, if you want a failed node not to take back resources after a failover process, then you should also check the Do not fail back services in this domain option. This is usually a desired behavior, because failing back the service and its resources involves stopping and then starting the Axigen server, disconnecting active connections for the end-users.
From the Failover domain membership panel, select the two nodes which will be the active and passive ones in this failover domain and set them different priorities, with the preferred node having a lower priority number, thus a higher priority in running cluster services.
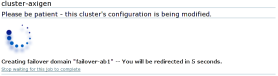
At the end, click on the Submit button, confirm the failover domain addition and wait until the cluster configuration is modified.
Repeat adding a failover domain for all active / passive nodes pair that will be part of the cluster.
 |
 |
|
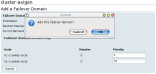
Failover Domains menu |
Configuration for failover-axib1 |
|---|
 |
 |
|
Pressing Submit will pop up the confirmation dialog |
Wait until update completion |
|---|
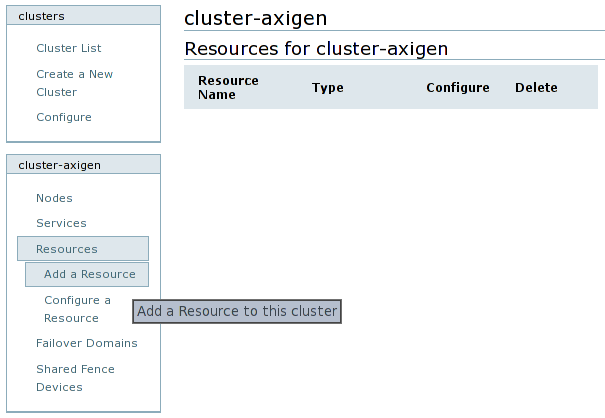
Resources
At this step you will add the following resources to the Axigen cluster:
-
Floating IP address
-
Storage mount
-
Startup script
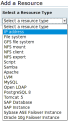
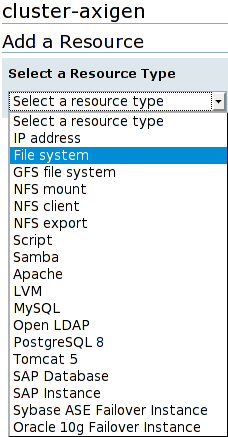
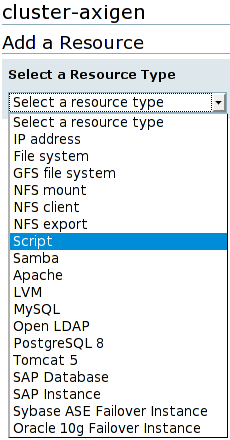
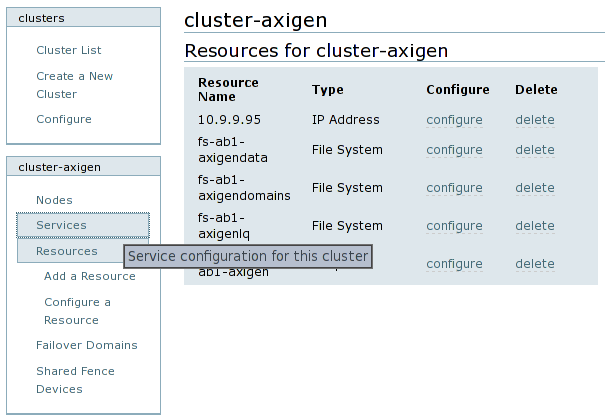
Each resource can be added by clicking on the Resources entry from the cluster name menu and then on the Add a Resource option. Then you must select the resource type from the drop-down list and configure it as explained below.
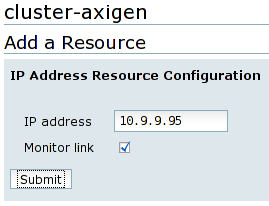
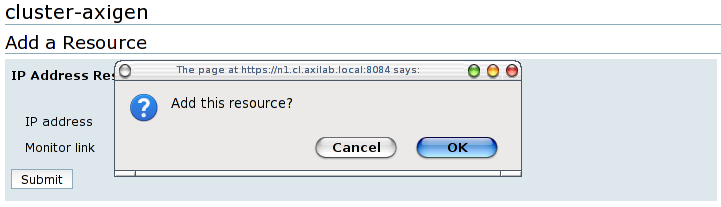
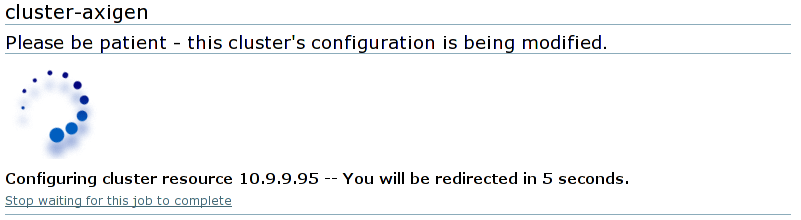
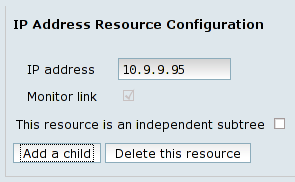
The IP address resource represents the failover domain floating IP address. Fill this IP address and check the Monitor link option. Click on the Submit button, confirm the resource addition and then wait for the cluster configuration to be completed.
Repeat adding an IP address resource for each failover domain.
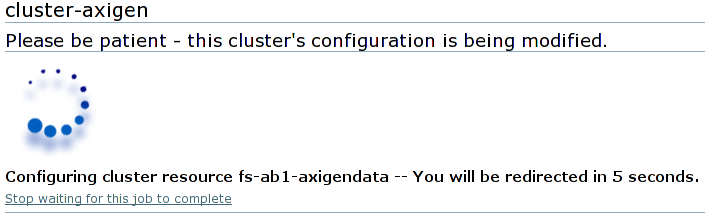
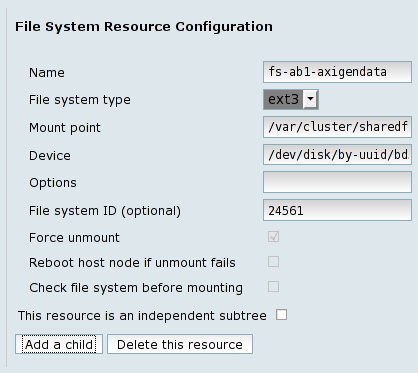
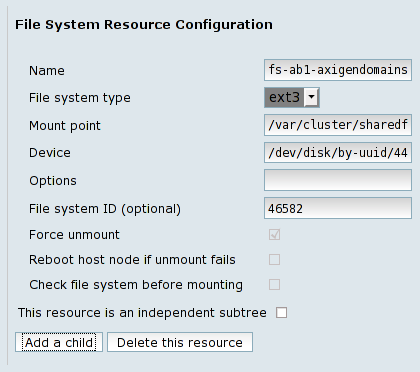
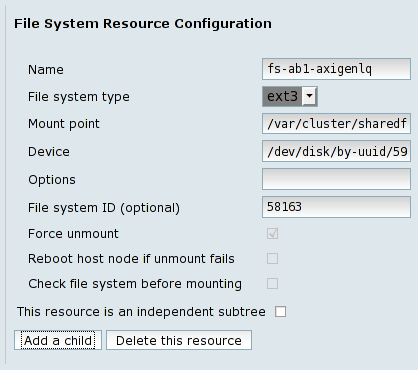
Each shared storage partition must be configured as resources in the cluster. To achieve this, you have to add each one of them as File system resources. Naming a resource is also important in order to ease performing future cluster administrative tasks, so you have to choose their names to be self explanatory and consistent.
For example, all file system resources which are part of the axib2 failover domain can be prefixed with fs-axib2- followed by a short descriptive text. In our example storage configuration we have named the file system resources for the axib1 failover domain as follows:
-
Axigen data directory:
fs-axib1-data -
Axigen domains:
fs-axib1-dom -
Axigen logs and queue:
fs-axib1-lq
Continue adding all the file system resources for all partitions that will be used in the cluster configuration.
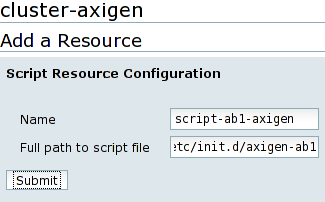
The last resource type that must be added to the cluster is the init script, used to start and stop the Axigen daemon. Each Axigen instance (one per failover domain) should have its own init script resource. To add a script resource, select Script from the resource type drop-down list and fill in the full path of the init script, as you have previously set. The name of the script should be prefixed with script-, followed by the name of the failover domain and the -axigen literal text.
The script in our example corresponding to the axib1 failover domain will be called script-axib2-axigen.
 |
 |
|
Resources menu |
IP address resource type selection |
|---|
 |
 |
|
Configuration parameters for the IP address resource |
Each resource addition must be confirmed |
|---|
 |
 |
|
Wait until the IP address resource is being added to the cluster configuration |
File system resource type selection |
|---|
 |
 |
|
Configuration parameters for the File system resource |
Wait until the File system resource is being added to the cluster configuration |
|---|
 |
 |
|
Script resource type selection |
Configuration parameters for the Script resource |
|---|
 |
|
Wait until the Script resource is being added to the cluster configuration |
|---|
Services
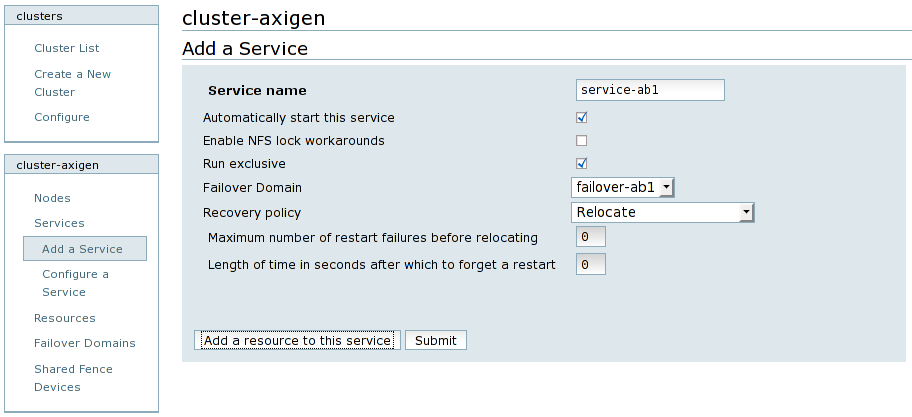
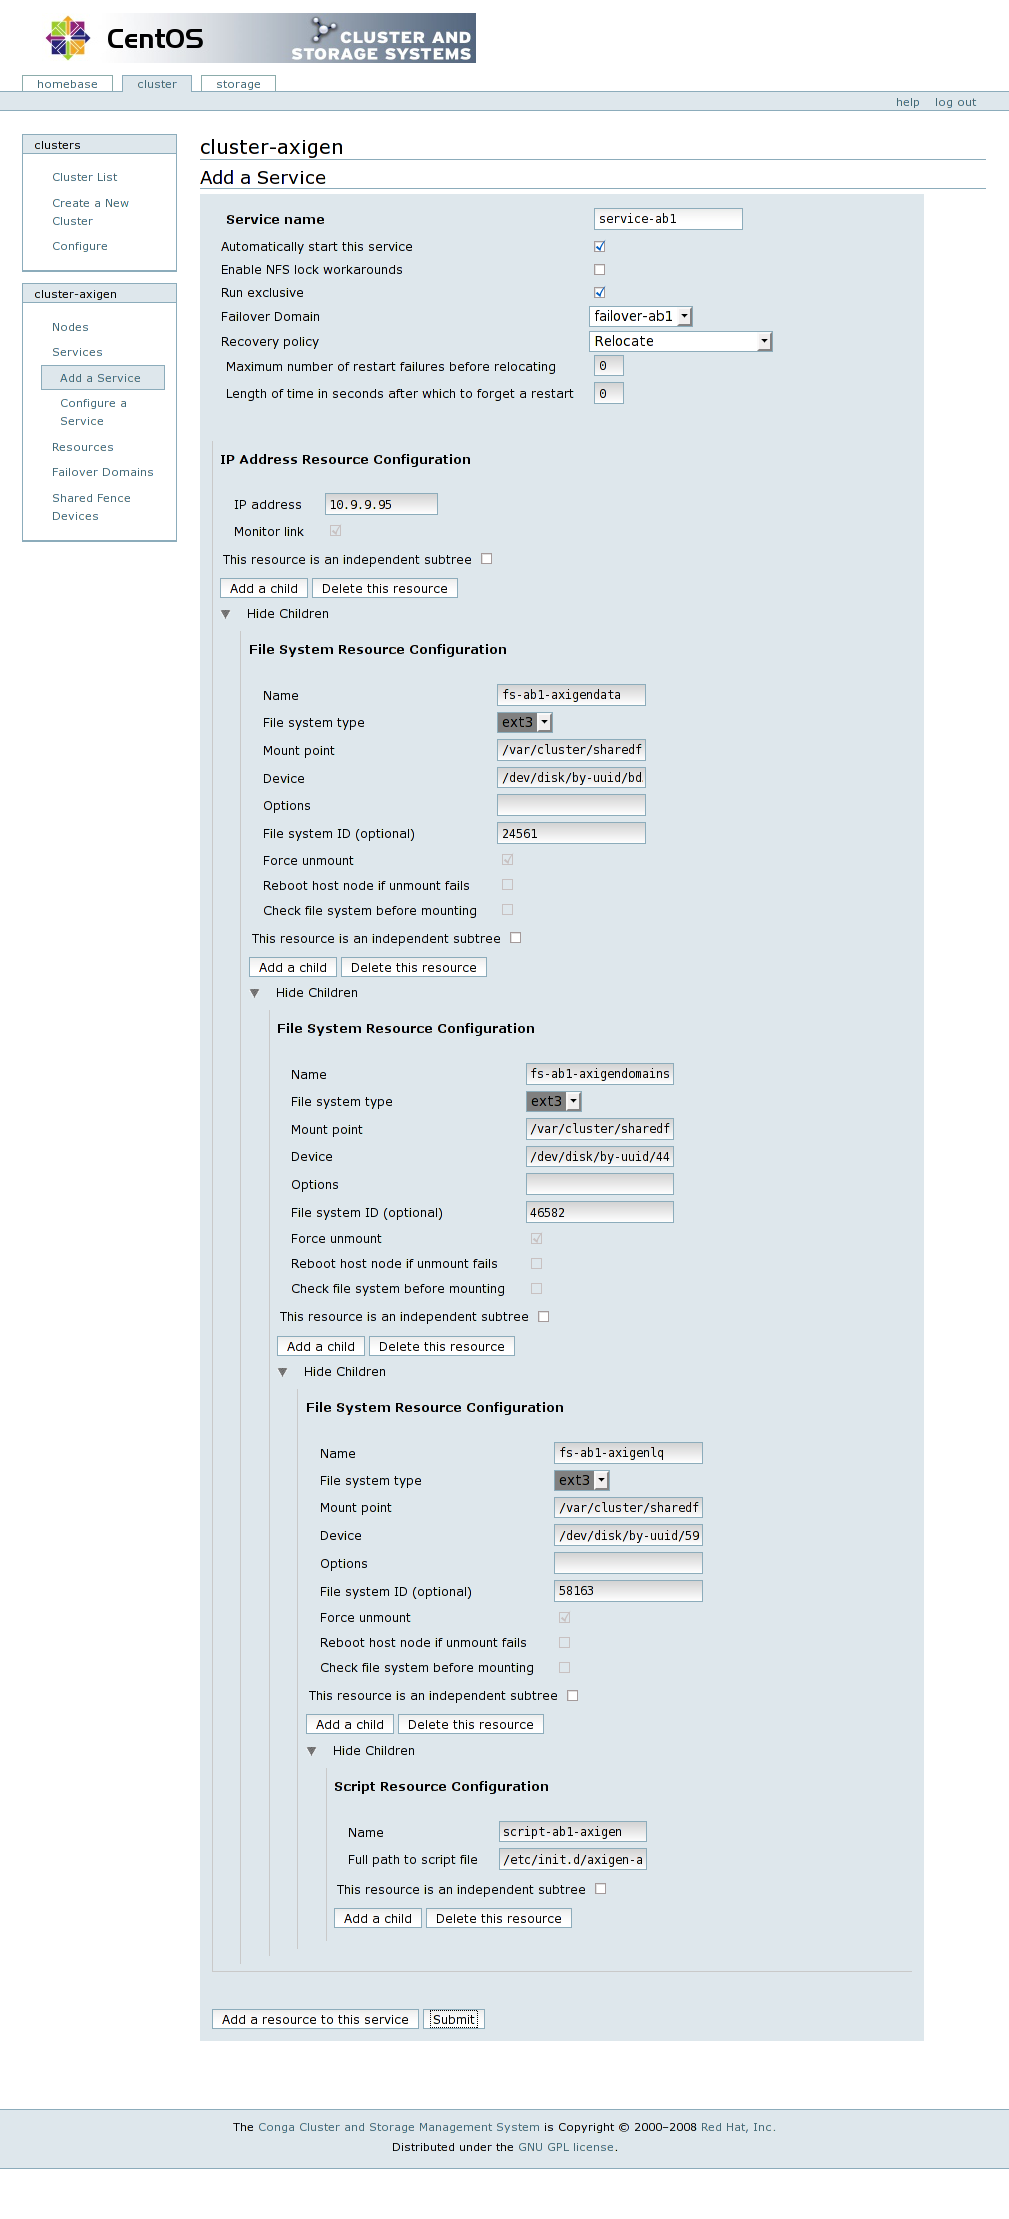
Each failover domain should have a corresponding cluster service configured. In order to create a cluster service, navigate to the Services entry from the cluster name menu and then click on the “Add a Service” option. Name the service prefixed with service-, followed by the failover domain tag, for example service-axib1. Check the Automatically start this service and the Run exclusive options, and then select the corresponding failover domain and set the Recovery policy to Relocate.
Before creating the cluster service, you need to add its corresponding resources by pressing the Add a resource to this service button for the IP address resource, then create a dependency based tree by subsequently using the Add a child buttons for each of the File system resources. The last resource should be the Script resource, dependent of all the other ones successful startup. This way, no resource is being started without the previous one successful startup.
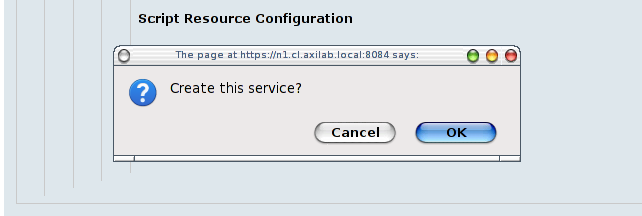
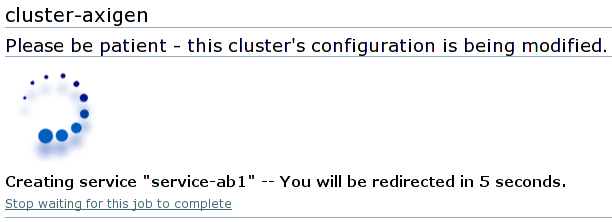
Pressing the Submit button will first ask for a service creation confirmation, and then automatically create the cluster service by modifying the cluster configuration.
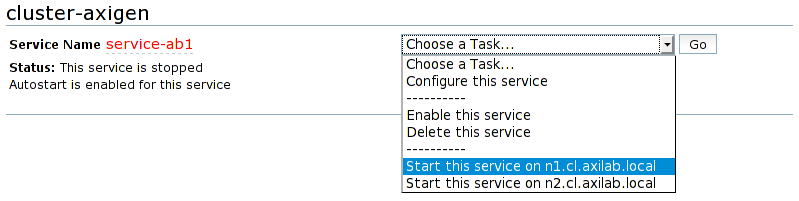
After the service will be created, you will be redirected to the service management page. In order to test the service startup, choose the option to start the service on the first preferred node, confirm the start action, and wait for it to finish. After its successful startup on the preferred node, test if the service is indeed relocatable to the hot stand-by node from the same failover domain. For this, you need to choose from the service management action drop-down list, the Relocate this service to <hot stand-by node name> option. Confirm the relocation and wait for the job to finish.
You need to repeat adding a service for each failover domain in the cluster.
 |
 |
|
Services menu |
Parameters for adding a service. Press the Add a resource to this service button after filling in all the required service configuration parameters |
|---|
 |
 |
|
IP address resource |
File system resource for Axigen data directory |
|---|
 |
 |
|
File system resource for Axigen domains |
File system resource for Axigen logs and queue |
|---|
 |
 |
|
Last resource, the Axigen init script resource |
Confirm the service creation |
|---|
 |
 |
|
Full service configuration. Review it and press the Submit button |
Wait until the service is being added to the cluster |
|---|
 |
 |
|
Service management page with the service stopped |
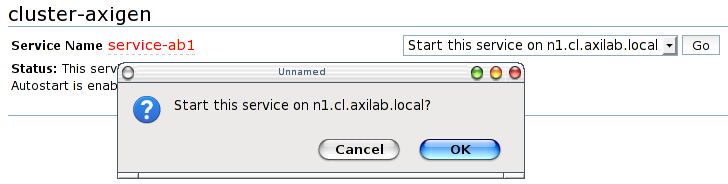
Start the service on the preferred node |
|---|
 |
|
|
Confirm service start |
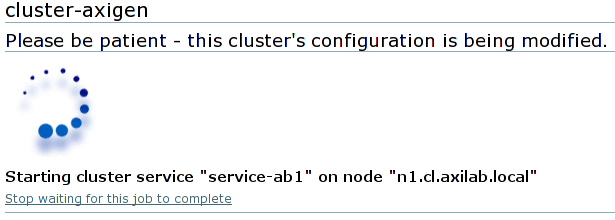
Wait for the service to be started |
|---|
 |
 |
|
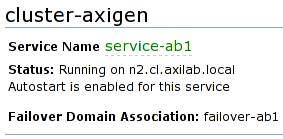
Service management page with the service started on the preferred node |
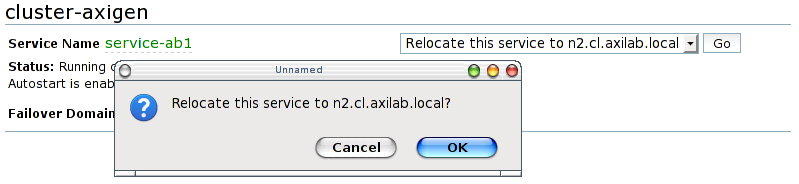
Choose the service to be relocated on the hot stand-by node |
|---|
|
 |
|
Confirm the relocation |
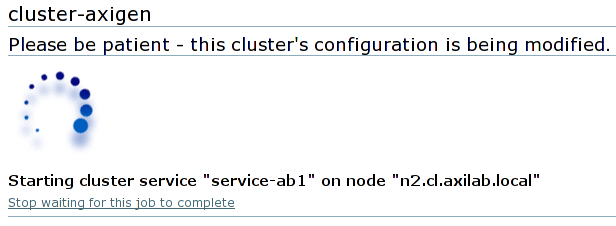
Wait until job completes |
|---|
 |
|
Service management page with the service started on the hot stand-by node |
|---|
Quick Example
This section shows a step by step quick configuration example of a cluster based on Axigen and Red Hat Cluster, without additional explanations, using the data from the example configuration section and the Conga cluster administration interface.
-
cluster → Create a New Cluster
-
Cluster Name:
cluster-axigen -
Node hostnames:
-
n1.cl.axilab.local -
n2.cl.axilab.local -
n3.cl.axilab.local -
n4.cl.axilab.local
-
-
Use locally installed packages: (*)
-
Enable Shared Storage Support: [_]
-
Reboot nodes before joining cluster: [_]
-
Check if node passwords are identical: [_]
-
-> View SSL cert fingerprints
-
-> Submit
-
-
(cluster-axigen) → Shared Fence Devices → Add a Fence Device
-
Fencing Type: APC Power Switch
-
Name:
fence-apc -
IP Address:
10.9.9.99 -
Login:
fenceadm -
Password:
<password here> -
-> Add this shared fence device
-
-
(cluster-axigen) → Nodes → Configure →
n1.cl.axilab.local-
Main Fencing Method -> Add a fence device to this level
-
Use an existing Fence Device ->
fence-apc(APC Power Switch)-
Port:
1 -
-> Update main fence properties
-
-
-
(cluster-axigen) → Nodes → Configure →
n2.cl.axilab.local-
Main Fencing Method → Add a fence device to this level
-
Use an existing Fence Device →
fence-apc(APC Power Switch)-
Port:
2 -
-> Update main fence properties
-
-
-
(cluster-axigen) -> Nodes -> Configure ->
n3.cl.axilab.local-
Main Fencing Method -> Add a fence device to this level
-
Use an existing Fence Device ->
fence-apc(APC Power Switch)-
Port:
3 -
-> Update main fence properties
-
-
-
(cluster-axigen) → Nodes → Configure →
n4.cl.axilab.local-
Main Fencing Method → Add a fence device to this level
-
Use an existing Fence Device →
fence-apc(APC Power Switch)-
Port:
4 -
-> Update main fence properties
-
-
-
(cluster-axigen) -> Failover Domains -> Add a Failover Domain
-
Failover Domain Name:
failover-axib1 -
Prioritized: [x]
-
Restrict failover to this domain's members: [x]
-
Do not fail back services in this domain: [_]
-
(Failover domain membership)
-
n1.cl.axilab.local-
Member: [x]
-
Priority: 1
-
-
n2.cl.axilab.local-
Member: [_]
-
-
n3.cl.axilab.local-
Member: [_]
-
-
n4.cl.axilab.local-
Member: [x]
-
Priority: 10
-
-
-> Submit
-
-
(cluster-axigen) -> Failover Domains -> Add a Failover Domain
-
Failover Domain Name:
failover-axib2 -
Prioritized: [x]
-
Restrict failover to this domain's members: [x]
-
Do not fail back services in this domain: [_]
-
(Failover domain membership)
-
n1.cl.axilab.local-
Member: [_]
-
-
n2.cl.axilab.local-
Member: [x]
-
Priority: 1
-
-
n3.cl.axilab.local-
Member: [_]
-
-
n4.cl.axilab.local-
Member: [x]
-
Priority: 10
-
-
-> Submit
-
-
(cluster-axigen) -> Failover Domains -> Add a Failover Domain
-
Failover Domain Name:
failover-ldap -
Prioritized: [x]
-
Restrict failover to this domain's members: [x]
-
Do not fail back services in this domain: [_]
-
(Failover domain membership)
-
n1.cl.axilab.local-
Member: [_]
-
-
n2.cl.axilab.local-
Member: [_]
-
-
n3.cl.axilab.local-
Member: [x]
-
Priority: 1
-
-
n4.cl.axilab.local-
Member: [x]
-
Priority: 10
-
-
-> Submit
-
-
(cluster-axigen) -> Resources -> Add a Resource
-
Select a Resource Type: IP address
-
IP address:
10.9.9.96 -
Monitor link: [x]
-
-> Submit
-
-
-
(cluster-axigen) -> Resources -> Add a Resource
-
Select a Resource Type: IP address
-
IP address:
10.9.9.97 -
Monitor link: [x]
-
-> Submit
-
-
-
(cluster-axigen) -> Resources -> Add a Resource
-
Select a Resource Type: IP address
-
IP address:
10.9.9.98 -
Monitor link: [x]
-
-> Submit
-
-
-
(cluster-axigen) -> Resources -> Add a Resource
-
Select a Resource Type: File system
-
Name:
fs-axib1-data -
File system type:
ext3 -
Mount point:
/var/clusterfs/axib1-data -
Device:
/dev/disk/by-uuid/bd537993-d78a-4bf9-acf7-ed0993edbafb -
Force unmount: [x]
-
Reboot host node if unmount fails: [x]
-
Check file system before mounting: [_]
-
-> Submit
-
-
-
(cluster-axigen) -> Resources -> Add a Resource
-
Select a Resource Type: File system
-
Name:
fs-axib1-dom -
File system type:
ext3 -
Mount point:
/var/clusterfs/axib1-dom -
Device:
/dev/disk/by-uuid/4407d04d-f48a-456b-b3f4-11a8d0f6e254 -
Force unmount: [x]
-
Reboot host node if unmount fails: [x]
-
Check file system before mounting: [_]
-
-> Submit
-
-
-
(cluster-axigen) -> Resources -> Add a Resource
-
Select a Resource Type: File system
-
Name:
fs-axib1-lq -
File system type:
ext3 -
Mount point:
/var/clusterfs/axib1-lq -
Device:
/dev/disk/by-uuid/59efb5e6-bf85-4486-ac75-57e2b40c2e78 -
Force unmount: [x]
-
Reboot host node if unmount fails: [x]
-
Check file system before mounting: [_]
-
-> Submit
-
-
-
(cluster-axigen) -> Resources -> Add a Resource
-
Select a Resource Type: File system
-
Name:
fs-axib2-data -
File system type:
ext3 -
Mount point:
/var/clusterfs/axib2-data -
Device:
/dev/disk/by-uuid/fc8a4bae-df23-421a-a6c7-de55fbf99a8c -
Force unmount: [x]
-
Reboot host node if unmount fails: [x]
-
Check file system before mounting: [_]
-
-> Submit
-
-
-
(cluster-axigen) -> Resources -> Add a Resource
-
Select a Resource Type: File system
-
Name:
fs-axib2-dom -
File system type:
ext3 -
Mount point:
/var/clusterfs/axib2-dom -
Device:
/dev/disk/by-uuid/2b1c992b-7385-40c8-bad6-a91dfb85c715 -
Force unmount: [x]
-
Reboot host node if unmount fails: [x]
-
Check file system before mounting: [_]
-
-> Submit
-
-
-
(cluster-axigen) -> Resources -> Add a Resource
-
Select a Resource Type: File system
-
Name:
fs-axib2-lq -
File system type:
ext3 -
Mount point:
/var/clusterfs/axib2-lq -
Device:
/dev/disk/by-uuid/f896a8aa-3bbd-43dc-8ea9-35ac2c79359b -
Force unmount: [x]
-
Reboot host node if unmount fails: [x]
-
Check file system before mounting: [_]
-
-> Submit
-
-
-
(cluster-axigen) -> Resources -> Add a Resource
-
Select a Resource Type: File system
-
Name:
fs-ldap -
File system type:
ext3 -
Mount point:
/var/clusterfs/ldap -
Device:
/dev/disk/by-uuid/28a715bb-8b1d-4acd-959f-a67328f04d16 -
Force unmount: [x]
-
Reboot host node if unmount fails: [x]
-
Check file system before mounting: [_]
-
-> Submit
-
-
-
(cluster-axigen) -> Resources -> Add a Resource
-
Select a Resource Type: Script
-
Name:
script-axib1 -
Full path to script file:
/etc/init.d/axigen-axib1 -
-> Submit
-
-
-
(cluster-axigen) -> Resources -> Add a Resource
-
Select a Resource Type: Script
-
Name:
script-axib2 -
Full path to script file:
/etc/init.d/axigen-axib2 -
-> Submit
-
-
-
(cluster-axigen) -> Resources -> Add a Resource
-
Select a Resource Type: Script
-
Name: script-ldap
-
Full path to script file:
/etc/init.d/ldap -
-> Submit
-
-
-
(cluster-axigen) -> Services -> Add a Service
-
Service name:
service-axib1 -
Automatically start this service: [x]
-
Enable NFS lock workarounds: [_]
-
Run exclusive: [x]
-
Failover Domain:
failover-axib1 -
Recovery policy: Relocate
-
-> Add a resource to this service
-
Use an existing global resource ->
10.9.9.96(IP address)-
-> Add a child
-
Use an existing global resource ->
fs-axib1-data(File system)-
-> Add a child
-
Use an existing global resource ->
fs-axib1-dom(File system)-
-> Add a child
-
Use an existing global resource ->
fs-axib1-lq(File system)-
-> Add a child
-
Use an existing global resource ->
script-axib1(Script)
-
-
-
-
-
-
-
-
-
-
-> Submit
-
-
(cluster-axigen) -> Services -> Add a Service
-
Service name:
service-axib2 -
Automatically start this service: [x]
-
Enable NFS lock workarounds: [_]
-
Run exclusive: [x]
-
Failover Domain:
failover-axib2 -
Recovery policy: Relocate
-
-> Add a resource to this service
-
Use an existing global resource ->
10.9.9.97(IP address)-
-> Add a child
-
Use an existing global resource ->
fs-axib2-data(File system)-
-> Add a child
-
Use an existing global resource ->
fs-axib2-dom(File system)-
-> Add a child
-
Use an existing global resource ->
fs-axib2-lq(File system)-
-> Add a child
-
Use an existing global resource ->
script-axib2(Script)
-
-
-
-
-
-
-
-
-
-
-> Submit
-
-
(cluster-axigen) -> Services -> Add a Service
-
Service name:
service-ldap -
Automatically start this service: [x]
-
Enable NFS lock workarounds: [_]
-
Run exclusive: [x]
-
Failover Domain:
failover-ldap -
Recovery policy: Relocate
-
-> Add a resource to this service
-
Use an existing global resource ->
10.9.9.98(IP address)-
-> Add a child
-
Use an existing global resource ->
fs-ldap(File system)-
-> Add a child
-
Use an existing global resource ->
script-ldap(Script)
-
-
-
-
-
-
-> Submit
-