The "DNR" tab allows you to configure parameters relative to logging, "DNR Options" and "Nameservers".
Service configuration
Logging

You can select several types of messages to be logged for the DNR service: critical messages, error messages, warning messages, informational messages, and protocol communication. To select which are to be logged, click the Log Level slider and move it to the left or right. The selected types of messages will change color from whiter to grey.
Log files can be stored using your internal log files, your system's log files, or within the log files located on a remote system. Use the Log drop-down menu to select where to save your log files.
DNR options

This section allows you to configure the general parameters relative to the DNR service.
Use the "First Query Timeout" option to specify after how many seconds the first DNR query is closed by Axigen. The values for this parameter can be entered by using the up and down arrows, and are only expressed in seconds, ranging from 1 to 120 seconds.
After each retry, the set timeout is doubled.
In the "Max. number of retries" field you can specify the maximum number of DNR query retries to be executed by Axigen. Use the up and down arrows to enter the parameters' values.
The "No. of cached results" option enables you to specify the number of results (IP addresses) cached for each DNR query type to be executed by Axigen. The default value is 1000 IPs.
Nameservers

You can edit the list of known name (DNS) servers (specified in the operating system configuration) used by Axigen when performing DNR searches.
To edit one of the defined name servers, just change the values of the corresponding fields and then save the configuration. In the Address field, specify the IP address of the name server. The parameters corresponding to the "Query Timeout" and "Retries" fields can be configured according using the guidelines in the "DNR Options" section, available above.
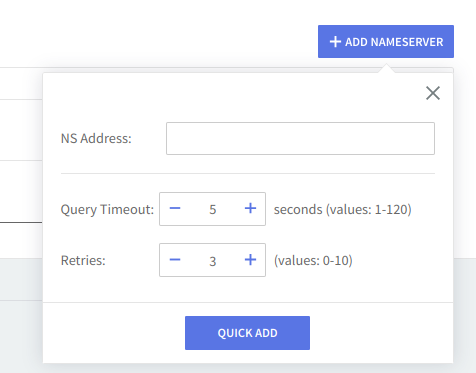
To add a new name server, hit the "Add Nameserver" button displayed in the upper right corner of the "Nameservers" section. Type the nameserver address in the text box then click on "Quick Add". The "Query Timeout" and number of “Retries" can be set when adding the nameserver or later.

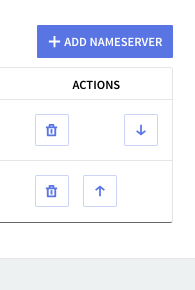
The "Actions" column allows you to set the priority level for the defined name servers. Use the available up and down arrows to set the order in which name servers are queried (the ones with higher priority, to the top of the list, will be queried first). Also via the "Actions" column, you can use the "Delete" button to remove an existing Nameserver from the list.

When you are done configuring these parameters, remember to click the "Save Configuration" button to preserve your changes.