Axigen can use different listeners for its TCP services (SMTP Receiving, POP3, IMAP, WebMail, WebAdmin, CLI, FTP Backup & Restore, POP3 Proxy, IMAP Proxy, and WebMail Proxy) and UDP services (Logging and Reporting).
Listeners are network points of entry associated with an interface address and port number that grant access to a specific TCP or UDP service.
Listeners add extra flexibility and configuration to each Axigen service as they can be used to grant differentiated access to the same services for different categories of users (e.g. users within a specific domain). Moreover, listeners can be associated with a variety of rules that allow defining specific limitations for connections coming from IPs within specified IP sets.
Listeners can be defined, using various parameters corresponding to that TCP service, from the configuration file (as of type "TcpListener" OBJECT-SET) or through WebAdmin (the web configuration interface). UDP service listeners have fewer parameters associated as connection-related parameters do not apply to them.
In Axigen, it is possible to configure TCP listeners for all TCP services: SMTP Receiving, POP3, IMAP, WebMail, WebAdmin, FTP Back-up & Restore, CLI, POP3 Proxy, IMAP Proxy, and WebMail Proxy.
To access listener configuration in WebAdmin, first click on the service tab (SMTP Receiving, POP3, IMAP, WebMail, WebAdmin, FTP Back-up & Restore, CLI, POP3 Proxy, IMAP Proxy or WebMail Proxy). A list of the already defined listeners (if any) will be displayed under the dedicated section Listeners, sorted by their IP addresses.
Editing one of the existing listeners will result in accessing two configuration pages: "General" and "SSL Settings". The same pages will also be displayed when hitting the "Add Listener" button and choosing the "Advanced Config" option.
Example:
SMTP Receiving listeners
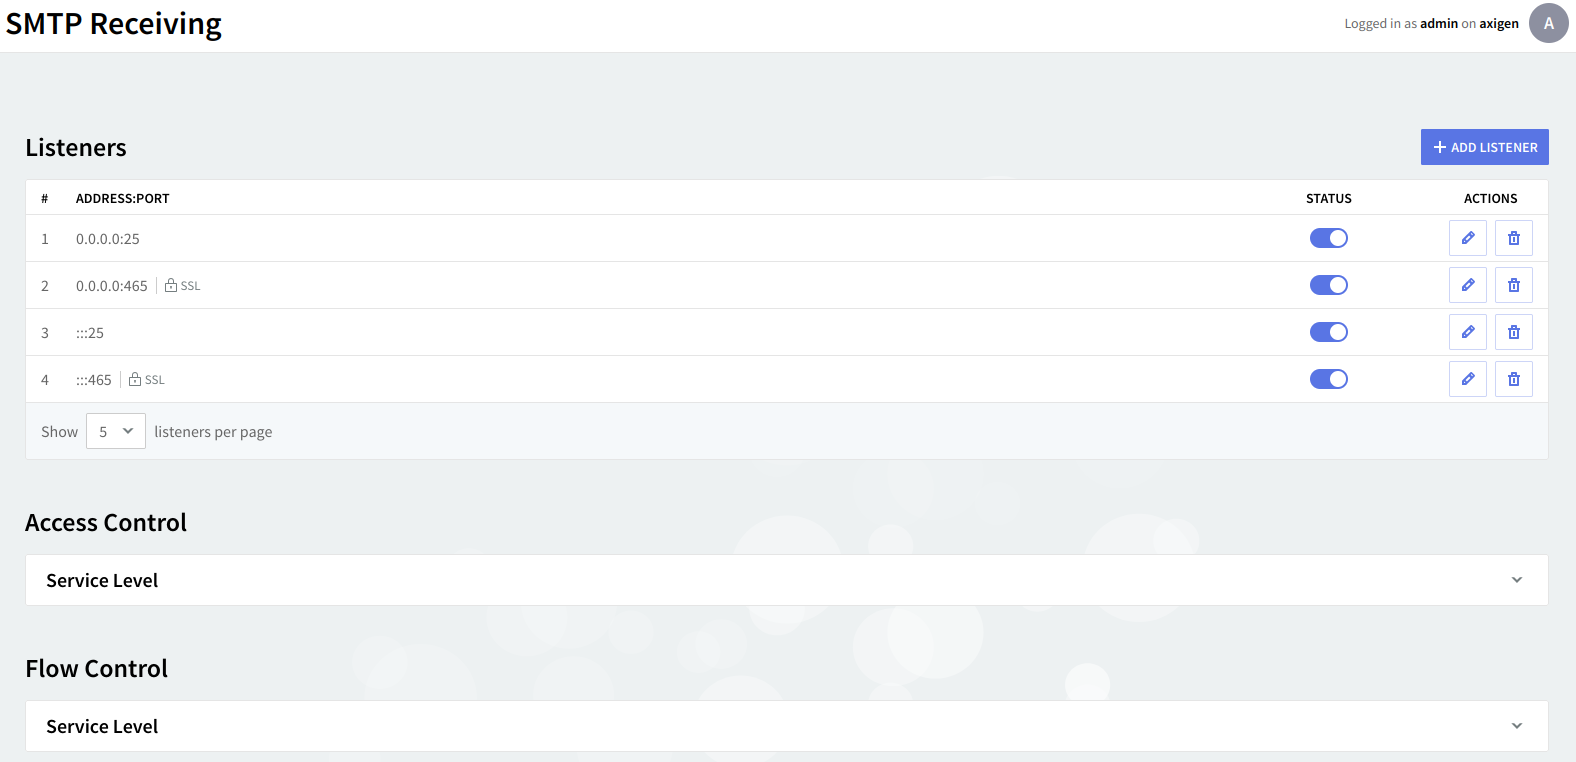
No matter if you are adding or editing a TCP listener, no matter what service tab you are on, the same parameters are available on two dedicated pages: "General" and "SSL Settings".

The "General" page enables you to set a list of general parameters relative to the listener being configured such as the listener bind address, connection parameters, and access control rules.
General settings
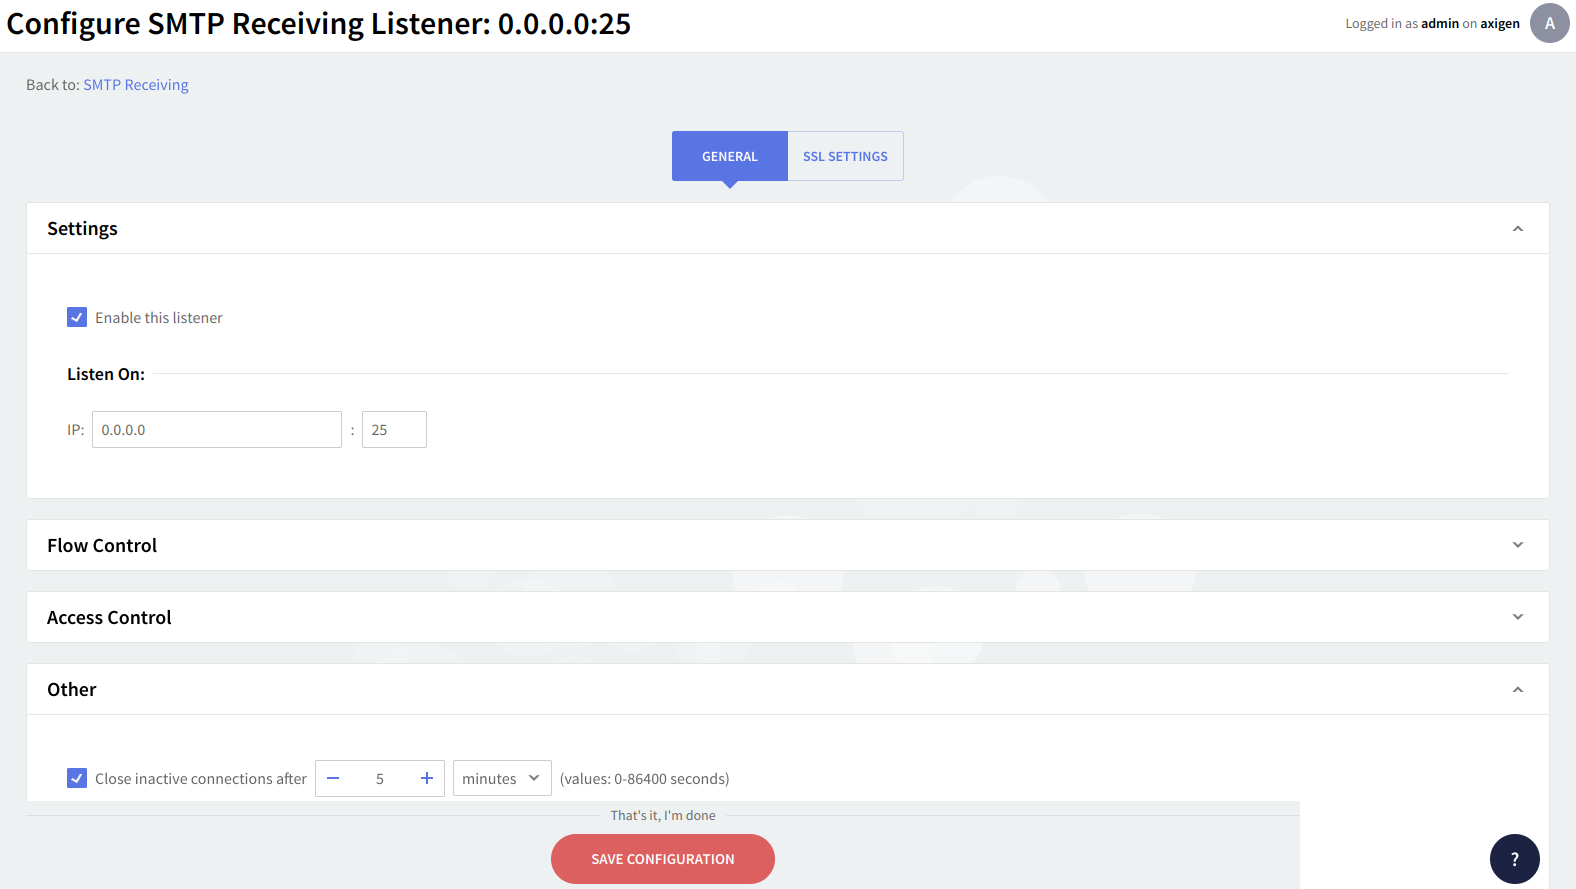
To enable the currently configured listener check the box in front of the "Enable this listener" option. To edit or specify the listener address use the IP-related text boxes. Listeners are uniquely identified by their address attribute. Two or more listeners cannot have the same address value - only the first object correctly defined is considered. The listener address will be the IP address followed by a colon and the port number.
Flow control
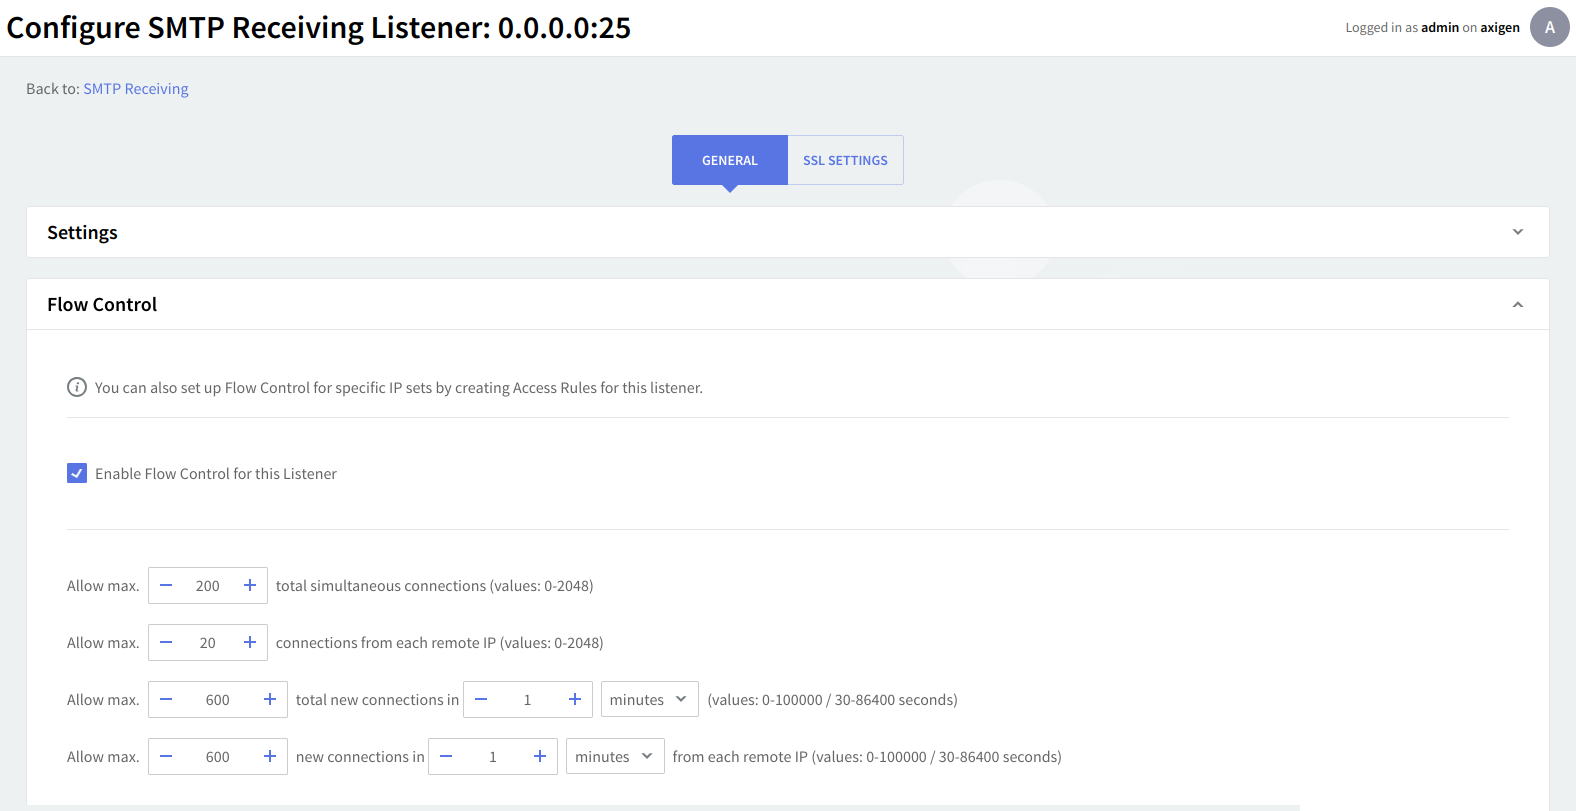
Within the "Flow Control" section you can enforce global access limitations to this listener by setting the maximum number of simultaneous connections, concurrent connections from each remote IP address, new connections made in a defined time interval, and connections from each remote IP address in a defined time interval. The default time interval is set to 1 minute. Use the up and down arrows and drop-down menus to specify the necessary parameters and time values.
You can also set up Flow Control for specific IP sets by creating Access Rules for this listener.
Access control
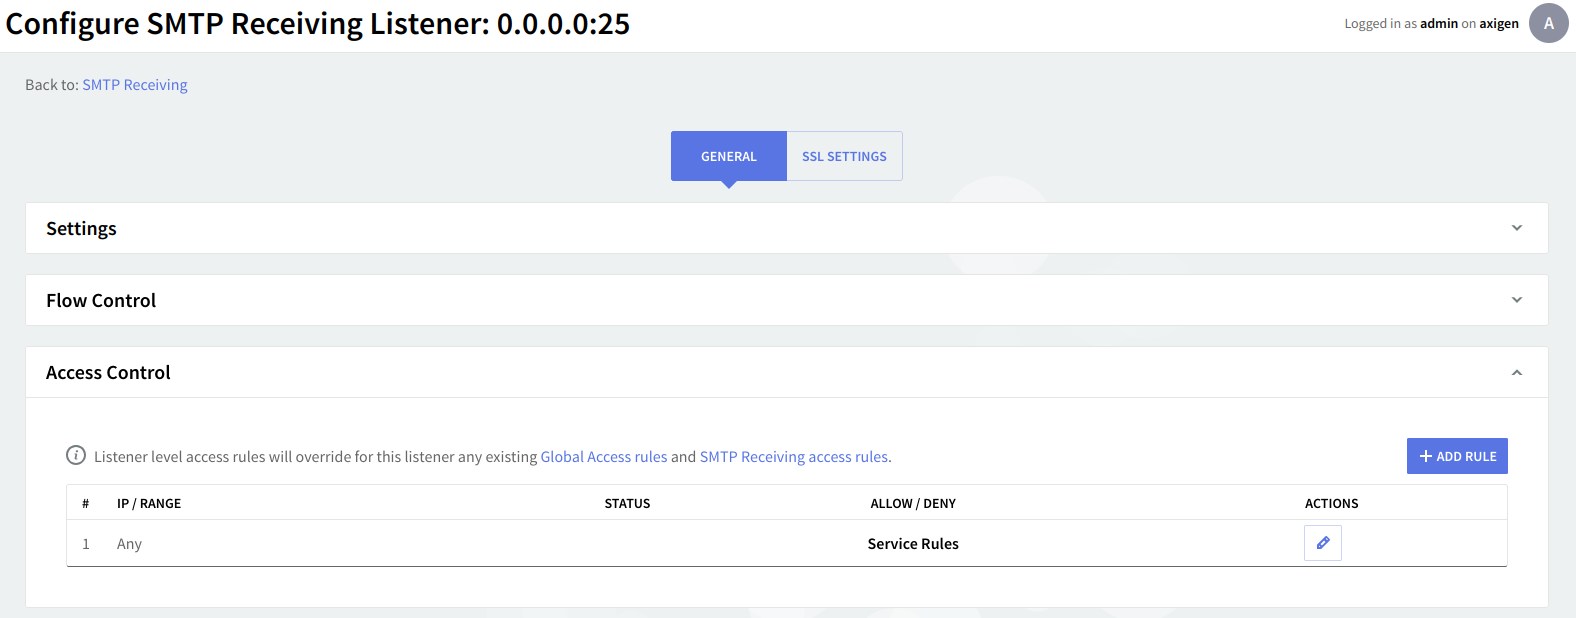
Under "Access Control" you can define simple access lists to restrict access to this service through the defined listener. By clicking the 'Add Rule' button, addresses can be entered in a Network/Mask, Single IP address, or IP Range format, and the actions that can be taken are "Allow" and "Deny".
Further use the up and down arrows (next to the "Delete" button) to set priorities between the rules and click the "Flow Control" button in order to enforce global access limitations to the rule, using the same options as the ones described in the above section. All defined listeners have created by default a rule allowing any IP address if no other rules match Service Rules.
Listener-level access rules will override for this listener any existing global access rules and service access rules.
Other settings
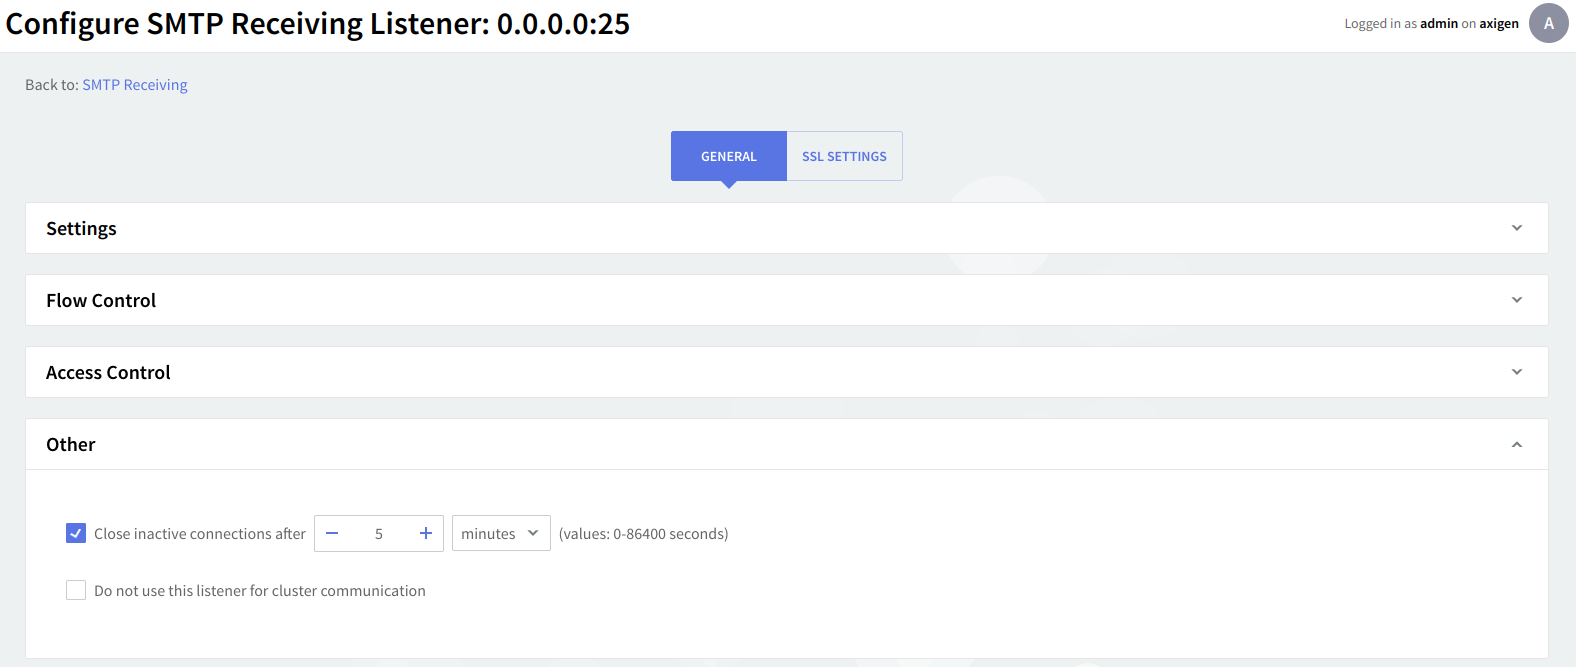
An inactivity period threshold can be defined for connections made to this listener to ensure that unused resources will be free and used to provide access for other clients. Check the box in front of the option under "Other" and then use the up and down arrows and drop-down menu to specify the time limit.
For each TCP listener created you can enable SSL support and further configure SSL settings using the "SSL Settings" page. Axigen implements OpenSSL-compliant SSL settings for all TCP listeners.
SSL configuration
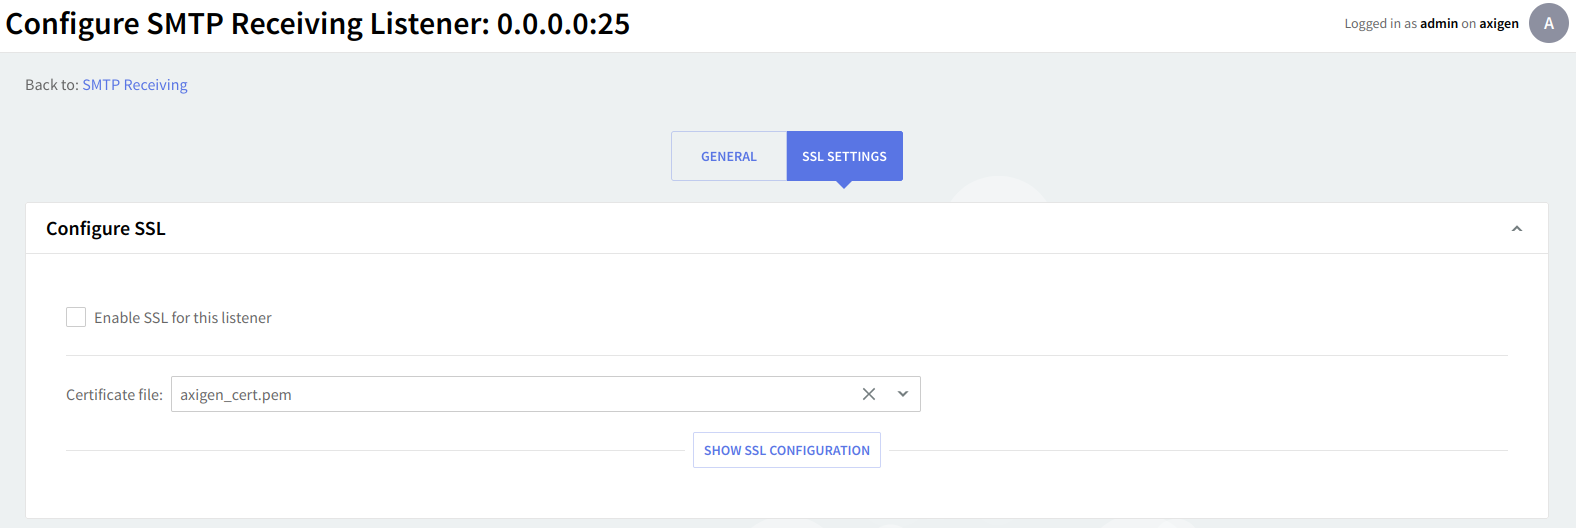
This context allows you to configure the SSL settings for this listener. To enable SSL on the configured listener, check the box in front of the "Enable SSL" for this listener option.
Use the checkboxes available under the "Allow the following SSL versions" section to specify the SSL versions to be used by the Axigen mail server. Possible values are: SSL2, SSL3, TLS1.0, TLS1.1 and TLS1.2. You can use any combination of these you may find useful. TLS 1.1 and TLS 1.2 are enabled by default.
Path to certificate file / authorities
For all SSL / TLS connections, a certificate file (containing the certificate chain used for the current listener) is a mandatory field that must be addressed with the use of the Path to certificate file attribute. The certificate chain refers to a chain of intermediate certificate issuers, that is, Certificate Authority certificates that are followed while verifying the remote server certificate.
By default, Axigen's init script will create, on all supported operating systems and platforms, at first run, a self-signed certificate automatically saved in the data directory with the axigen_cert.pem name.
If you have another certificate file, provided by an authority, you can enter the path to this certificate and also provide the Path to certificate authorities. Axigen must be able to access these locations.
The path you enter for the certificate files may be absolute/full or relative to the Axigen working directory.
Axigen uses a .pem (Privacy Enhanced Mail - Base64 encoded) file to store both the private key and the SSL certificate. Axigen only works with NULL passphrase certificates.
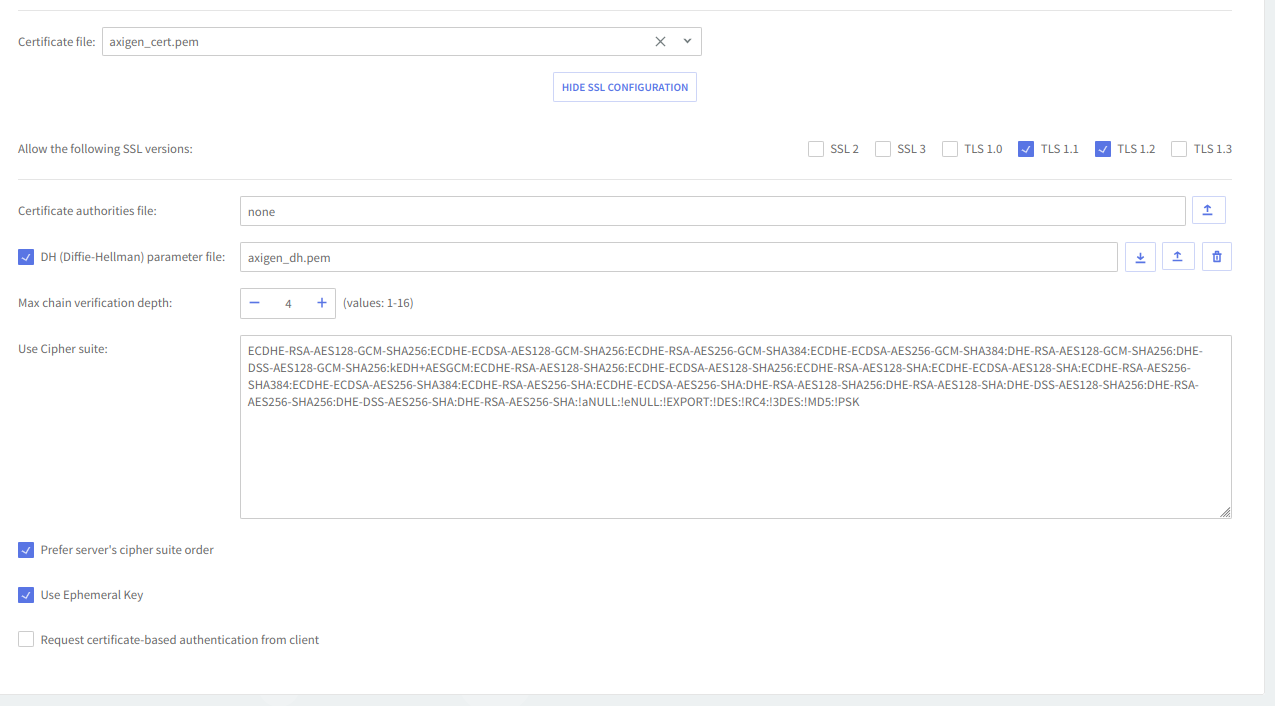
Additional attributes such as the Path to DH (Diffie-Hellman) parameter, Max chain verification depth, Cipher suite, Ephemeral Key, and certificate-based authentication requests can be used for more specific implementations.
-
Use the Path to DH (Diffie-Hellman) parameter file to specify the path in the local file system to the file containing the (OpenSSL) Diffie-Hellman parameter used by this listener. If the keyword value "none" is used no file will be used. The Diffie-Hellman key agreement protocol (also called exponential key agreement) allows two users to exchange a secret key over an insecure medium without any prior secrets. Find more information about this protocol and how to configure this protocol, on the RSA Laboratories website.
-
Use the Max. chain verification depth field to specify the depth of verification for the certificate chain. The depth refers to the maximum number of intermediate certificate issuers i.e. the maximum number of CA certificates that are allowed to be followed when verifying the remote server certificate. For instance, a depth of 1 means the remote server certificate can be self-signed or has to be signed by a CA which is directly known to the server. The default value of 4 means that 4 intermediate certificate issuers are accepted.
-
Axigen implements cipher suites active in OpenSSL, except for idea, rc5, and mdc2. Click here to see the corresponding OpenSSL documentation file listing ciphers and their OpenSSL equivalents.
-
Tick the Use ephemeral key checkbox to specify whether ephemeral keys should be used or not. This option allows for generating ephemeral keys which transform all keys exchanged during one connection session into ephemeral keys (valid only for the current connection).
-
Use the Request certificate-based authentication from the client option to specify if client certificate-based authentication should be requested or not.
-
When you are done configuring these parameters, remember to click the "Save Configuration" button to preserve your changes.