General Parameters
The "Administrative Groups" → "General" sub-page allows you to specify the name and display name of the configured administrative group.
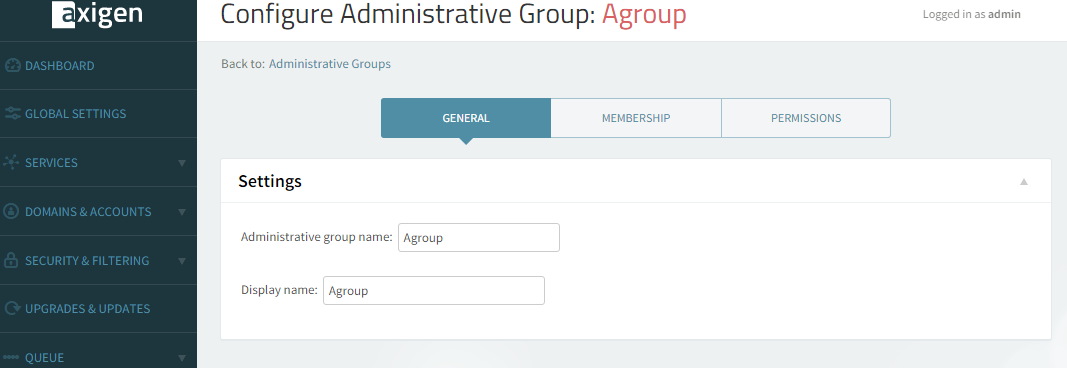
Whether creating a new administrative group or editing an already created one use the available text boxes under the "Settings" section to specify the "Administrative group name" and "Display name".
When you are done configuring these parameters remember to hit the "Save Configuration" button to preserve your changes.
Membership Hierarchy
The "Administrative Groups" → "Membership" sub-page allows you to further configure administrative groups by specifying their hierarchy among the other existing groups.
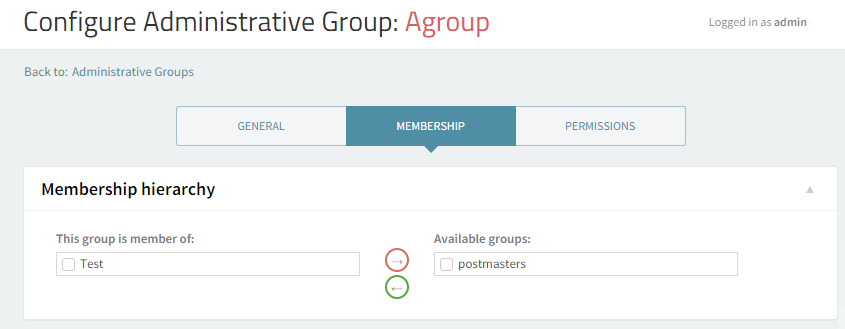
Use the options under Membership hierarchy to set the hierarchy of the configured administrative group (AccountAdministrators in this example). Thus, the configured group can an be assigned as a member of the existing available groups or removed from an already existing group member list by using the two arrows. Example: check the box in front of the CustomPermissions group and then click on the green arrow; as a result, the AccountAdministrators group will be moved to the list of administrative groups to which this group belongs to, as a member.
Members of the Configured Group

The Members of this group section gives you an overview of the group's children (both administrative groups and users which inherit permissions from the current group).
Parents of the Configured Group

Check the Parents of this group section in order to view the groups from which the currently configured group, AccountAdministrators, inherits permissions. Click the "+" sign corresponding to the group that interests you in order see further details relative to its child groups and their hierarchy.
Please note that cyclic inclusion is not permitted (i.e. if group A is a member of group B and group B is a member of group C, then group C will not be allowed as a member of group A).
When you are done configuring these parameters, remember to hit the "Save Configuration" button to preserve your changes.
Explicit Permissions
The "Administrative Groups" → "Permissions" sub-page allows you to specify the parameters relative to server and domain permissions for the configured administrative group.
Two classes of permissions can be delegated to an administrative group: server permissions allow administrative users based on this group to modify certain server modules; domain management permissions include management rights on all domains or on any specific domain (previously created).
Setting Explicit Permissions at Server Level
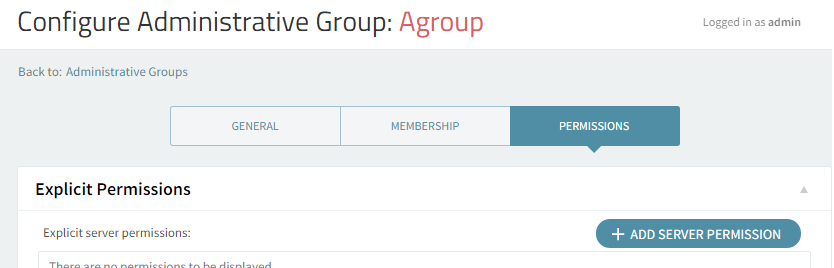
Check the "Explicit server permissions" section for a list of the already defined server permissions for the configured administrative group. Should you like to edit or delete any of the existing permissions use the corresponding "Change" and "Remove" options.
Should you like to delete all permissions relative to a certain service just hit the "Remove all" button. To add new server permissions for the configured administrative group, click on the "Add server permission" button and fill in the requested details.
Adding Server Permissions
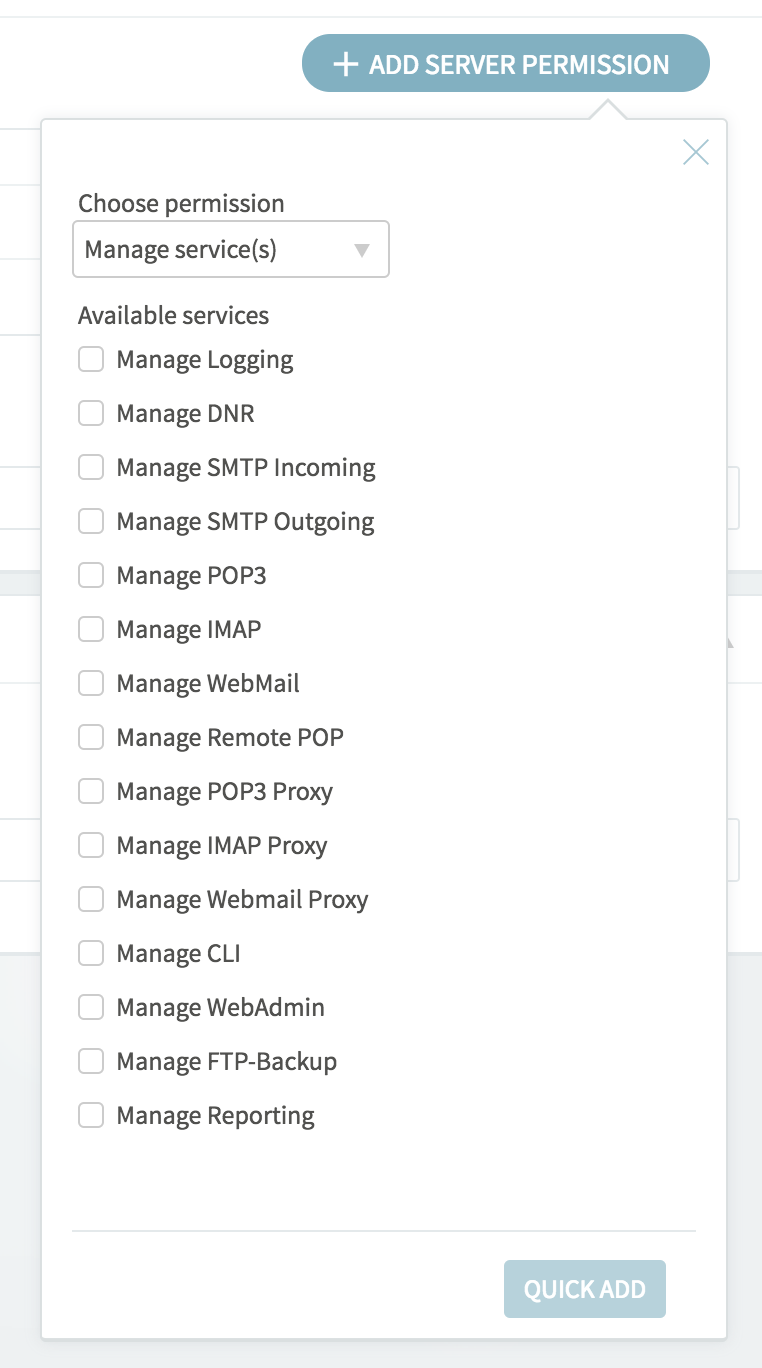
Click on the "Add server permission" button, then use the available drop-down menus to configure the new permission by choosing the service and action to be taken relative to the selected module. Available actions are: "Allow" and "Deny". Hit the "Quick Add" button to finalize the adding of the new configuration.
Setting Explicit Permissions at Domain Level

Check the "Explicit domain permissions" section for a list of the already defined server domain permissions for the configured administrative group. Should you like to edit or delete any of the existing permissions use the corresponding "Change" and "Remove" options. To delete all permissions relative to a certain service just hit the "Remove all" button. To add new server permissions for the configured administrative group click the "Add domain permission" button and fill in the requested details.
Adding Domain Permissions
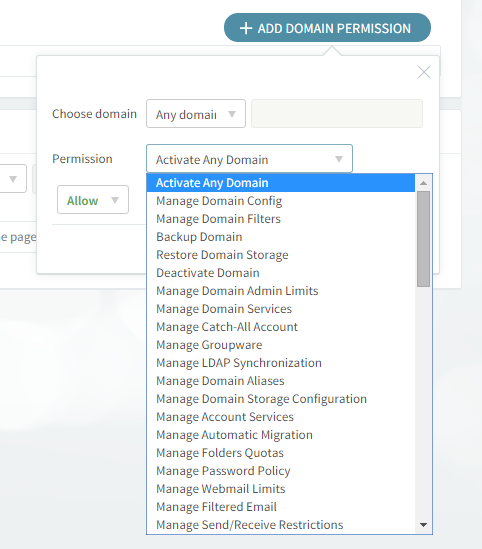
Click on the "Add domain permission" button and use the available drop-down menus to configure the new permission by choosing the service and action relative to the selected module. Available actions are: "Allow" and "Deny". Hit the "Quick Add" button to finalize the adding of the new configuration.
Effective Permissions
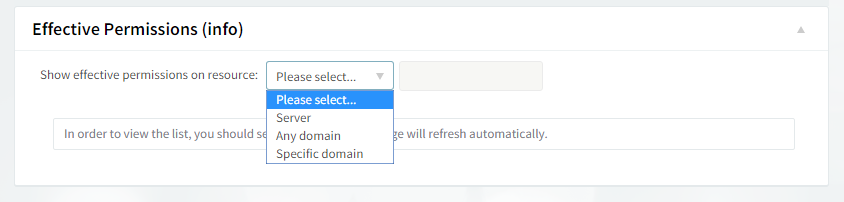
Click on the "Effective Permissions" section for complete information about the permissions available for the configured administrative group at different levels (resources): server, any domain, a specific domain. Displayed information will include all information for a certain resource as they result from the inheritance of its parents' permissions combined with the permissions assigned directly to this group.